


5-43
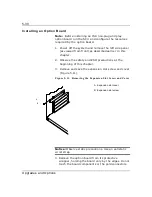
Upgrades and Options
5.
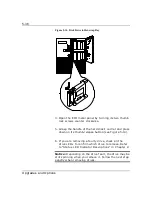
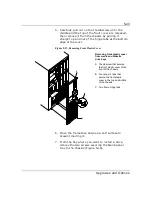
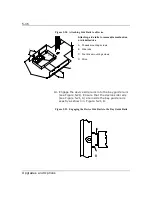
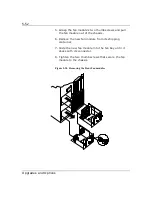
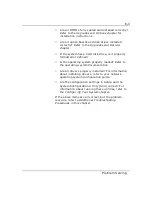
Carefully pull out on the thumbscrew until the
middle and the top of the front cover are released,
then remove it from the chassis by pulling it
straight up and out of the hinge tabs at the bottom
edge of the cover.
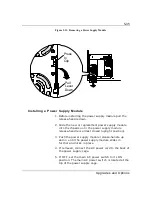
Figure 5-17. Removing Front Plastic Cover
POWER
STATUS
DISK
POWER
RESET
B
A
C
Removing front plastic cover
from media and diskette
drive bays
A Thumbscrew that secures
the front plastic cover to the
front of the chassis
B Four snap-in tabs that
secure the front plastic
cover to the top and middle
of the chassis
C Two frame hinge tabs
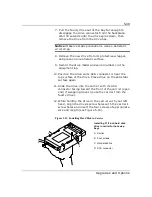
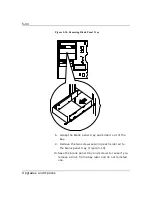
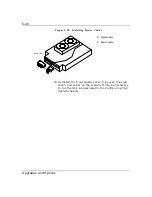
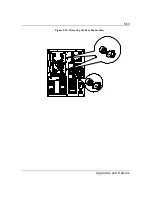
6.
Place the frame face down on a soft surface to
prevent marring it.
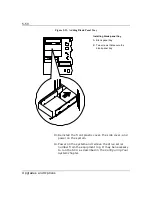
7.
From the bay where you want to install a drive,
remove the two screws securing the blank panel
tray to the chassis (Figure 5-18).
Summary of Contents for MT2000
Page 1: ...Server MT2000 U s e r s G u i d e...
Page 6: ...raham...
Page 8: ...Bill Graham...
Page 9: ...Chapter 1 Introduction Contents Organization 1 Notational Conventions 3...
Page 10: ...Bill Graham...
Page 53: ...1231231 Billy Graham...
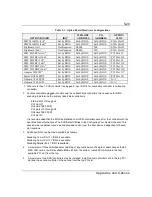
Page 81: ...4 28 Configuring Your System Figure 4 2 System Board Jumpers...
Page 141: ...5 53 Upgrades and Options Figure 5 25 Removing the Rear Fan modules...
Page 143: ...dfgdfg...
Page 171: ...Bill GrahamBill Graham...
Page 182: ...Appendix B Memory Configurations Contents Memory DIMM Configurations 1...
Page 183: ...Bill Grahamaerrterterter...
Page 186: ...Appendix C Option Boards Contents Introduction C 1...
Page 188: ...Appendix D Devices Contents Introduction 1...
Page 190: ...Appendix E Network Operating Systems Contents Introduction 1...
Page 193: ...rtyrtyrtyrtyry...
Page 203: ...8 Glossary...
Page 204: ......
Page 205: ...101843 1...


