5-15
Upgrades and Options
DIMMs
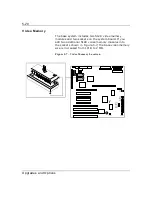
The processor/memory board contains eight DIMM
sockets labeled M1 through M8 (Figure 5-5). Each
socket can hold a single 72-bit DIMM module with
32MB, 64MB, or 128MB of memory. When all eight
sockets are populated, the processor/memory board
supports a maximum of 1GB of memory with 128MB
DIMMs. The first DIMM should be installed in the first
(M1) socket and subsequent DIMMs installed in
sequence (M2 - M8).
Installing DIMMs
When properly installed, the DIMM module is oriented
at an angle of 90 degrees relative to the
processor/memory board.
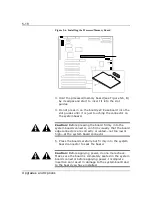
1. Remove the processor/memory board as described
earlier in this section.
Notice: Observe static precautions. Use an antistatic
wrist strap. Hold DIMMs only by their edges.
2. Holding the DIMM module only by the edges, remove
it from its antistatic package.
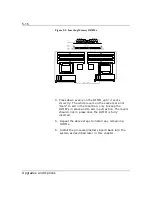
3.
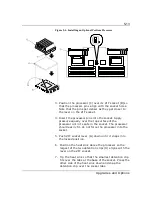
DIMMs are keyed so they can only be inserted one
way. Position the DIMM over the socket on the
board (Figure 5-5, A and B). The notches in the
bottom edge of the DIMM mates with the raised
bumps in the DIMM socket.
Summary of Contents for MT2000
Page 1: ...Server MT2000 U s e r s G u i d e...
Page 6: ...raham...
Page 8: ...Bill Graham...
Page 9: ...Chapter 1 Introduction Contents Organization 1 Notational Conventions 3...
Page 10: ...Bill Graham...
Page 53: ...1231231 Billy Graham...
Page 81: ...4 28 Configuring Your System Figure 4 2 System Board Jumpers...
Page 141: ...5 53 Upgrades and Options Figure 5 25 Removing the Rear Fan modules...
Page 143: ...dfgdfg...
Page 171: ...Bill GrahamBill Graham...
Page 182: ...Appendix B Memory Configurations Contents Memory DIMM Configurations 1...
Page 183: ...Bill Grahamaerrterterter...
Page 186: ...Appendix C Option Boards Contents Introduction C 1...
Page 188: ...Appendix D Devices Contents Introduction 1...
Page 190: ...Appendix E Network Operating Systems Contents Introduction 1...
Page 193: ...rtyrtyrtyrtyry...
Page 203: ...8 Glossary...
Page 204: ......
Page 205: ...101843 1...

