background image


Installation & Getting Started 


         - 5 -


This device consumes, produces and radiates electric energy. Improper installation may cause electric 
disturbances  on  radio  transmitters  and  receivers.  Vice  versa,  strong  emitters  of  electric  fields  may 
cause noise and artifacts to the instrument measurements. 


IMPORTANT ! 


1.1 Electrostatic Discharge 


Zennium-ECWs

  are  very  sensitive  instruments  measuring  currents  down  to  the  range  of  fA  and  aA. 

For  this  purpose  they  are  equipped  with  high-precision  and  high-sensitive  inputs.  These  inputs  are 
well protected against over-voltage. Of course this can only be done to a degree which does not affect 
the sensitivity of the inputs. 
 
At  dry  conditions,  the  user  can  get  charged  electrostatically  by  rubbing  two  different  materials,  e.g. 
shoe  sole  and  floor,  trouser  material  and  chair  cover  material,  etc.  You  can  feel,  see  and  hear  the 
discharge when touching a metallic part. An electrostatic charge on a human body can reach several 
thousand  Volts.  From  such  high  voltages  the  instrument  inputs  cannot  be  protected.  Therefore,  the 
user needs to take care of not being charged when touching the input connectors or the ends of the 
connected electrode lines. Discharging can be done by touching a grounded metal surface. The best 
solution is a grounding pad beneath your 

Zennium-ECW

 system which you touch before you touch the 

electrode inputs or electrode cables. The pad has to be grounded e.g. at the main ground. 


Electrostatic discharge on the 

Zennium-ECW

 inputs can destroy the input amplifiers! 


Before  touching  electrode  connectors  or  electrode  cables,  make  sure  that  you 
discharged yourself by grounding. 


Defects caused by electrostatic discharge are not covered by warranty! 


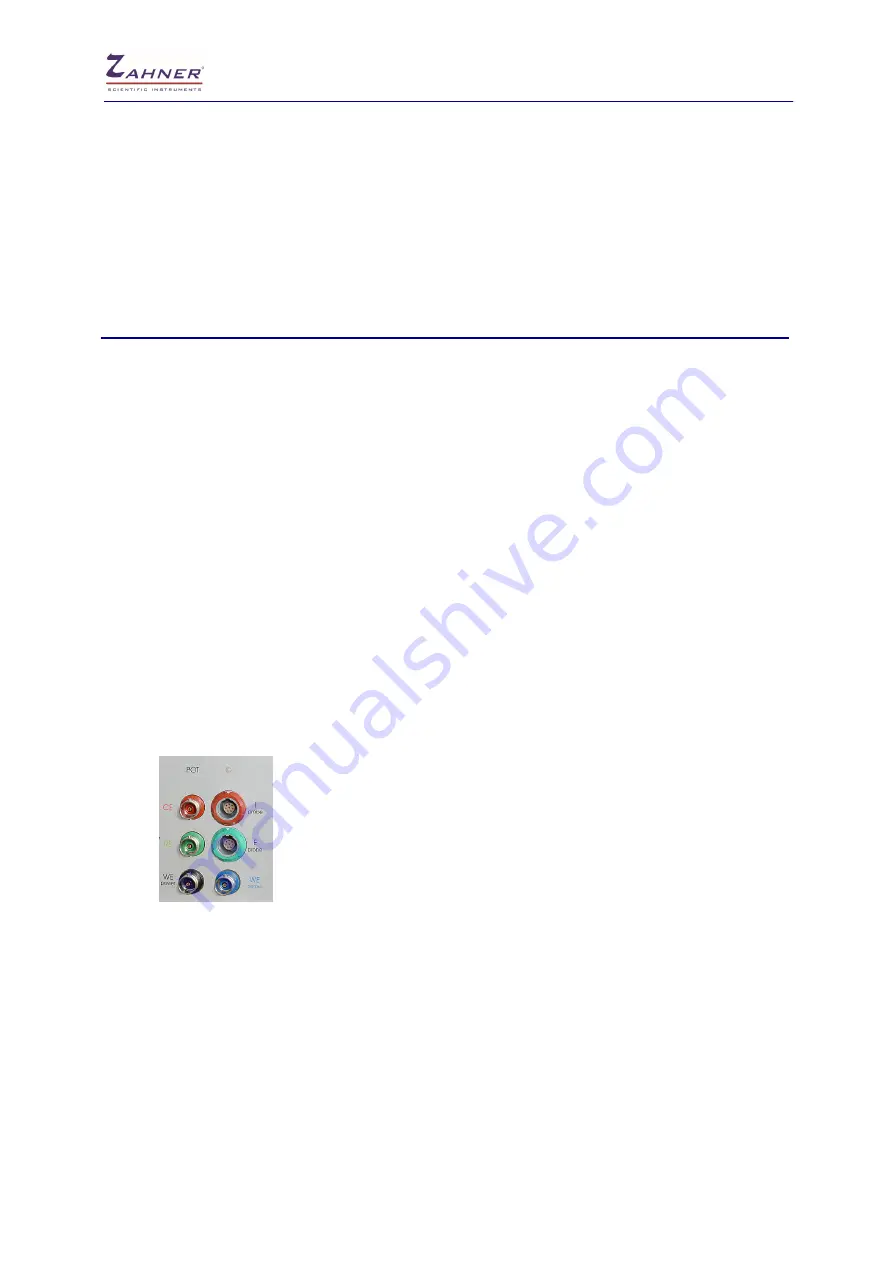
Connect the electrode lines only in the following sequence: 


1.  Working electrode (WE) 

2.  Working electrode sense (WE sense) 

3.  Reference electrode (RE) 

4.  Counter electrode (CE) 


Device  under  test  (DUTs)  can  be  left  connected  while  turning  off  or  restarting  the  ECW.  Also 
switching  measurement  device  from  main  ECW  to  external  potentiostats  (via  EPC42)  can  be 
done without reconnecting the DUTs. 

Summary of Contents for Zennium Series

Page 1: ...Installation Getting Started Zahner 11 2019...

Page 2: ...ions Therefore it is very important to read this manual carefully Only this way you can be sure to get the most out of your instrument The manual guides you through the installation process and introd...

Page 3: ...ion 9 4 1 ThalesXT Installation 9 4 2 Installation of the Calibration Data 15 5 Configuring Starting the ThalesXT Software 16 5 1 ThalesXT Main Menu 16 6 Classic Mode 19 6 1 Menu Structure in Classic...

Page 4: ...structions written on the Zennium ECW case on tags attached to the case and in the manuals for your own safety and for the safety of your system Especially strictly observe the following Connect the Z...

Page 5: ...n reach several thousand Volts From such high voltages the instrument inputs cannot be protected Therefore the user needs to take care of not being charged when touching the input connectors or the en...

Page 6: ...nected to ground This allows to measure on grounded samples without creating ground loops The electrode outlets and cables are shielded actively That means the phase shifted signal is applied to the s...

Page 7: ...e shipment directly after receipt for completeness If there are obvious damages please immediately contact Zahner or your Zahner distributor The shipment contains the following parts Zennium ECW Zenni...

Page 8: ...USB cable USB extensions and or hubs can lead to artefacts in measurements and possible damage to device or setup under investigation 3 Connect optional devices to the Zennium ECW as described in the...

Page 9: ...as backup only Thales can handle only 12 drive letters of your PC file system If you have got more the first 12 drive letters are accessible whereas the rest will be ignored You can access floppy disk...

Page 10: ...ring the installation the folder c flink and c thales are created and files will be copied from USB to the c partition of the PC USB device drivers will be installed This window will be shown in the l...

Page 11: ...ns for high power DC test systems Adobe Acrobat DC Reader Needed for displaying online help FTDI USB installation After the installation of Zennium installation of FTDI USB interface starts automatica...

Page 12: ...installing the Zahner Analysis Click Install Zahner Analysis installation is complete Choose the desired language for the Thales software BC Mux installation Choose the destination location for instal...

Page 13: ...this step the installation process finishes click Finish Adobe Acrobat Reader DC installation Finally start the installation of Adobe Acrobat Reader DC Installation of Adobe Acrobat Reader DC is fini...

Page 14: ...s Shifting from classic mode to Thales XT or vice versa is always possible even after installation The Thales XT installation creates the following folders on your hard drive c flink c thales The USB...

Page 15: ...ation data for the complete system including Zennium ECW and all optional devices like external potentiostats light sources CIMPS HiZ probe etc you ordered with the workstation Click on the Calibratio...

Page 16: ...start up screen After loading all data the screen will change to the ThalesXT main menu 5 1 ThalesXT Main Menu In the ThalesXT main menu you can 1 Create delete and edit Thales Projects 2 Select your...

Page 17: ...on of a method easier and clearer Methods From this menu you select the method of your choice If you set the Application filter to All Applications and the Techniques filter to All Techniques all avai...

Page 18: ...Not all methods and parameters can be accessed by the ThalesXT user interface Furthermore there may be users who got acquainted to the classical Thales user interface Therefore we still provide this b...

Page 19: ...e 0 simple 1 selects the ThalesXT mode In Classic Mode you will get the following main menu This menu is leading you to the main pages of the methods implemented By pointing not clicking on the icons...

Page 20: ...rements only with TR8M or HCI option Setup of Additional Measurement Channels only with optional TEMP U DIO DA4 etc Online Display of Additional Measurement Channels Frequency Response Analysis Polaro...

Page 21: ...to the powerful and very helpful functions of Thales we strongly recommend reading this manual carefully anyway 6 2 Pull Down Menu The Thales pull down menu lets you access your applications faster a...

Page 22: ...ter a short delay Full information about a function or button can be accessed by clicking the secondary mouse button The standard Adobe Reader opens the PDF manual according to the software function R...

Page 23: ...te the function of a button left click on it With the middle mouse button you have one of three similar functions depending on the context you reach the next higher menu level you terminates a running...

Page 24: ...d by using the same tools In the Thales environment all input boxes accept not only pure values but also the following technical multiplier prefixes engineer s units prefix meaning multiplier a atto 1...

Page 25: ...ue s or rejecting it In more line boxes you can also position the text cursor to a specific line by clicking with the mouse onto the line If you do want to reject the new value click the middle mouse...

Reviews: