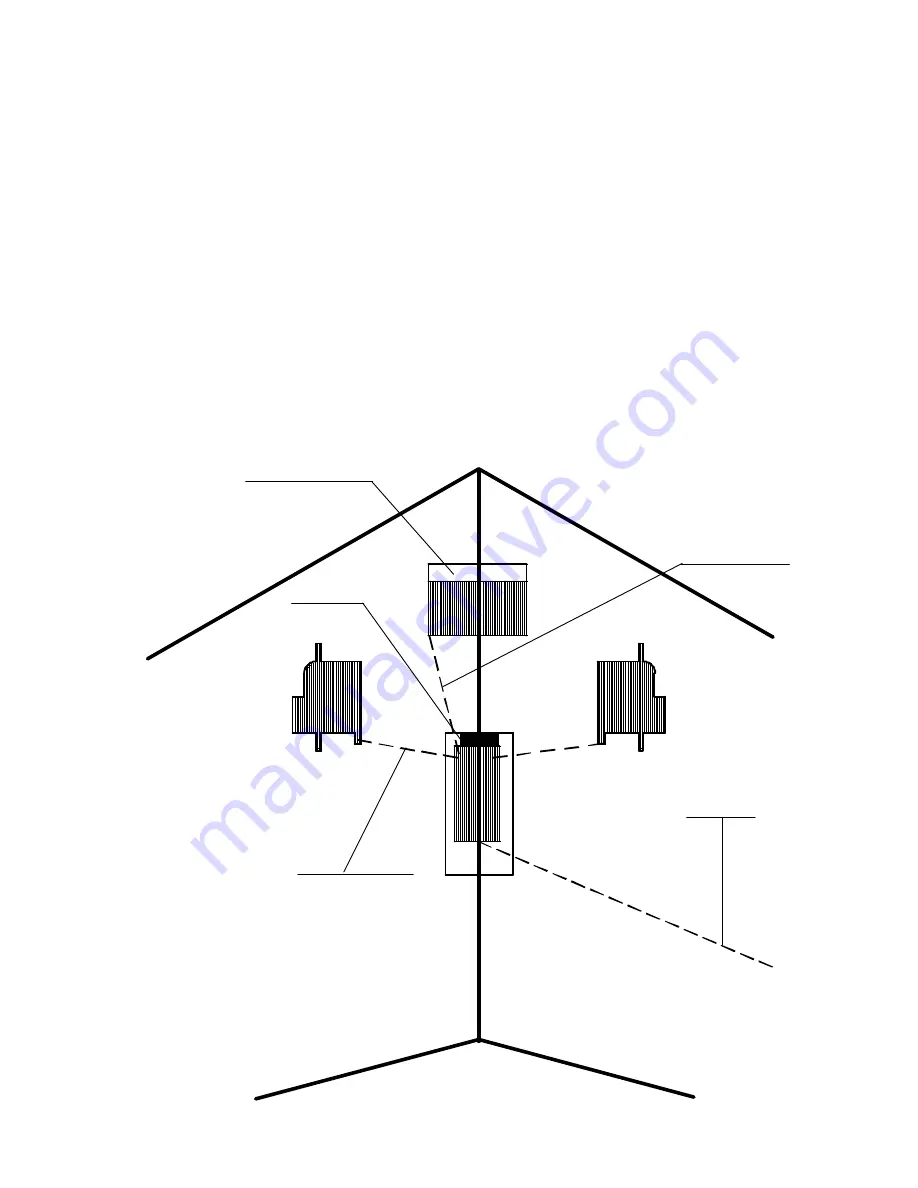
Drill a hole between the battery bay and the receiver bay big enough to push the connec-
tors through. Use a 3/8” brass tube with one edge filed sharp. Twist the tube while push-
ing to make a clean cut through the foam. Do the same between the servo bays and re-
ceiver bay. A hole can also be burned in the foam by heating a wire. Do not overheat the
wire. Do a few tests on a piece of scrap before trying it on the wing. Allow space in front
of the RX bay to install the switch. If needed, make a small space next to the switch to
stow the battery charge wire. (NOTE: If using AA batteries a battery charge wire is not
used.) Mount the switch below the surface of the wing for two reasons. Reason one,
drag. Reason two, contact can turn it off in flight. Make a line with a straight edge from
the RX bay to the wing tip parallel to the wing spars. Cut a 1/4 inch deep cut on the line.
Push the antenna into the slot with a flat blade screwdriver. Let the extra antenna wire
hang off the wing tip. Install the servos, battery, switch, and receiver using double backed
tape. The switch may be taped to the RX for a solid mount. Cut a wafer off of the top of
the RX and battery cookies, making sure they match the contours of the wing surfaces.
Put the servo, battery, and receiver bay covers in place, leaving an opening for the switch.
Rotate the servo control arms out of the way of the servo tops. Push the antenna wire
into the spar. Apply a piece of fiber tape over the covers.
(See figure 9)
To wing tip
Battery
Nose weight
Servo leads
Switch
Rx
Antenna
Figure 9
page 7
Servo
Servo
Battery Lead


