9
DOC-USR-0034-08
____________________________________________________________________________________
Z3 Technology, LLC
♦
100 N. 8th St. STE 250
♦
Lincoln, NE 68508-1369 USA
♦
+1.402.323.0702
6.0
GETTING STARTED AND RUNNING THE ENCODER
This section gives step-by-step instructions on using the Z3-SME-01 to stream 1080p or 1080i video to VLC
media player running on your PC. For these steps, you will need: a computer, a 1080p30/1080i video source
with HDMI output, a Z3-MVE-20, a 12V power supply, an HDMI Cable and at least one Ethernet cable. These
instructions can apply to both Encoder 1 or Encoder 2.
*Note
:
Actual version numbers for your Z3 product may differ from those pictured in this document.
Setting up the Video Source
6.1
Select an HD source with HDMI non-HDCP
1
output.
(1)
-Power on the HD Source.
-Connect an HDMI cable from the HD Source to a monitor.
-Set the HD Source to 1080p30 or 1080i output.
-If you are using a media player, select and begin playback of the content you would like to stream.
If you see playback on the monitor, you’ve confirmed the source works.
Connecting and Powering up the Z3-MVE-20
6.2
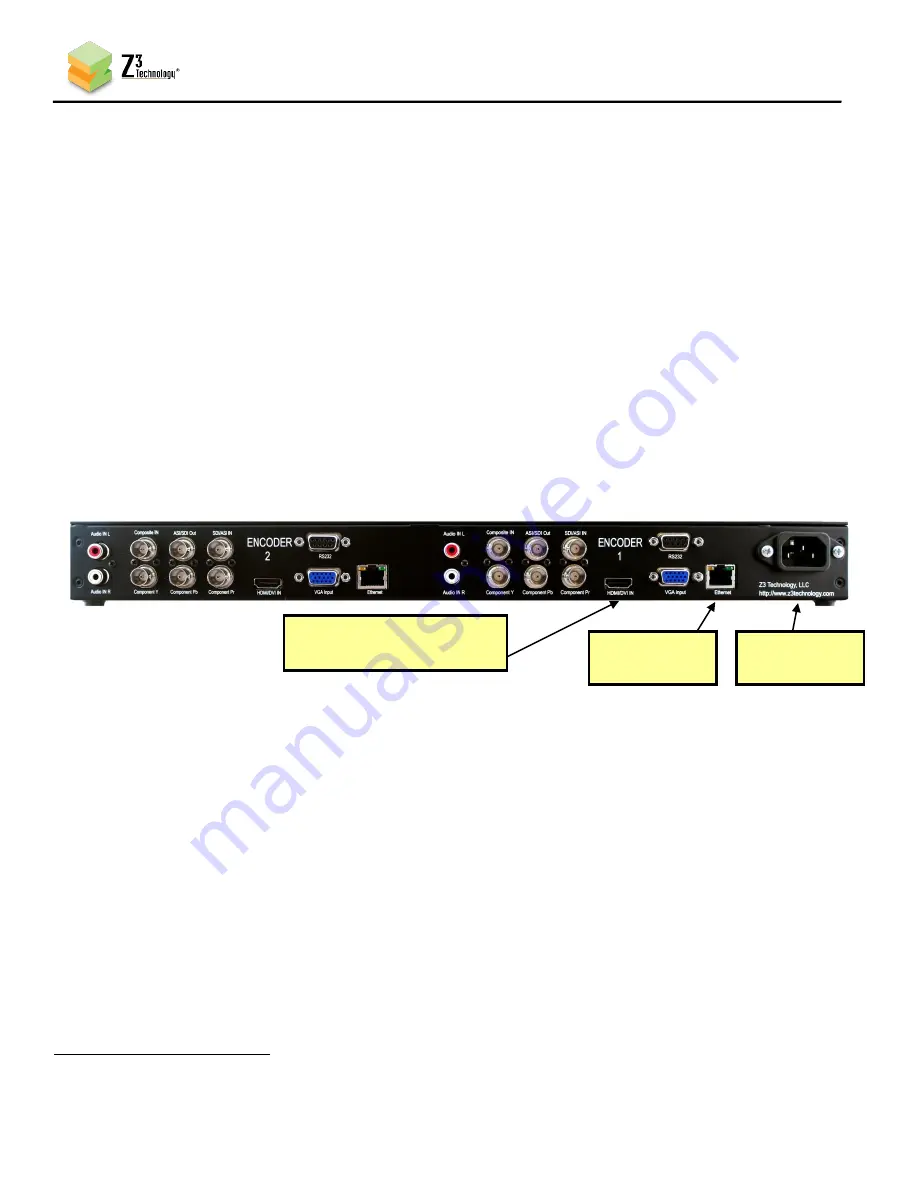
Move the HDMI cable from the monitor to the Z3-MVE-20 “HDMI In” port.
(2)
Connect an Ethernet cable to “Ethernet” on the back of the unit to a switch, router or other DHCP
(3)
server on the same network as your Windows PC.
Connect the AC power cable and turn on the power switch. It will take 45-60 seconds to boot, and
(4)
the status LEDs will light up on the front of the unit.
1
High-Bandwidth Digital Content Protection (HDCP) HDMI content is not supported. For example, a Blu-Ray player
cannot be used as a source for the encoder.
(1) Connect Video Source
to HDMI In
(3) Connect
Power
(2) Connect
Ethernet
Figure 4 Z3-MVE-20 Rear Panel Connections


