


3 Getting started with VIP
digital
3.1 Electrical connection
Connect VIP
digital
to your local power supply. VIP
digital
is equipped with a switched-mode power
supply unit and can be operated on 90 to 240 V AC without any transfer.
Always follow the local safety regulations! Also, read the safety information below!
3.2 Activation
Switch on the power supply of the unit, using the power switch on the back panel. The
Function
Display
briefly shows
VIP
digital
, followed by the version identification of the firmware loaded. Your
VIP
digital
is now ready for operation.
Please note that VIPdigital can only be deenergized by the power switch on the rear side of the
unit! Disconnect the mains plug before opening the housing in each case!
3.3 Using internal presets
VIP
digital
has a non-volatile memory which stores up to 100 Presets.
If no SmartCard has been inserted, one of the three
Preset Recall
memories is active. This is signalled
by the corresponding LED above the (black)
Preset Recall
buttons.
First of all, make yourself familiar with the preset functions. Press the
Preset Recall
buttons to select
the three available presets directly. The active preset is shown by a LED above the respective button.
The upper line of the display shows
Internal Preset
and the
number
of the selected presets; its name
appears in the lower line.
There is a capacity of storing 100 presets in the unit. Use the to define which of them should be
accessible via the three buttons on the front panel.
Note: As a default the first 3
Presets
are assigned to the 3
Preset Recall buttons
. You can define a
different assignation using the green
Enter button
. User defined
Preset
to
Preset Recall
button
assignment is stored in a cap-buffered RAM for approx. 24 hrs. after the unit has been switched off.
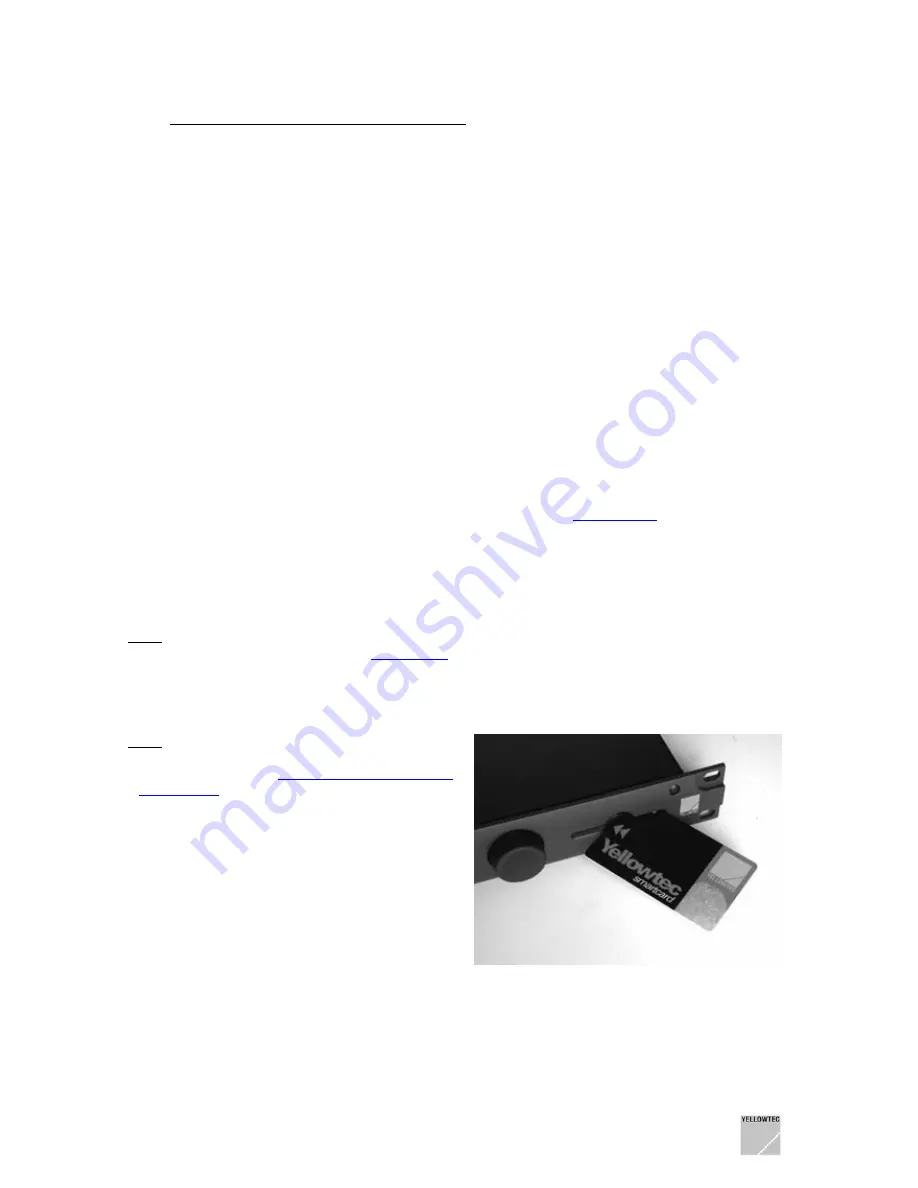
3.4 Using SmartCard
Note: There are no presets stored on the
YELLOWTEC SmartCard which is supplied with the
unit. Refer to Chapter
VIP
remote
– THE REMOTE
SOFTWARE
for learning how to save data to your
SmartCard.
Inserting a new SmartCard or a SmartCard with
non-valid data (e.g. data from the previous version)
causes an error message on the VIP
digital
display:
WRONG CARD
or
FAULTY CARD
.
If valid data have been stored on your SmartCard:
Insert a YELLOWTEC SmartCard
into the
card slot
.
Please make sure that the gray double arrow of the
card is on the top, pointing to the front to the unit
(the chip is upside down).
Once the card has been inserted, the LED of the previous selected preset button will blink to indicate
that the SmartCard has been detected, but none of its presets were loaded. At this time, the current
preset is still active.
The three
Preset Recall
buttons allow an access to the three presets stored on the SmartCard. Select
one of the three card presets. The display now shows the name of the card holder in the upper line and
the name of the preset below.
VIP
digital
Manual 4.0 Yellowtec 2004 Rev. 26.07.2004
Page 10


