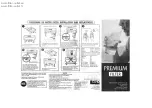
Proceed to remove the orange plugs of the sanitization
cartridge and install in the polishing cartridge location.
Install the sanitization cartridge into the polishing cartridge
position. Lock the lever into position
Proceed to screen 4 and purge air out of system and allow
water to enter the sanitization cartridge to begin the chlorine
dioxide reaction.
WARNING!
Chlorine dioxide gas is a respiratory
irritant. Avoid breathing fumes. Ensure area is sufficiently
ventilated.
Install the supplied 3/8” barbed fitting into the dispense
solenoid valve (where the POU filter was removed). 6 feet of
3/8” ID clear vinyl tubing is provided in the kit. Connect the
tubing to the barbed fitting. Place the other end in a drain.
NOTE: Insert the tubing directly into the drain, if possible, to
minimize odors.
In screen 5, pressing the “Start Cycle”, which will initiate the
45 minute sanitization process. The cycle will toggle between
soaking (pump off) and recirculation (pump on). The cycle
breakdown is as follows:
• 10 min soak
• 5 min recirc
• 10 min soak
• 5 min recirc
• 10 min soak
• 5 min recirc
• End
When 20 - 25 minutes remaining is displayed dispense a
small amount of water from the drain tubing into a small,
clean container. Do not allow tubing to touch the collected
water. Place the tubing to the drain.
Chlorine Dioxide test strips are provided in the kit. Use the
white vial high range test strips to confirm a minimum of 30
ppm chlorine in the sample by dipping a strip into the sample
container. Do not place the test strip directly under the
running dispense water stream.
38
SANITIZATION
Summary of Contents for WA Series
Page 5: ...3 MODEL TYPES...
Page 49: ...47 DIMENSIONAL DRAWINGS...
Page 50: ...48 DIMENSIONAL DRAWINGS...
Page 51: ...49 PRE INSTALLATION CHECKLIST...


