RIVAGE PM10 System Setup Guide
29
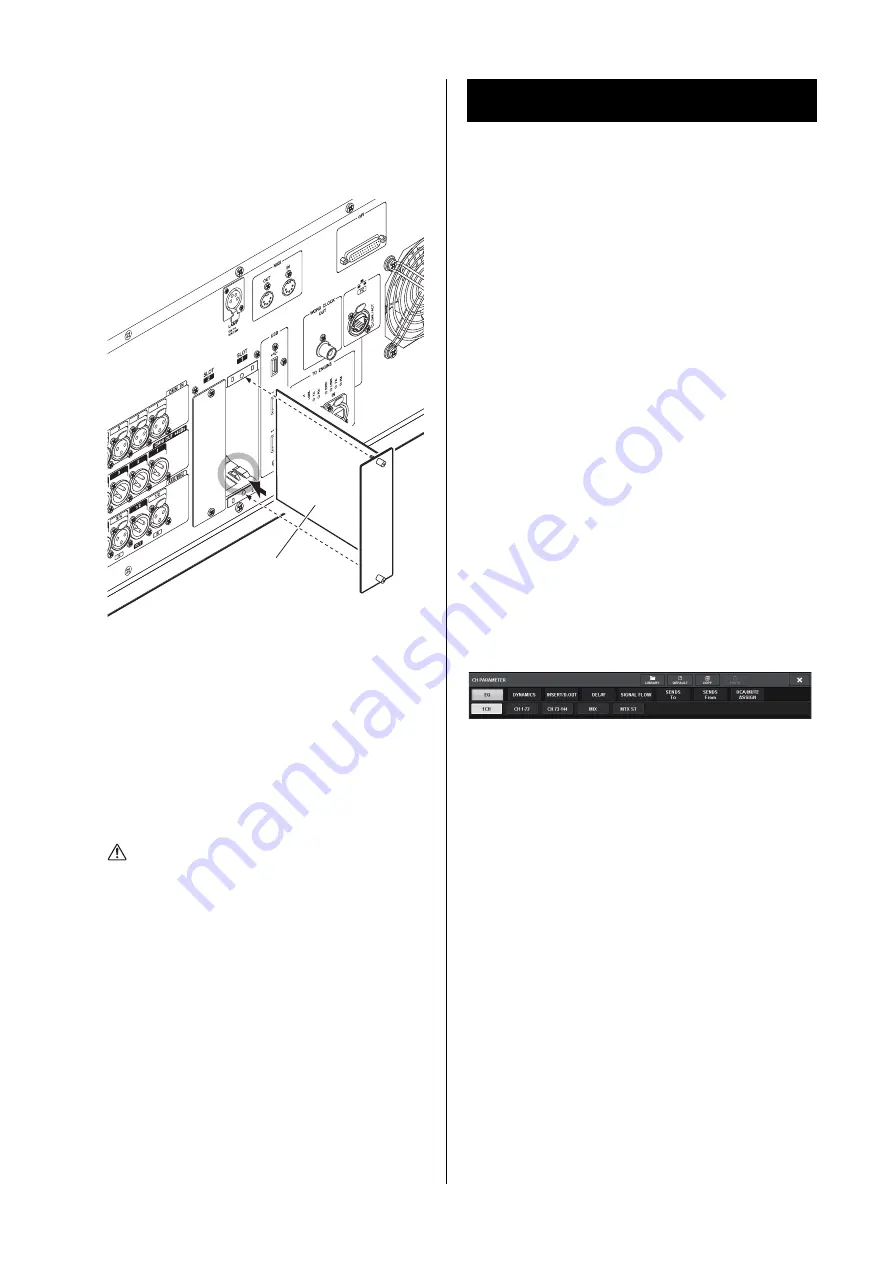
3.
Align both edges of the card with the guide
rails inside the slot, and then insert the card
into the slot.
Push the card all the way into the slot so that the
connector at the end of the card is correctly inserted
into the connector inside the slot.
4.
Fasten the card using the screws attached to
the card.
If the card is not fastened securely, component failure
or malfunction may occur.
Removing the Mini-YGDAI
card
1.
Make sure that the power is turned off.
Caution
Installing or removing a card while the power is on may
lead to component failure or electric shock.
2.
Completely loosen the screws that hold the
card in place.
3.
Pull the card toward you while holding the
screws on the card.
4.
Replace the stored slot cover and affix it with
the screws.
Basic touch screen
operations
This section explains the basic procedures you can
perform on the unit’s touch screens.
Pressing the touch screen
You will use this operation primarily to switch screens and
pages, to select the parameter to be operated, and to turn a
button on/off. Some buttons enable you to change the
value depending on the location you press.
On-screen user interface
This section explains various user interface components
shown in the touch screens, and how to use them.
Tabs
Tabs enable you to switch between multiple pages. Each
tab indicates its page name.
Buttons
Buttons are used to execute specific functions, to switch
parameters on or off, or to select one of multiple choices.
Buttons that perform on/off operations appear in solid
background colors while they are turned on, and dark
while turned off.
Faders/knobs
Faders and knobs on screen move in tandem when you
operate the top panel faders and knobs. The current value
appears immediately below the fader or knob.
If you press once a knob that can be operated by the
[TOUCH AND TURN] knob, a thick frame appears
around the knob. This frame indicates that the knob has
been selected for operation.
NOTE
Pressing certain knobs a second time while a thick frame is
displayed around them will open a window in which you can
make additional detailed settings.
Card
Touch Screen
Summary of Contents for RIVAGE PM10
Page 1: ...CONTROL SURFACE CS R10 System Setup Guide EN...
Page 51: ...RIVAGE PM10 System Setup Guide 51 MEMO...
Page 52: ...RIVAGE PM10 System Setup Guide 52 MEMO...
Page 54: ......


