background image

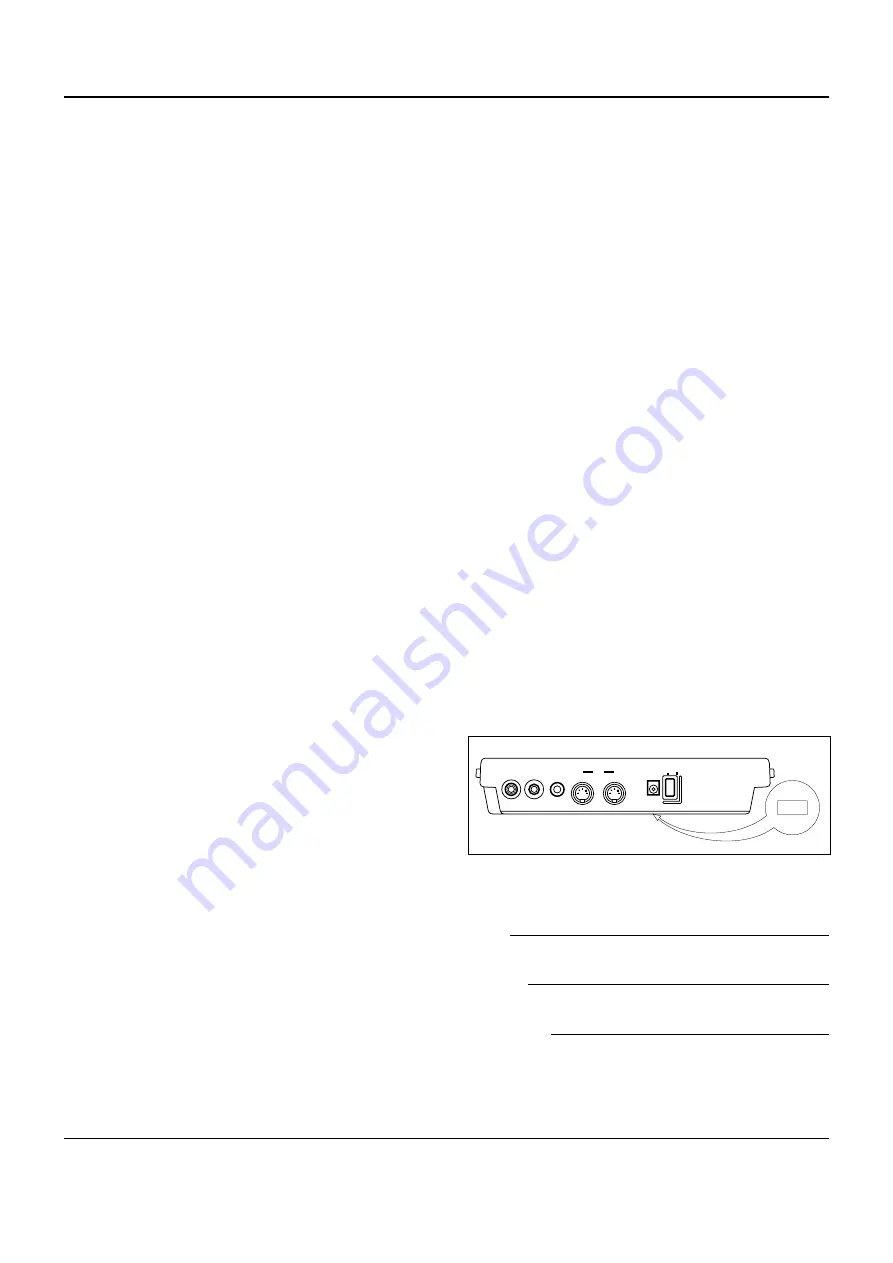
I N ;

OUT;

;

INPUT;

OUTPUT;

PHONES;

MIDI;

;

DC IN;

ON;

;

OFF;

;

POWER;

PLEASE KEEP THIS MANUAL

SPECIAL MESSAGE SECTION

This product utilizes or an external power supply (adapter). DO
NOT connect this product to any power supply or adapter other
than one described in the manual, on the name plate, or specifi-
cally recommended by Yamaha.

WARNING: Do not place this product in a where anyone could
walk on, trip over, or roll anything over power or connecting cords
of any kind. The use of an extension cord is not recommended! If
you must use an extension cord, the minimum wire size for a 25’
cord (or 1 cm) is I8 AWG. NOTE: The smaller the AWG number,
the larger the current handling capacity. For longer extension
cords, consult a local electrician.

This product should be used only with the components supplied
or; a cart, rack, or stand that is recommended by Yamaha. If a cart,
etc., is used, please observe all safety markings and instructions
that accompany the accessory product.

SPECIFICATIONS SUBJECT TO CHANGE: The information
contained in this manual is believed to be correct at the time of
printing. However, Yamaha reserves the right to change or modify
any of the specifications without notice or obligation to update
existing units.

Do not attempt to service this product beyond that described in the
user-maintenance instructions. All other servicing should be re-
ferred to qualified service personnel.

This product, either alone or in combination with an amplifier and
headphones or speaker/s, may be capable of producing sound lev-
els that could cause permanent hearing loss. DO NOT operate for
long periods of time at a high volume level or at a level that is
uncomfortable. If you experience any hearing loss or ringing in the
ears, you should consult an audiologist. IMPORTANT: The louder
the sound, the shorter the time period before damage occurs.

Some Yamaha products may have benches and/or accessory
mounting fixtures that are either supplied with the product or as
optional accessories. Some of these items are designed to be dealer
assembled or installed. Please make sure that benches are stable
and any optional fixtures (where applicable) are well secured BE-
FORE using. Benches supplied by Yamaha are designed for seat-
ing only. No other uses are recommended.

NOTICE: Service charges incurred due to lack of knowledge relat-
ing to how a function or effect works (when the unit is operating
as designed) are not covered by the manufacturer’s warranty, and
are therefore the owners responsibility. Please study this manual
carefully and consult your dealer before requesting service.

ENVIRONMENTAL ISSUES: Yamaha strives to produce prod-
ucts that are both user safe and environmentally friendly. We sin-
cerely believe that our products and the production methods used
to produce them, meet these goals. In keeping with both the letter
and the spirit of the law, we want you to be aware of the follow-
ing:

Battery Notice: This product MAY contain a small non-recharge-
able battery which (if applicable) is soldered in place. The average
life span of this type of battery is approximately five years. When
replacement becomes necessary, contact a qualified service repre-
sentative to perform the replacement.

This product may also use “household” type batteries. Some of
these may be rechargeable. Make sure that the battery being
charged is a rechargeable type and that the charger is intended for
the battery being charged.

When installing batteries, do not mix old batteries with new, or
with batteries of a different type. Batteries MUST be installed
correctly. Mismatches or incorrect installation may result in over-
heating and battery case rupture.

Warning: Do not attempt to disassemble, or incinerate any battery.
Keep all batteries away from children. Dispose of used batteries
promptly and as regulated by the laws in your area. Note: Check
with any retailer of household type batteries in your area for bat-
tery disposal information.

Disposal Notice: Should this product become damaged beyond
repair, or for some reason its useful life is considered to be at an
end, please observe all local, state, and federal regulations that
relate to the disposal of products that contain lead, batteries, plas-
tics, etc. If your dealer is unable to assist you, please contact
Yamaha directly.

NAME PLATE LOCATION: The graphic below indicates the lo-
cation of the name plate for this model. The model number, serial
number, power requirements, etc., are located on this plate. You
should record the model number, serial number, and the date of
purchase in the spaces provided below and retain this manual as a
permanent record of your purchase.

Model

Serial No.

Purchase Date

92-BP

Summary of Contents for QR10

Page 1: ......

Page 2: ...r please contact Yamaha Corporation of America Electronic Service Division 6600 Orangethorpe Ave Buena Park CA 90620 The above statements apply ONLY to those products distributed by Yamaha Corporation of America or its subsidiaries This applies only to products distributed by YAMAHA CORPORATION OF AMERICA CANADA THIS DIGITAL APPARATUS DOES NOT EXCEED THE CLASS B LIMITS FOR RADIO NOISE EMISSIONS FR...

Page 3: ...nly No other uses are recommended NOTICE Service charges incurred due to lack of knowledge relat ing to how a function or effect works when the unit is operating as designed are not covered by the manufacturer s warranty and are therefore the owners responsibility Please study this manual carefully and consult your dealer before requesting service ENVIRONMENTAL ISSUES Yamaha strives to produce pro...

Page 4: ...topped 24 Starting Playback from a Specific Measure Number 24 Repeat Playback 24 Segment Repeat 25 Tempo Settings Track Muting Voice Selection and Pattern Selection in the SONG Mode 25 Volume Settings in the SONG Mode 25 The PHRASE Keys 26 Selecting Different Phrases 26 Setting the Phrase Volume 27 7 Recording Original Songs 28 Basic Song Recording 28 Overdubbing 30 Recording a MELODY Track 30 Fix...

Page 5: ...the instru ment Physical shocks caused by dropping bumping or placing heavy objects on the instrument can result in scratches and more serious damage Cleaning Clean the cabinet and panel with a dry soft cloth A slightly damp cloth may be used to remove stubborn grime and dirt Never use cleaners such as alcohol or thinner Avoid placing vinyl objects on top of the instru ment vinyl can stick to and ...

Page 6: ...r operation or set up IMPORTANT This icon marks information that you must read i e important steps or procedures that are e s s e n t i a l f o r p r o p e r e f f i c i e n t o r e a s y o p e r a t i o n DETAIL The magnifying glass icon indicates information that may not be essential for general operation but is a more detailed explanation of a feature a description of the principle involved etc...

Page 7: ...ns from scratch page 37 69 superb normal voices and 60 percussion voices change the voices in the preset patterns as required and assign them to your combination and original patterns page 17 Built in sampler function lets you record two different sounds either via the built in microphone or line in jack that can be selected and used in patterns in the same way as the preset voices page 19 Song mo...

Page 8: ...nerator compromise You get outstanding AWM sound quality that s on a par with some of the finest full size synthesizers You can play the QR10 remotely from just about any MIDI keyboard computer or other controller Add ABC Capability to Use the QR10 as an ABC expander for your MIDI keyboard Auto accompaniment Your MIDI Keyboard can makes playing at home more fun and it can be a tremendous sound boo...

Page 9: ...yback at maximum volume Alkaline batteries may last as long as four hours Please use an AC power adaptor see above wherever possible 1 Open Battery Compartment Cover Open the battery compartment cover located on the instrument s bottom panel by pressing on the two latches on the cover and pulling outward as shown in the illustration 2 Insert Batteries Insert the six batteries being careful to foll...

Page 10: ...s or other audio source The signal received at the INPUT jack is mixed with the QR10 s own sound and delivered via the built in speaker system the OUTPUT jack above or the PHONES jack also above as required The INPUT GAIN function described on page 5 should be used to match the input gain of the QR10 to the connected instru ment or source DETAIL The INPUT jack can also be used as a footswitch jack...

Page 11: ...tereo sound system and the red plug goes to the right channel input If you will be connecting a guitar or keyboard to the INPUT jack use a standard 1 4 phone phone plug instrument cable CAUTION Make sure that both the QR10 and your sound system are turned OFF when making connections Setting the Input Gain The QR10 has two input gain settings HI high and LO low Use the HI setting for microphone inp...

Page 12: ...lay panel shows all parameters and prompts you need to operate the QR10 with optimum ease and efficiency 3 VOICE SELECT Key The VOICE SELECT key allows any of the QR10 s voices to be assigned to the five tracks MELODY CHORD 1 CHORD 2 BASS and RHYTHM page 17 4 PATTERN SELECT Key This key is used to select any of the QR10 s 100 patterns for playback in the PATTERN or SONG mode page 10 5 TEMPO Key Th...

Page 13: ...page 12 or in the SONG mode Micro keyboard This miniature 1 octave keyboard used in conjunction with the chord type keys below makes it easy to specify chord changes for your accompaniments page 14 It is also used to enter single notes when recording a melody track in the song mode page 31 OCTAVE Keys Since the 1 octave range of the QR10 micro keyboard may not be sufficient for some operations the...

Page 14: ...til the required listening level is reached This simple precaution can prevent unexpectedly high volume levels from damaging your speaker system and maybe even your ears Microphone When no source is connected to the rear panel INPUT jack the QR10 s sampling voices voice numbers 69 and 70 can be recorded via this built in microphone page 19 Speaker The QR10 s built in amplifier and speaker system p...

Page 15: ...t until stopped If demo song number 2 is selected it will repeat until stopped 4 Press the START STOP key again when you re ready to stop playback DETAIL Demo playback will repeat continuously until stopped by pressing the START STOP key 5 Press the EXIT key this is the same as the PATTERN SONG key to exit from the DEMO function DETAIL Demo song number 0 is a complete song including melody and acc...

Page 16: ...ys or the number keys to select the number of the pattern you want to play When using the number keys to enter a pattern number you must enter two digits For example to enter pattern number 35 first press the 3 key and then the 5 key To enter pattern number 9 press the 0 key and then the 9 key The preset patterns are numbered from 00 to 49 DETAIL Pressing the 1 key briefly decreases the pattern nu...

Page 17: ... You can change patterns during playback by following the standard pattern selection procedure press PATTERN SELECT use t h e 1 a n d 1 o r n u m b e r k e y s t o s e l e c t a p a t t e r n t h e n p r e s s E X I T DETAIL Whenever you turn the QR10 power on or select the PATTERN mode from the SONG mode the previously selected pattern number will automatically be re selected To Continue Playback...

Page 18: ...ions or sections INTRO NORMAL VARIATION FILL 1 FILL 2 and ENDING INTRO introduction NORMAL normal pattern used for the verse of a song VARIATION normally used as a chorus or bridge FILL 1 fill in 1 transition from normal to variation FILL 2 fill in 2 transition from variation to normal ENDING ending pattern When the INTRO FILL 1 and FILL 2 sections are selected the section plays through once and i...

Page 19: ... when the TEMPO key is released 2 Set the Tempo Use the 1 and 1 keys or the number keys to set the tempo as required The slowest tempo is 40 beats per minute and the fastest is 250 DETAIL The tempo value can be adjusted in 1 beat increments As with pattern selection pressing the 1 or 1 key briefly decrements or increments the tempo value by 1 respectively Press and hold the 1 or 1 key to continuou...

Page 20: ...he accompaniment sound to match chords you specify This makes creating complete accompaniments fast and easy just select a pattern then specify the required chord changes Here s how to specify chord changes 1 Play a Pattern Select and play one of the preset patterns as described in the preceding section 2 Enter a Chord Note that the micro keyboard is arranged in the form of a small piano keyboard ...

Page 21: ...hout changing the chord root by simply pressing the appropriate chord type key HINT You can specify the first chord to be played before starting pattern playback DETAIL Chords can be changed via the micro keyboard whenever the indicator block next to CHORD on the display is showing 3 Stop playback when done Stop playback by pressing the START STOP key You can also stop playback after an appropriat...

Page 22: ...page 30 It cannot be turned on in the PATTERN mode MUSICAL NOTE The track keys are a handy way to turn tracks that you don t want to hear off You could for example turn the CHORD 1 and CHORD 2 tracks off leaving only the bass and drum accompaniment You could also mute the bass track if you just want drums DETAIL All tracks are automatically turned ON when the QR10 power is initially turned on and ...

Page 23: ...ly restored as soon as a different pattern or mode is selected You can make permanent voice assignments when programming your own combination or user patterns pages 36 and 37 1 Press the VOICE SELECT Key VSEL will appear on the display while the VOICE SELECT key is held then MELO will appear when the key is released indicating that the melody voice can now be changed Note that at the same time the...

Page 24: ...ecting the desired voice number by using the 1 and 1 or number keys DETAIL The number shown to the right of rY on the display when a rhythm track note is selected is the MIDI Note Number corresponding to that note The note number range is from 36 corresponding to C1 to 95 B5 This is a five octave range and you ll need to use the OCTAVE keys to shift octaves in order to access the full range of not...

Page 25: ...ophone or a source connected to the rear panel INPUT jack The RECORD key indicator will flash during recording then recording will end automatically when the sampling memory is full the recording time depends on the sampling frequency which can be set as described in the following section DETAIL The built in microphone is automatically shut off when a plug is inserted into the INPUT jack Make sure...

Page 26: ...four sampling frequency settings 1 Select the Sampling Frequency Function Select the sampling frequency function by pressing the SAMPLING key while holding the SHIFT key a second time after engaging the sampling mode or simply press SAMPLING twice while holding SHIFT when initially engag ing the sampling mode The current sampling frequency setting will appear on the lower display line F1 F2 F3 or ...

Page 27: ...sound and 99 maximum volume HINT If you are adjusting the volume while playback is stopped you can play the micro keyboard to hear the effect of volume changes 4 Adjust the Remaining Tracks Select and adjust other tracks as required 5 Exit Press the EXIT key when done DETAIL Volume adjustments applied to the preset patterns are only temporary The original default settings will be automatically res...

Page 28: ...numbered 8th or 16th notes Each pattern can be programmed with a different SWING setting Swing settings can be made while playback is stopped or during playback so you can immediately hear the effect 1 Engage the SWING Function Press the REPEAT SWING key the number 9 key while holding the SHIFT key DETAIL The SWING function is only available in the PATTERN mode In the SONG mode pressing REPEAT SWI...

Page 29: ...00 to 49 DETAIL If you select a song number between 50 and 99 and the song has not yet been recorded a series of dashes will appear on the display 3 Start Playback Press the START STOP key to begin playback of the selected song Make sure that the VOLUME control is set to an appropriate level As the pattern plays a triangular beat indicator will flash in time with the music The SONG Mode Chord Disp...

Page 30: ...song playback from a specific measure number as follows 1 Specify the Starting Measure Before starting playback hold the SHIFT key and use the 1 and 1 keys to select the measure number from which you want playback to begin the measure number appears after m on the upper line of the display Don t release the SHIFT key yet 2 Start Playback While still holding the SHIFT key press the START STOP key t...

Page 31: ...the repeat segment then the segment will repeat continuously Also note that the segment repeat function is automatically cancelled if you select a different song or mode Tempo Settings Track Muting Voice Selection and Pattern Selection in the SONG Mode Tempo settings track muting voice selection and pattern selection all function the same way in the SONG mode as they do in the PATTERN mode selecti...

Page 32: ...iefly to play just a short section of a phrase as required The phrase will repeat continu ously as long as the key is held Selecting Different Phrases The QR10 PHRASE SELECT function makes it possible to independently select different phrases for the PHRASE 1 and PHRASE 2 keys You can for example select the phrases from two different songs for use while playing a third song 1 Select the Song to Pl...

Page 33: ...ry and the default phrases will be restored as soon as a different song or mode is selected Setting the Phrase Volume The volume of the sound produced by each of the PHRASE keys can be set independently in basically the same way that the track volume can be adjusted in the PATTERN mode 1 Engage the VOLUME Function Press the VOLUME key the number 0 key while holding the SHIFT key 2 Select a PHRASE ...

Page 34: ...HORD on the display rather than the usual pattern number and chord If a pattern number and chord appear on the display the song already contains data Nothing will appear below PATTERN and CHORD however if the song only contains melody track data HINT You can completely erase individual songs in the user song memory by using the CLEAR function described on page 34 3 Engage the Record Ready Mode Pre...

Page 35: ... playing it at a higher pitch HINT When recording over previously recorded data see Overdubbing below you can start recording from any specified measure by using the technique described in Starting Playback from a Specific Measure Number on page 24 hold the SHIFT key and use the 1 and 1 keys to select the starting measure number then still holding the SHIFT key press the START STOP key 9 Enter Sec...

Page 36: ... recorded data is not affected by the overdubbing process and you can overdub as many times as necessary to build up complicated chord changes for example Recording a MELODY Track After recording the basic song accompaniment tracks you might want to record a melody track to add a little extra life to your creation Unlike the accompaniment tracks the melody track records exactly what you play on th...

Page 37: ...ort as the shortest notes you intend to record 5 Start Recording Press the START STOP key to start recording After the usual 2 measure count in you can start recording your melody track by playing on the QR10 micro keyboard or a MIDI keyboard connected to the QR10 MIDI IN connector you can also record phrases by pressing the appropriate PHRASE key When using the QR10 micro keyboard you will have t...

Page 38: ...dividually deleted by pressing the keys listed below while holding the SHIFT DELETE key All corresponding changes that occur while these keys are held will be deleted The Accompaniment Tracks Chord changes are deleted by holding the SHIFT DELETE key and pressing any chord type key Section changes are deleted by holding the SHIFT DELETE key and pressing any section key Pattern changes are deleted b...

Page 39: ...lay 4 Start Recording Press the START STOP key to start recording then after the usual count in press the CHORD PROGRESS key whenever you want to switch to the next chord Timing is easy since you only have to press a single key to progress from chord to chord DETAIL Any section pattern and tempo changes recorded prior to using the CHORD PROGRESSION function will be erased HINT You can use the CHOR...

Page 40: ...can be cleared 2 Engage the CLEAR Function Press the CLEAR key the number 3 key while holding the SHIFT key 3 Select the Track s to Clear You can clear the MELODY and accompaniment tracks independently by selecting the appropriate tracks prior to execut ing the clear function The accompaniment tracks CHORD 1 CHORD 2 BASS RHYTHM are selected as a group 4 Press START STOP to Clear Press the START ST...

Page 41: ...HYTHM are selected as a group 4 Select the Destination Song Use the 1 and 1 keys or the number keys to enter the number of the destination song i e the song number to which the source song is to be copied The destination song number must be between 50 and 99 5 Press START STOP to Copy Press the START STOP key to actually copy the source song to the specified destination song number or EXIT to exit...

Page 42: ...of new sounds without the need for complicated programming procedures Here s how 1 Select the PATTERN Mode If the pattern mode is not already selected press the PATTERN SONG key to select it 2 Select a Combination Pattern Press the PATTERN SELECT key and use the 1 and 1 keys or the number keys to select a pattern number between 60 and 99 the COMBINA TION patterns 3 Select a Section The six section...

Page 43: ...ASS and RHYTHM 9 Stop Recording Press the START STOP key to stop recording when your combination pattern is complete 10 Record the Remaining Sections Repeat the above procedure to record the remaining sections of your combination pattern Recording the User Patterns 1 Select the PATTERN Mode If the pattern mode is not already selected press the PATTERN SONG key to select it 2 Select a User Pattern ...

Page 44: ...mechanical feel Always use a quantize value that is at least as short as the shortest notes you intend to record Time Signature TS Use the 1 and 1 keys to set the time signature as required The available time signatures are 1 4 2 4 3 4 4 4 5 4 6 4 7 4 8 4 1 8 2 8 3 8 4 8 5 8 6 8 7 8 8 8 The upper number on the display next to TS for Time Signature corresponds to the upper number of the time signat...

Page 45: ...ck exactly as it was recorded The record ready mode can be disengaged at any time prior to actually starting recording the next step by pressing the RECORD or EXIT key 8 Start Recording Press the START STOP key to start recording After the usual 2 measure count in you can start recording the selected track by playing on the QR10 micro keyboard or a MIDI keyboard connected to the QR10 MIDI IN conne...

Page 46: ...0 and song clear page 34 functions as necessary to erase unwanted data to make room for further recording The Pattern Clear Copy Functions Pattern Clear The PATTERN mode CLEAR function completely erases the specified section of the selected user pattern If you want to save the pattern data before clearing the pattern from the QR10 memory to make room for new material use the MIDI BULK DUMP functio...

Page 47: ...n of an existing pattern preset combination or user to a new user pattern number in which it can be modified as required 1 Select the Source Pattern and Section Select the pattern you want to copy This can be any of the preset combination or user patterns Use the section keys to select the section of the pattern you want to copy 2 Engage the COPY Function Press the COPY key the number 6 key while ...

Page 48: ... IMPORTANT Any previous data in the destination pattern location will be erased and replaced by the source pattern when the copy function is executed DETAIL If the QR10 memory becomes full due to a copy operation the memory full error display ERR 3 will appear If this happens use the pattern clear page 40 and song clear page 34 functions as necessary to erase unwanted data to make room for the dat...

Page 49: ...ress the QR10 MIDI key the number 5 key once while holding the SHIFT key if you press MIDI twice while holding SHIFT you ll select the Sync Mode function described below When you re ready to transmit the data to the MDF2 press START STOP A flashing triangle will appear on the display while the data is being transmitted and End will appear briefly when the transmission is complete DETAIL The QR10 a...

Page 50: ... or music computer An indicator block will appear next to MIDI SYNC on the display Please note that the QR10 will not run on its own when this parameter is turned on The QR10 as an ABC Expander The QR10 features an advanced ABC Auto Bass Chord system that can be controlled from an external keyboard making it useful as an ABC expander module When the MIDI ABC function is turned on you can change ch...

Page 51: ...d the accompaniment chord will change accord ingly during pattern playback or song accompaniment track recording Chords played within the specified range of an external MIDI keyboard connected to the QR10 MIDI IN connector are recognized IMPORTANT MIDI ABC will only function when an indicator block is showing next to CHORD on the display DETAIL The UPPr parameter can not be set to a lower number t...

Page 52: ...th Bass 1 1 32 Synth Bass 2 1 33 STRINGS ENS Tremolo Strings 2 34 String Ensemble 1 1 35 String Ensemble 2 2 36 String Ensemble 3 2 37 Synth Strings 2 38 Hit Strings 2 39 Voice Oohs 2 40 Orchestra Hit 1 41 BRASS REED Trombone 1 42 Brass Section 2 43 Synth Brass 2 44 Tenor Sax 1 45 SYNTH LEAD Synth Lead 1 square 2 NO Category Voice name EL 46 SYNTH LEAD Synth Lead 2 saw tooth 2 47 Synth Lead 3 fift...

Page 53: ...List Note No Note Rhythm Voice 35 B 0 Bass Drum 2 36 C 1 Bass Drum 1 37 Cs 1 Side Stick 38 D 1 Acoustic Snare 39 Ds 1 Hand Clap 40 E 1 Rim Snare 41 F 1 Low Floor Tom 42 Fs 1 Closed Hi Hat 43 G 1 High Floor Tom 44 Gs 1 Pedal Hi Hat 45 A 1 Low Tom Soft 46 As 1 Open Hi Hat 47 B 1 Low Mid Tom 48 C 2 Hi Mid Tom 49 Cs 2 Crash Cymbal 1 50 D 2 High Tom 51 Ds 2 Ride Cymbal 1 52 E 2 Chinese Cymbal 53 F 2 Ri...

Page 54: ...nge the time signature of a pattern that has already been recorded page 38 Chords cannot be changed via the You cannot change chords via the micro keyboard in the SONG mode In this mode chords can only be micro keyboard during song playback changed via the CHORD PROGRESS button if the CHORD PROGRESS function is turned ON page 33 The PHRASE keys produce no sound The phrase keys do not produce sound...

Page 55: ...ing Songs Preset 50 User 50 Tracks Melody Accompaniment Recordable data Accompaniment pattern number section chord tempo change Melody note program change phrase control change sustain pitch bend Other function Repeat System Functions Sampling MIDI bulk dump sync MIDI ABC Phrase type Transpose Footswitch Input gain Demo playback Sampling quantization 8 bit linear Sampling time Up to 3 2 seconds Ot...

Page 56: ... ASCII _ DATA FORMAT 00110000 30H ASCII 0 NAME 00110001 30H ASCII 1 00110010 31H ASCII 2 data bytes 00111011 38H ASCII 3 01010011 53H ASCII S 01010011 53H ASCII S DATA 0ddddddd 0ddddddd 1 Reception Conditions 1 1 Reception Data Conditions NOTE OFF 8nH MIDI IN NOTE ON OFF 9nH SUSTAIN SWITCH BnH 40H PROGRAM CHANGE CnH PITCH BEND CHANGE EnH BULK DUMP F0H F7H TIMING CLOCK F8H SW1 START FAH CONTINUE FB...

Page 57: ...ssion ON or OFF for each track The transmit channel is fixed for each channel 0 3 6 7 9 SW2 MIDI sync ON OFF Determines whether the internal clock or an external MIDI clock signal controls the QR10 2 2 Transmission data 2 2 1 System Realtime Message TIMING CLOCK 11111000 F8H START 11111010 FAH CONTINUE 11111011 FBH STOP 11111100 FCH ACTIVE SENSING 11111110 FEH FEH transmitted approximately once ev...

Page 58: ...52 Appendix continued MIDI IMPLEMENTATION CHART ...

Page 59: ...eys 7 18 Output jack 4 Overdubbing 30 Pattern length 38 Pattern mode 10 Pattern number 10 Pattern recording 37 Pattern select key 6 10 Pattern variations 12 Pattern song key 7 10 23 Phones jack 4 Phrase volume 27 Phrase chord shift keys 7 15 26 Phrases 26 Polyphony information 46 Power supply i 3 Power switch 6 Preset patterns 10 Preset pattern song list 47 Preset songs 23 Quantize 31 38 Record ke...

Page 60: ...apha Building Rama I Road Patumwan Bangkok 10330 Thailand Tel 2 215 3443 THE PEOPLE S REPUBLIC OF CHINA AND OTHER ASIAN COUNTRIES Yamaha Corporation International Marketing Division Nakazawa cho 10 1 Hamamatsu Japan 430 Tel 053 460 2311 MIDDLE SOUTH AMERICA MEXICO Yamaha De Mexico S A De C V Departamento de ventas Javier Rojo Gomez No 1149 Col Gpe Del Moral Deleg Iztapalapa 09300 Mexico D F Tel 68...

Page 61: ...VN00000 JCADR0CMS00 0 ITP ...

Reviews: