22
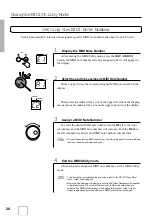
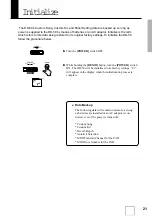
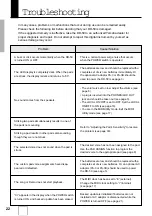
In many cases, problems or malfunctions that occur during use can be remedied easily.
Please check the following list before deciding that your DD-50 is damaged.
If the suggested remedy is ineffective, take the DD-50 to an authorized Yamaha dealer for
proper diagnosis and repair. Do not attempt to repair this digital instrument by yourself as
serious damage may occur.
Troubleshooting
Problem
Cause/Solution
The song or Demo does not start playback.
The MIDI clock has been set to “E” (external).
Change the MIDI clock setting to “I” (internal)
(see page 17).
A buzz or click occurs momentarily when the DD-50
is turned ON or OFF
This is a normal power surge noise that occurs
when the POWER switch is operated
“Cr” appears in the display when the POWER switch
is turned ON, and backed up data has been erased.
Backed up data is initialized if batteries are not
installed or AC adaptor is disconnected while the
POWER is turned OFF (see page 21).
The selected voice does not sound when the pad is
struck.
The desired voice has not been assigned to the pad.
Use the PAD ASSIGN function to program the
desired voice to the appropriate pad (see page 8).
The batteries are low and should be replaced with a
complete set of six new batteries. Or, an optional AC
adaptor (PA-3 or PA-3B) should be used to power
the DD-50 (see page 3).
The custom pad voice assignments have disap-
peared or defaulted.
Striking two pads simultaneously results in one of
the pads not sounding.
Striking a pad results in other pads also sounding,
though they were not struck.
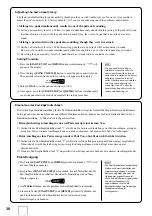
Refer to “Adjusting the Pad’s Sensitivity” to resolve
the problem (see page 30).
The batteries are low and should be replaced with a
complete set of six new batteries immediately. Or,
the optional AC adaptor PA-3 or PA-3B should be
used to power the DD-50 (see page 3).
The LED display is completely dark. When the pads
are struck, the display is dark and returns to “00”.
No sound comes from the speakers.
• The volume is set too low. Adjust the volume (see
page 6).
• A plug is inserted into the PHONES/AUX. OUT
jack and should be taken out (see page 3).
• The LOCAL ON/OFF is set to OFF. Set the LOCAL
ON/OFF to ON (see page 18).
• You are in the MIDI/Utility mode. Exit the MIDI/
Utility mode (see page 17).

