12
3. Download the latest firmware from YAESU website (
4. Unzip the downloaded file and copy all the files to the desired folder.
5. Refer to the “
Firmware Update Manual
” PDF file in the folder and update the firmware of the transceiver.
Be sure to use the “
Supplied USB cable
” for the FT5D, FT3D, FT2D, FTM-500D, FTM-300D or the FTM-200D firmware
update. The PC connection cable SCU-56, SCU-55, SCU-20 or SCU-19 cannot be used for the FT5D, FT3D, FTM-500D,
FTM-300D or the FTM-200D firmware update.
Connect the transceiver and the PC
Do not connect the connection cable to the PC before the installation of the USB device driver is completed. The wrong
device driver may be installed and it may not operate correctly.
To communicate with an analog FM station, refer to “
Communicating with digital or analog FM mode (Portable HRI
” (page 13) and connect the transceiver and the PC.
Communicating only with C4FM digital mode (Portable Digital Node Mode)
FT5DR/DE, FT3DR/DE or FT2DR/DE
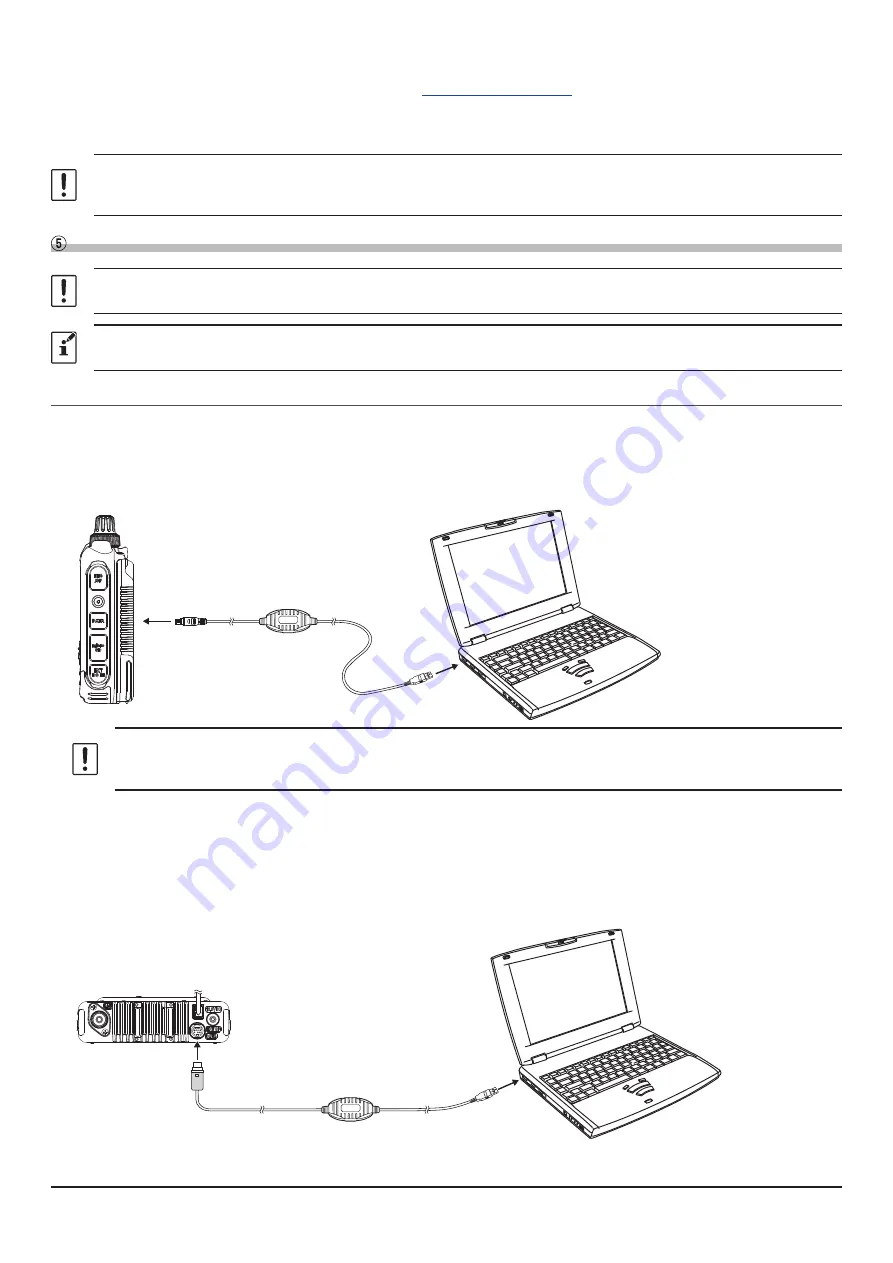
1. Refer to the below figure and connect the PC connection cable SCU-55 or SCU-19.
(The SCU-55 or SCU-19 is included in the optional SCU-57 kit or SCU-39 kit.)
*It is not necessary to connect the microphone / speaker terminal.
USB
DATA Jack
SCU-55 or SCU-19
• To prevent RF interference, keep the antenna of the transceiver as far away from the connecting cables and PC
as possible.
• It is recommended to set the transmit output power of the transceiver as low as possible for the desired communication.
The connection is complete.
FTM-500DR/DE, FTM-400XDR/XDE/DR/DE, FTM-300DR/DE, FTM-200DR/DE and FTM-100DR/DE
1. Refer to the below figure and connect the PC connection cable SCU-56 or SCU-20.
(
The SCU-56 or SCU-20 is included in the optional SCU-58 kit or SCU-40 kit.
)*
*The SCU-56 or SCU-20 PC Connection Cable is supplied with the FTM-400XDR/XDE/DR/DE / FTM-100DR/DE.
USB
DATA Jack
SCU-56 or SCU-20
The connection is complete.


