Version 1.0
PartPro150 xP Operation Manual
28
Wireless
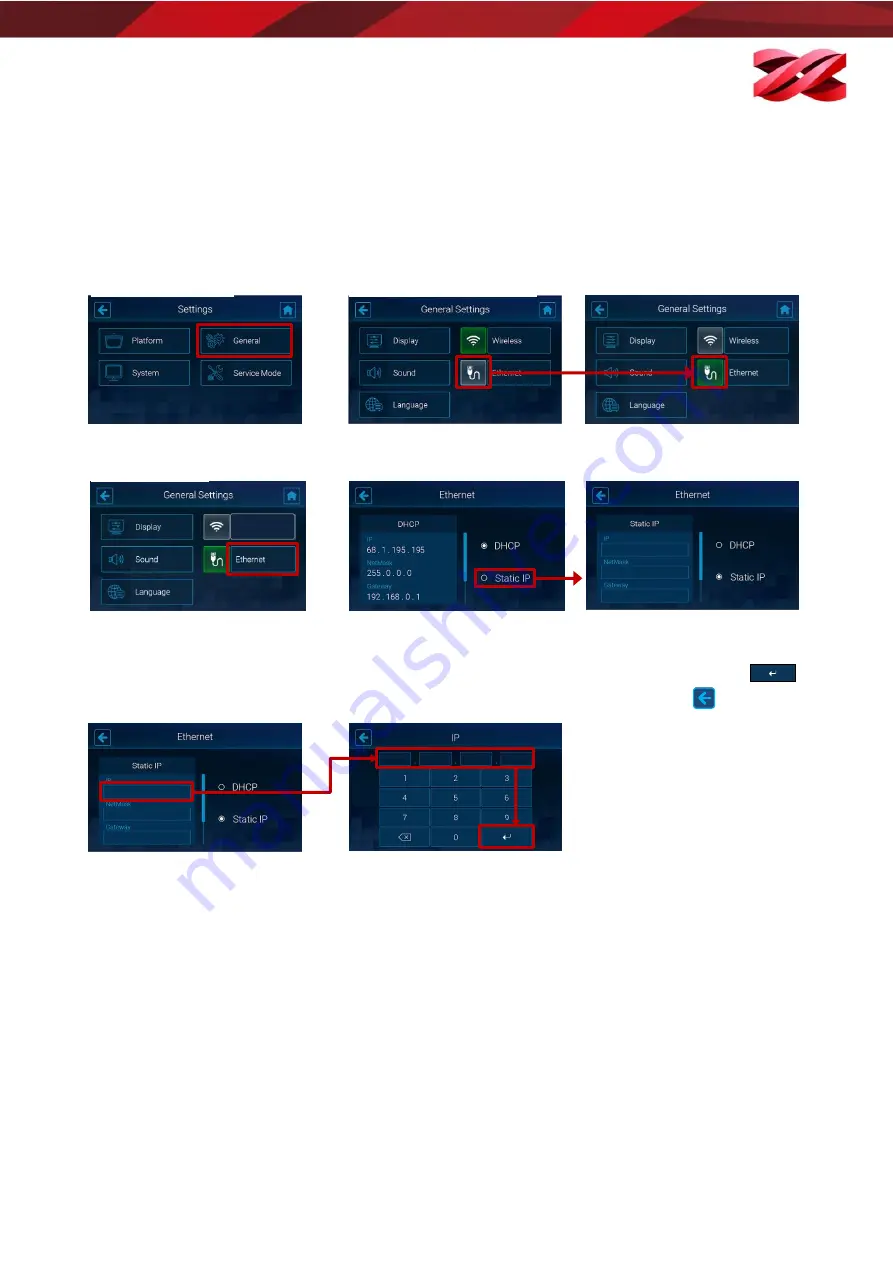
Manually configuring Ethernet network
The printer is set to obtain an IP address automatically by default. However, if you are using the printer on a
network without DHCP, or want to prevent the printer's IP address from changing, you may specify IP address for
the printer. Check the corresponding settings with your network administrator.
Proceed to the following procedures after plugging the Ethernet cable to the Ethernet port at the back of the
printer.
1.
From the main menu, go to
[SETTINGS] > [General].
2.
Tap the Ethernet connection icon to enable the function. Skip this step if the
icon is already shown in green.
3.
Tap [Ethernet] to go to the
configuration page.
4.
Tap [Static IP] to switch to manual configuration
5.
Set up [IP], [NetMask], [Gateway], and [DNS] respectively. Tap each field to open up the on-screen keyboard.
In each input screen, tap the IP address field and input the IP address using the on-screen keyboard and tap
to
apply the setting. Repeat the process until you have setting up the IP address of each item and tap
to exit the
function.


