Version 1.0
PartPro150 xP Operation Manual
11
2.
PRODUCT OVERVIEW
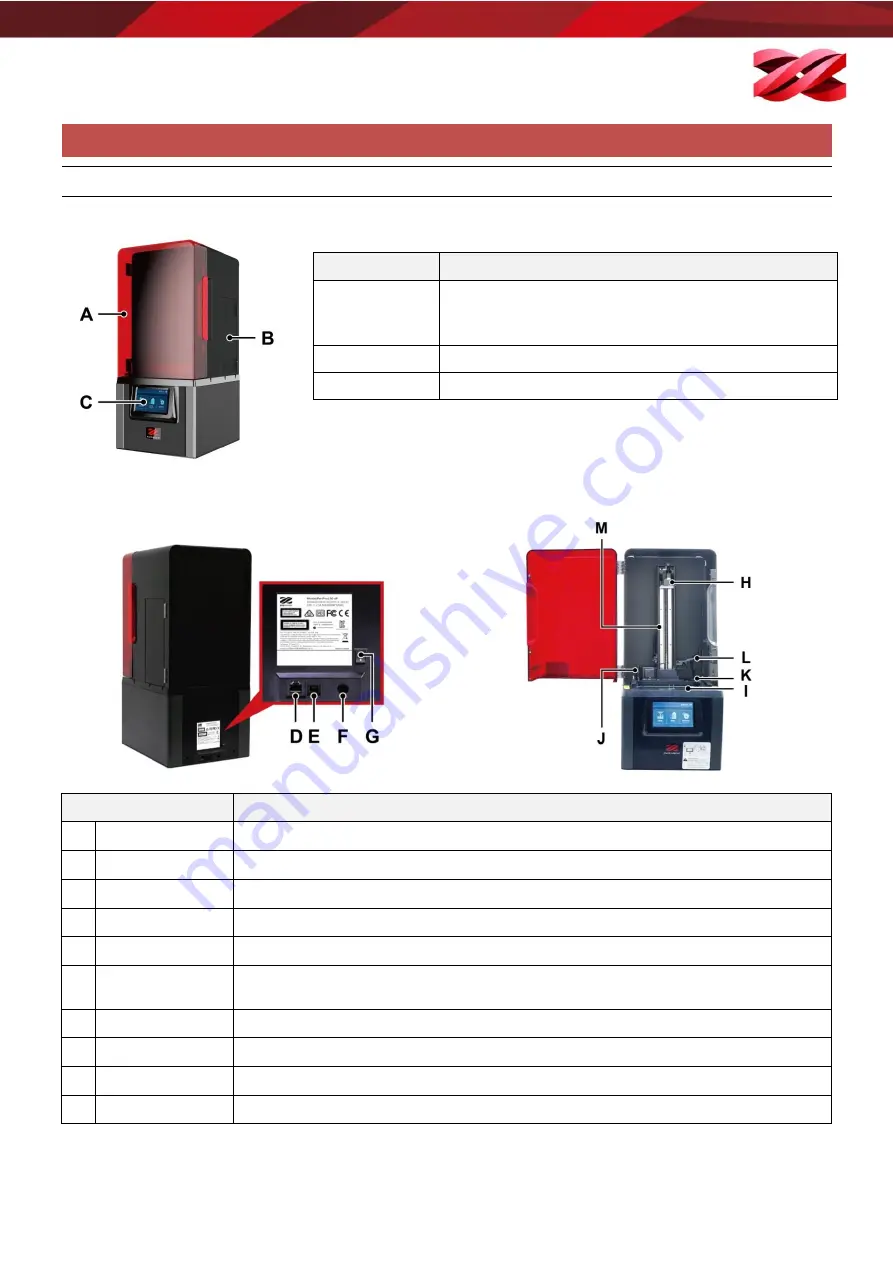
APPEARANCE
Front View - Exterior
Rear View
Front View - Interior
Component
Description
D
Ethernet Port
Attach the Ethernet cable to the port to connect the printer to the Ethernet.
E
USB Wire Port
Attach the USB cord to the port to connect the printer to the PC.
F
Power Jack
Connect the supplied power adapter to the socket to power on the printer.
G
Power Switch
Press the switch to power on or off the printer.
H
Platform Rack
The printing platform to hold the printed parts during printing.
I
Tank Slot
The tank slot holds the resin tank on the printer. Insert the resin tank into the slot while
completing the installation.
J
Wiper Shaft
The wiper shaft holds the wiper on the printer.
K
Cartridge Slot
Resin bottle should be inserted into the slot to connect to the refilling system.
L
Filling Tube
Resin runs through the filling tube when auto-refill is enabled.
M
Pumping Tube
Air flows into the resin bottle through the pumping tube to push out the material when filling.
Component
Description
Front Cover
Open this cover to take out printed model or perform regular
maintenance.
Keep the front cover securely closed during printing.
Side Cover
Access the resin bottle through the side cover.
Touch Panel
Contains a screen and keys for machine control.


