8-10
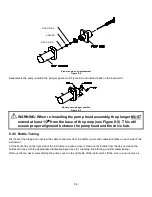
Remove the screw holding the sipper arm cover, then raise the cover up and slide it out of the sipper arm. Disconnect the
tubing from the sipper.
Unscrew the sipper cone, slide it down and remove it from the sipper. Loosen the two needle mount screws two turns,
then remove the sipper by sliding it straight out of the mounts.
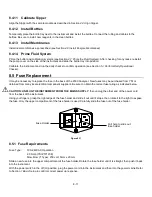
Carefully insert the long thin end of the new sipper and slide it into the mounts. Slide the sipper cone up the sipper and
screw it into the sipper arm. Be sure the sipper is centered in both mounts. Tighten the mount screws gently until they
contact the sipper, then tighten an additional ¼ turn (
do not over tighten
). Install the sipper arm cover and secure using
the hex screw (
do not over tighten
).
Route the new sipper tubing behind the sipper assembly and connect the other end to the front connector of the sipper
pump.
Screw
Cover
Summary of Contents for YSI 2500
Page 1: ...USER MANUAL 525021 YSI 2500 Biochemistry Analyzer OPERATIONS AND MAINTENANCE MANUAL...
Page 34: ...5 11 8 The Stat sample results are displayed on the Run Stat tab Stat sample results...
Page 88: ...13 1 13 Notices Declaration of Conformity 13 1...
Page 96: ...17 1 17 Appendix D Line Power Cord and Plug Wiring United Kingdom United States Europe...


