


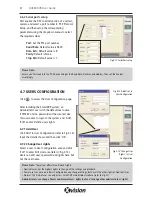

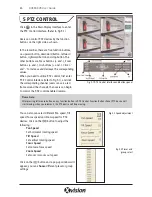


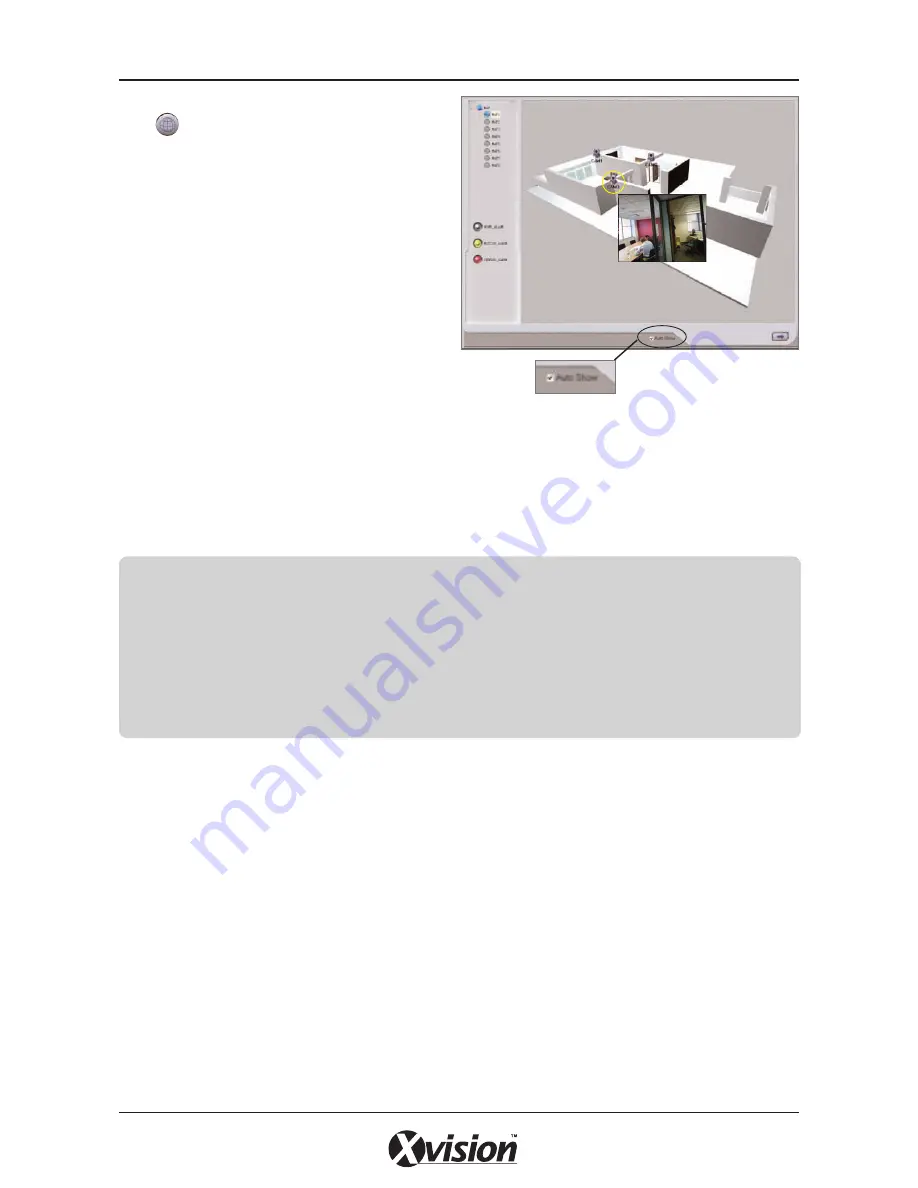
4.8.2 View the map
Click to enter E-map, where you can view the
distribution of all the cameras in the map, as Fig
4.16 shows.
When a camera channel alarms, ie. if motion is
detected, the corresponding camera icon will flash
yellow to indicate an alarm signal.
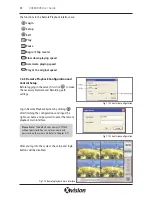
If you select
‘Auto show’
, the alarming camera’s
image will pop out automatically as a mini-screen
and show the live image so you can view the
motion detected, as Fig 4.18 shows.
If ‘Auto Show’ is not selected, you can right click
the camera head to show the live camera image.
Further options are available in the Basic Configuration > Alarm menu, in the E-map Tab. Here you can
select if you wish the E-map alarm screen to
‘Auto-hide’
after the live image pops up on screen and the
holding time
the E-map stays on screen when an alarm is triggered.
23
XUSB4DVR User Guide
Fig 4.18 Auto show on Alarm
Please Note:
• E-map only supports three tier levels
• When loading a customised map, the image will be enlarged or shortened proportionally to fit the standard size
of the E-map frame (833x678 pixels)
• If ‘Auto Close’ is set, the pop up screen which opens on an Alarm triggering will close automatically after the
‘Holding Time’ is over and there is no other activity. ‘Auto Close’ is invalid when the E-map is opened manually.
• The default map in the E-map is a demonstration map, and you can use your own map by saving it as a JPEG or
BMP file.


