


Troubleshooting
128
Phaser 6700 Color Printer
User Guide
Troubleshooting Paper Jams
This section includes:
•
Multiple Sheets Pulled Together .................................................................................................................................. 128
•
Paper Misfeeds .................................................................................................................................................................... 128
•
Label and Envelope Misfeeds ....................................................................................................................................... 129
•
Paper Jam Message Stays On ....................................................................................................................................... 129
•
Jams During Automatic 2-Sided Printing ................................................................................................................ 129
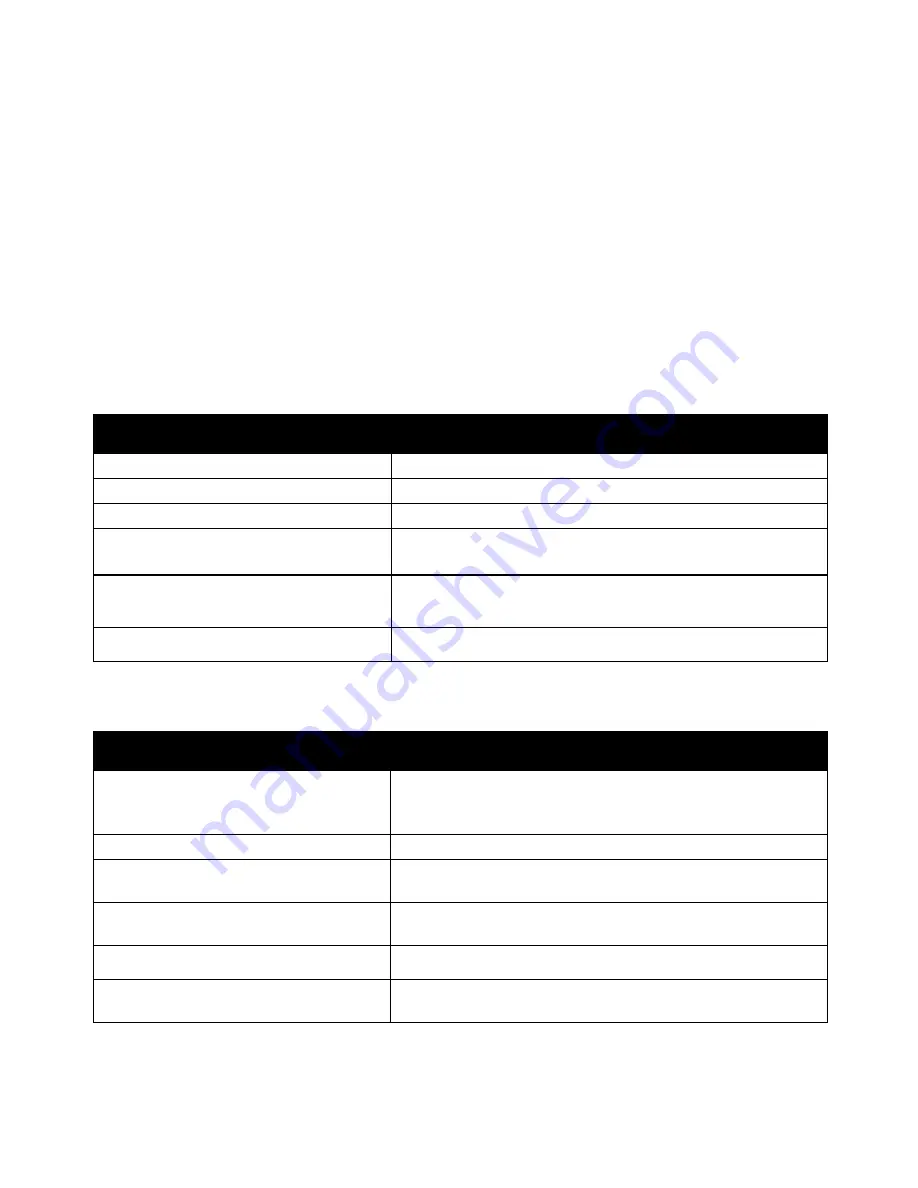
Multiple Sheets Pulled Together
Probable Causes
Solutions
The paper tray is too full.
Remove some of the paper. Do not load paper past fill line.
The edges of the paper are not even.
Remove the paper, align the edges, and then reload it.
The paper is moist from humidity.
Remove the paper from the tray, and replace it with new dry paper.
Too much static electricity is present.
•
Try a new ream of paper.
•
Do not fan transparencies before loading in tray.
Using unsupported paper.
Use only Xerox
®
-approved paper. For details, see
Supported Paper
on page 32.
Humidity is too high for coated paper.
Feed paper one sheet at a time.
Paper Misfeeds
Probable Causes
Solutions
The paper is not correctly positioned in
the tray.
•
Remove the misfed paper and reposition it properly in the tray.
•
Adjust the paper guides in the tray to match the size of
the paper.
The paper tray is too full.
Remove some of the paper. Do not load paper past the fill line.
The paper guides are not correctly adjusted to
the paper size.
Adjust the paper guides in the tray to match the size of the paper.
The tray contains warped or wrinkled paper.
Remove the paper, smooth it out, and reload it. If it still misfeeds, do
not use that paper.
The paper is moist from humidity.
Remove the moist paper and replace it with new, dry paper.
Use paper of the correct size, thickness,
and type.
Use only Xerox
®
approved paper. For details, see
Supported Paper
on
page 32.
Summary of Contents for Phaser 6700DN
Page 30: ...Installation and Setup 30 Phaser 6700 Color Printer User Guide...
Page 50: ......
Page 66: ......
Page 108: ......


