General Care
Xerox
®
Phaser
®
3052 / 3260
User Guide
120
4.
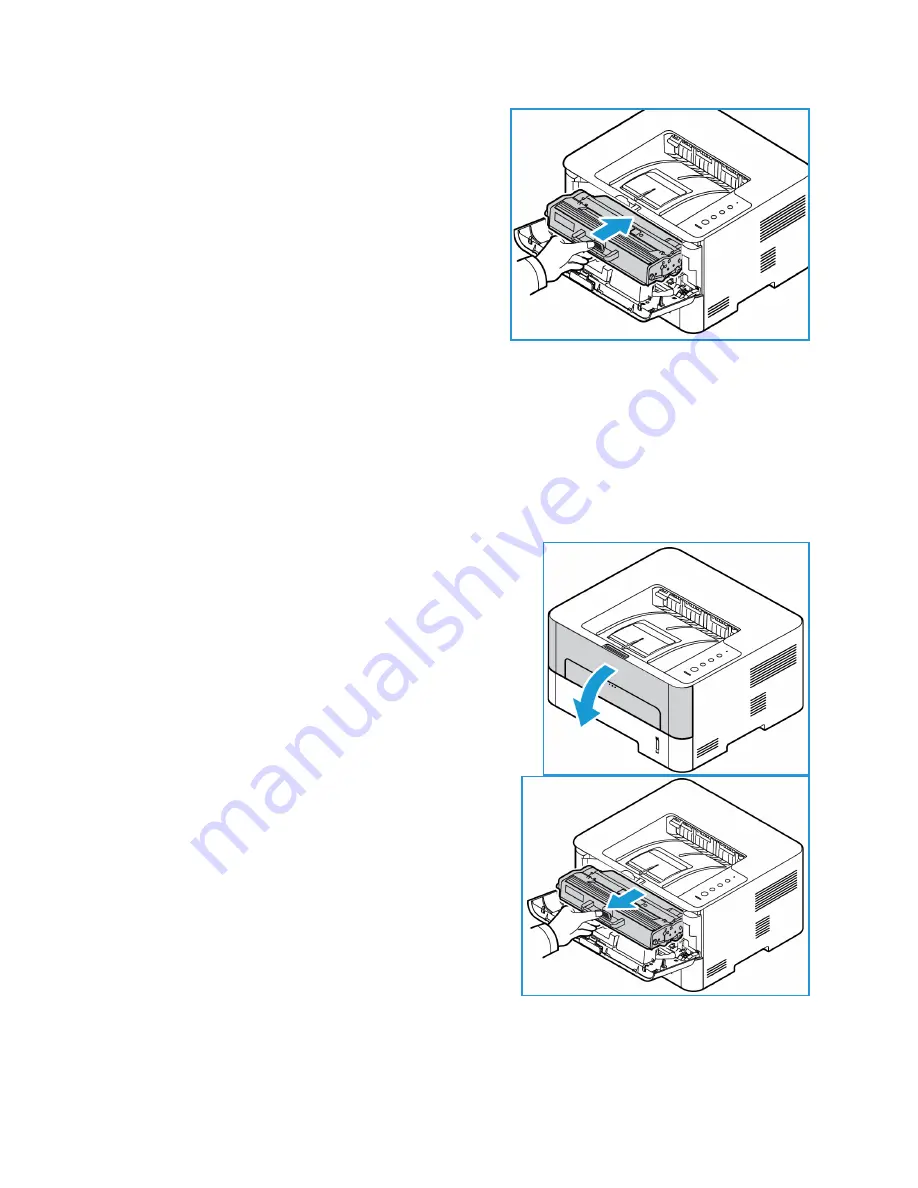
Insert the toner cartridge slowly into the printer,
pushing it until it locks into place.
5.
Close the front cover of the printer. The Machine
Status light should be solid green, indicating the
printer is ready to print.
Replacing the Toner Cartridge
When the Toner LED light on the control panel is solid orange, it is time to replace the toner cartridge.
To replace the cartridge, follow the instructions provided below or with the consumable.
WARNING:
When replacing consumables, DO NOT remove the covers or guards that are fastened
with screws. You cannot maintain or service any of the parts that are behind these covers and
guards. Do NOT attempt any maintenance procedure that is NOT specifically described in the
documentation supplied with your machine.
1.
Open the front cover of the printer.
2.
Pull the toner cartridge out using the handle.
3.
Remove the new toner cartridge from the packaging.
Follow the packaging directions to remove the
protective packaging materials from the cartridge.
Summary of Contents for Phaser 3052NI
Page 1: ...July 2014 Xerox Phaser 3052NI Xerox Phaser 3260DI 3260DNI User Guide ...
Page 8: ...Contents Xerox Phaser 3052 3260 User Guide viii ...
Page 72: ...Media Output Locations Xerox Phaser 3052 3260 User Guide 64 ...
Page 120: ...Software Update Xerox Phaser 3052 3260 User Guide 128 ...
Page 150: ...Environmental Specifications Xerox Phaser 3052 3260 User Guide 158 ...
Page 166: ...Material Safety Data Xerox Phaser 3052 3260 User Guide 174 ...
Page 173: ......
Page 174: ......


