Unpacking the Printer
1. Setting up the DocuColor 2006
Xerox DocuColor 2006
1-13
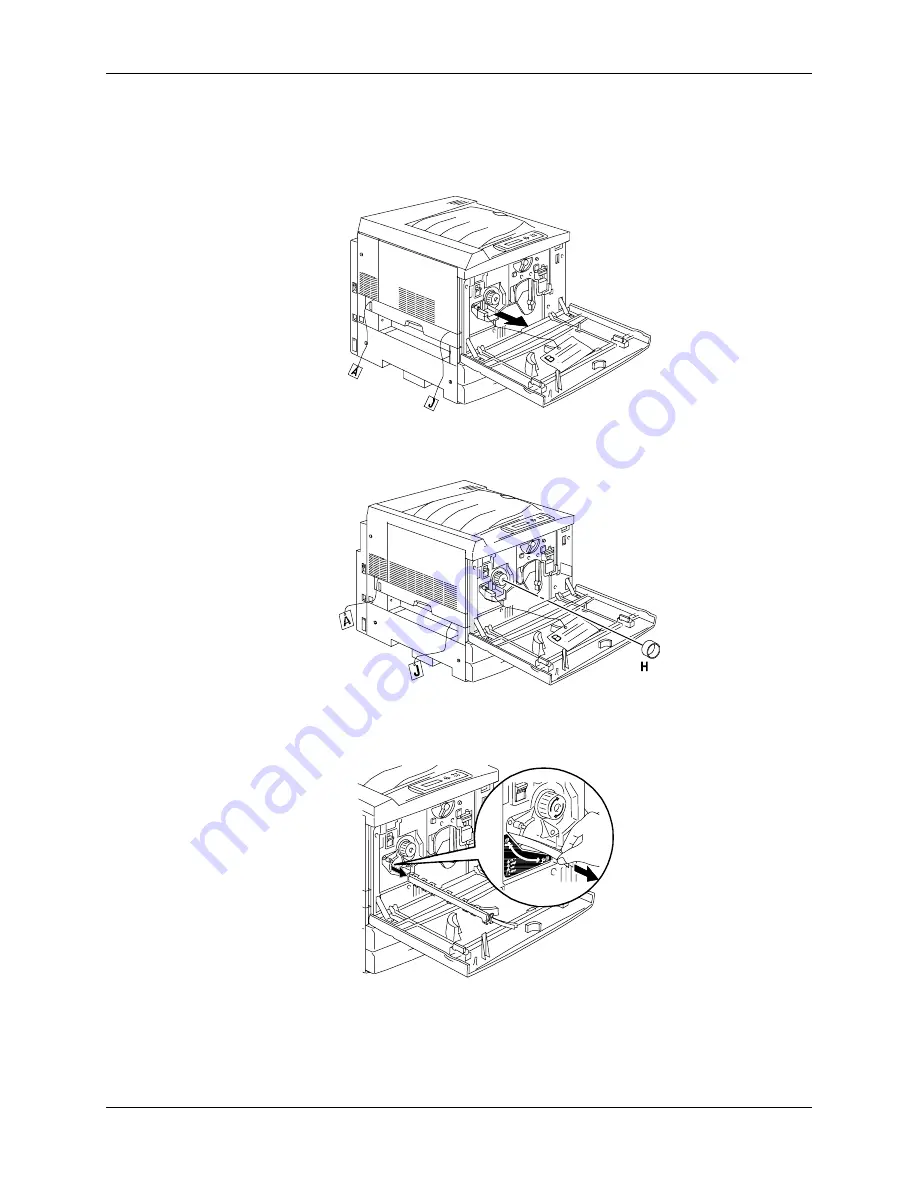
10. Remove all the internal packing from the Printer by performing steps a
through m.
a. Remove the spacer labeled
B
.
301025B-WOL
0
b. Remove the cardboard collar from the knob shown below.
301245A-WOL
0
c.
Pull the narrow strip labeled
G
from the Dry Ink chamber.
301026B-WOL
0
Summary of Contents for 2006NPC - DocuColor Color Laser
Page 1: ...DocuColor 2006 Documentation The Document Company XEROX...
Page 30: ...1 Setting up the DocuColor 2006 Installing the 2 Tray Module 1 8 Xerox DocuColor 2006...
Page 40: ...1 Setting up the DocuColor 2006 Unpacking the Printer 1 18 Xerox DocuColor 2006...
Page 60: ...1 Setting up the DocuColor 2006 Loading paper in the paper tray 1 38 Xerox DocuColor 2006...
Page 390: ...20 Using ColorWise Pro Tools Xerox DocuColor 2006 20 18...
Page 452: ...24 Problem Solving Clearing paper jams 24 4 Xerox DocuColor 2006...
Page 460: ...24 Problem Solving Clearing Area 1 jams 24 12 Xerox DocuColor 2006...
Page 462: ...24 Problem Solving Clearing Area 2 jams 24 14 Xerox DocuColor 2006...
Page 464: ...24 Problem Solving Clearing Area 3 jams 24 16 Xerox DocuColor 2006...
Page 466: ...24 Problem Solving Clearing Area 4 jams 24 18 Xerox DocuColor 2006...
Page 484: ...24 Problem Solving Printer Error messages 24 36 Xerox DocuColor 2006...
Page 486: ...24 Problem Solving Printer Error Codes 24 38 Xerox DocuColor 2006...
Page 488: ...24 Problem Solving Scanner Error messages 24 40 Xerox DocuColor 2006...
Page 526: ...25 Maintenance Replacing the Copy Print Cartridge 25 14 Xerox DocuColor 2006...
Page 546: ...26 Technical Data 26 16 Xerox DocuColor 2006...


