Step 4
– For a wall or panel mount, drill or use a
hole saw to create a 1¼" hole. Pull the power cable
from the the Gateway and the RV’s power wires
through the wall or panel.
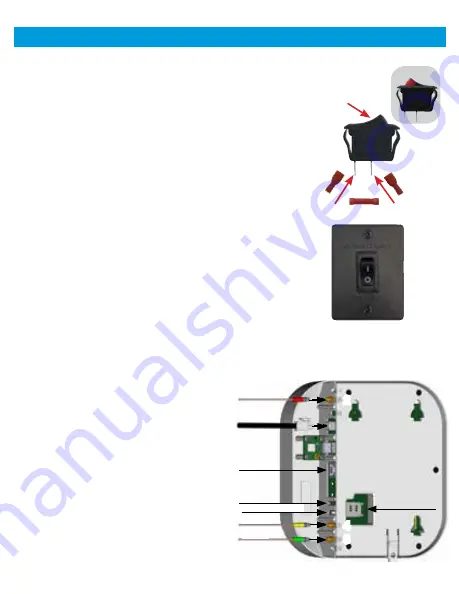
Step 5
– Be sure the switch is in the OFF position
before continuing. Slide the power switch into the
wall plate.
Step 6
– Connect the +12V power wire from the
vehicle to a small red terminal insulator. Crimp the
connector.
Step 7
– Connect this small red terminal insulator
to the isolated spade of the power switch. (See diagram)
Step 8
– Connect the red wire from the Gateway
to the other small red terminal insulator. Crimp
the connector.
Step 9
– Connect this small red terminal insulator
to the middle spade on the switch.
Step 10
– Slide the ground wire from the vehicle
into one end of the barrel crimp splice, and slide
the black ground wire from the Gateway
into the opposite end of the splice.
Crimp the splice.
Step 11
– Mount the wall plate to the
wall or panel with the two supplied wall
plate screws.
Step 12
– Next, connect the WiFi
cable with the red tubing to the
mating connector that is designated
in the #2 slot.
Step 13
– Connect the 4G LTE cables
with their respective mating connectors
(Yellow - #4 slot and Green - #5 slot).
Installation (cont.)
On/Off rocker
switch (shown
in Off Position)
+12 V
from
vehicle
+12 V
from Air
360+
Barrel crimp splice
ON
Power switch into
wall plate
7
Red
Power
Green
Yellow
Green
Yellow
Red
Power
Ethernet
Reset Button
LED
SIM Card Slot
#4
#2
#5


