en
Installation and electrical connection
22
WILO SE 2021-05
Completing installation
1
2
9
11
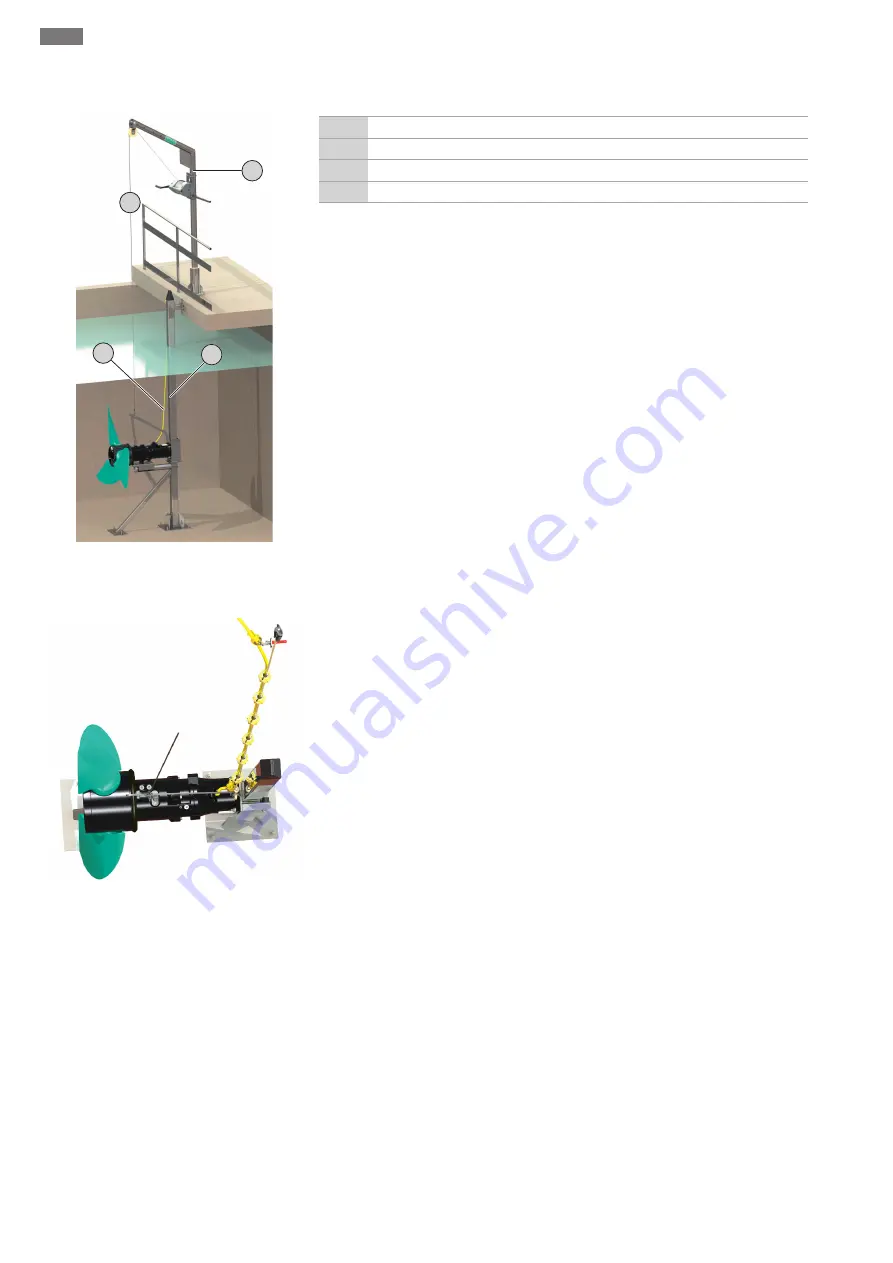
Fig. 7: Mixer set down on the stand unit
1
Hoisting gear
2
Lifting equipment
9
Guide pipe for lowering device
11
Connection cable
‡
Mixer mounted on the lowering device
1. Slowly lower the mixer.
- Hold the connection cable slightly taut when lowering it.
- Do not damage the connection cable. Do not lead it directly over the edge of the
basin!
NOTICE! Alternatively, anchoring can be done via a separate nylon rope. An an-
choring set is included in the accessories for this purpose.
2. Lower the mixer to the end of the guide pipe.
3. Anchor the connection cable with the cable bracket on the edge of the basin.
▶ Installation is complete. Lay the connection cable and make the electrical connec-
tion.
Install additional rope anchoring
Fig. 8: Additional rope anchoring
The additional rope anchoring protects the connection cable against damage in case of
powerful flows in the basin. The rope anchoring consists of a 12 mm nylon rope (PA6)
and a corresponding number of cable brackets. The quantity and size of the cable
brackets depends on the order.
WARNING! Use the nylon rope and cable brackets only for anchoring the connection
cable. They must never be used to secure heavy loads and/or third-party products!
NOTICE! Install the nylon rope in the length delivered. If the nylon rope is shortened,
fuse the ends with a heat gun and secure against unravelling with heat-shrink
tubing!
‡
The submersible mixer is completely installed.
1. Guide the nylon rope through a free eyelet on the frame and knot it securely.
2. Tension the nylon rope hand-tight (tensile force approx. 10...15 kg).
3. Securely attach the nylon rope to adequately dimensioned parts of the construc-
tion (e.g. railings, top holder etc.).
4. Attach the first cable bracket directly to the frame. Attach all the connection
cables to the nylon rope using this bracket.
NOTICE! Do not tauten the connec-
tion cables! The connection cables must form a loop!
5. Use the additional cable brackets to attach the connection cables to the nylon
rope. Max. distance between the cable brackets: 1 m.
CAUTION! The nylon rope
may stretch in the water. When the nylon rope is taut, the connection cables
must sag approximately 10 cm!


