


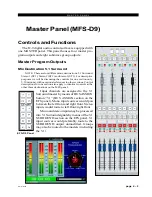


C O N T R O L P A N E L
page 3 – 10
D-9 / Oct 2003
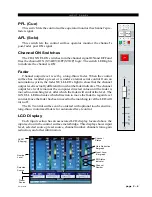
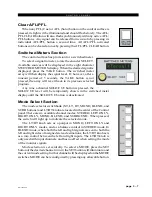
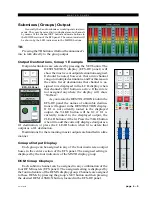
To Copy One To All
Press the COPY button, and then the desired source channel SET
button; both will flash in concert. Then press PASTE ALL, which will
commence flashing. To execute the global paste, press TAKE.
NOTE: If the TAKE button is not pressed within a timeout period
of 10 seconds, the entire copy/paste operation will cancel out.
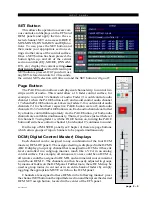
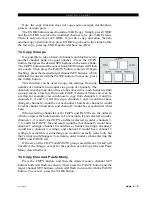
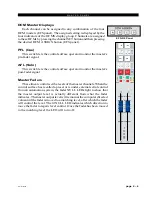
Test Section
The test section, located on the top of the EFS
panel, provides adjustable frequency test signals, a
pink noise source, and a stereo ID source (a 400Hz
tone on the left channel, and a 1KHz tone on the
right channel).
Operate as follows: The encoder knob operates
as both - a frequency knob and a level control knob.
By pressing the FREQ button, the encoder will
now adjust the oscillator frequency designated in
the TEST TONES display. Its level can then be adjusted by pressing the
LEVEL button and using the encoder to adjust the level as displayed
in the TEST TONES display. If a pink noise is desired, press PINK
button and adjust its level by pressing the LEVEL button. Using the
same procedure with ST ID TONES button establishes a STEREO ID
tone. The test tone destination is chosen by pressing the SET button at
the desired destination location and then the ASSIGN button in the test
tone section. To use any of the test tones, press the ON button. When
it is lit the selected test tone is available; when not lit the tones are off.
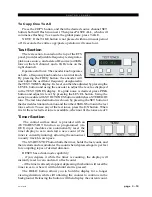
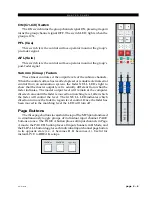
Timer Section
The control surface timer is provided with an
AUTO-RESTART function so programmed (via
GUI) input modules can automatically reset the
timer display to zero and start a new count (if the
timer is currently running), allowing the announcer
to easily track his own pace.
The START/STOP button halts the timer, holds the last count, and
then restarts and accumulates the count when depressed again
—
perfect
for compiling tapes of desired duration.
RESET has a dual-mode capability:
- if you depress it while the timer is counting, the display will
instantly reset to zero and start a fresh count;
- if the timer is already stopped, depressing this button will reset the
timer to zero, where it will hold until start is pressed.
The HOLD button allows you to hold the display for a longer
viewing duration, while still allowing the counter to continue in the
background. Releasing the button will then display the current count.
Summary of Contents for D-9
Page 63: ...D 9 May 2005 page 7 2 ...
Page 64: ...D 9 May 2005 page 7 3 ...
Page 65: ...D 9 May 2005 page 7 4 ...
Page 66: ...D 9 May 2005 page 7 5 ...
Page 67: ...page 7 6 D 9 May 2005 ...
Page 68: ...D 9 May 2005 page 7 7 ...
Page 69: ...page 7 8 IP 9 4 Inputs Panel Switch Card Load Sheet D 9 May 2005 ...
Page 70: ...page 7 9 D 9 Oct 2003 ...
Page 71: ...page 7 2 D 9 Oct 2003 S C H E M A T I C D R A W I N G S IQ 9 IQ Card Load Sheet page 7 10 ...
Page 72: ...page 7 11 D 9 Oct 2003 ...
Page 73: ...page 7 12 D 9 Oct 2003 ...
Page 74: ...page 7 13 D 9 Oct 2003 ...
Page 75: ...page 7 14 D 9 Oct 2003 ...
Page 76: ...page 7 15 D 9 Oct 2003 ...
Page 77: ...page 7 16 MN 9 Control Panel Switch Card Load Sheet D 9 Oct 2003 ...
Page 78: ...D 9 May 2005 page 7 17 ...
Page 79: ...D 9 May 2005 page 7 18 ...
Page 80: ...page 7 19 MFS 9 4 Master Panel Switch Card Load Sheet D 9 May 2005 ...
Page 84: ...D 9 Oct 2003 page 7 23 ...
Page 85: ...D 9 Oct 2003 page 7 24 ...
Page 86: ...D 9 Oct 2003 page 7 25 ...
Page 87: ...page 7 26 DCM 9 DCM Panel Switch Card Load Sheet D 9 Oct 2003 ...
Page 95: ...page 7 34 HC 9 Host Controller Card Load Sheet D 9 Apr 2008 ...
Page 96: ...page 7 35 D 9 Oct 2003 ...
Page 97: ...page 7 36 BP 9 Back Plane Card Load Sheet D 9 Oct 2003 ...
Page 98: ...page 7 37 D 9 Oct 2003 ...
Page 100: ...D 9 Oct 2003 page 7 39 ...
Page 102: ...D 9 Oct 2003 page 7 41 ...
Page 104: ...page 7 43 D 9 Oct 2003 ...
Page 106: ...page 7 45 D 9 Oct 2003 ...