background image


030-300198 Rev. D

 41 

                                                    March 2003 


WireSpeed Dual Connect NAT Router 


User Guide 


 DSL Connection Information 

Connection Rate 

This field will let you know if you have a DSL Sync (UP/DOWN) and the DSL rate 
at which you are connected. 

Connection Status 

This field will display how much information was received (IN) or sent (OUT) in 
packets. 

IP Network Address 

PPP = An IP address identifies your device on the Internet 
Primary DNS = Provided by your Service Provider 
Secondary DNS = Provided by your Service Provider 

Ethernet Status 

This field will display your Ethernet information that was received (IN) or sent 
(OUT) in packets on your Ethernet port. 

ATM Network Address 

This field will display your VPI & VCI values, which are provided by your Internet 
Service Provider. 

Firewall Status 

This field will display your firewall traffic in packets. 
 
Passed: Monitors information traffic that was successfully received (IN) or 
transmitted (OUT) in packets. 
Dropped: Monitors information traffic that was not successfully received (IN) or 
transmitted (OUT) due to your firewall settings. 

PPP Connection Information 

Connection Name 

This is from the connection profile that you established in section 7. 

Connection Duration 

This field will display how long your PPP session has been connected. 

Status 

This field will display the status of your PPP session. 
UP=Connected 
DOWN=Disconnected 

Number of Reconnects 

This field will display the number of attempts that were made to establish a PPP 
session. 


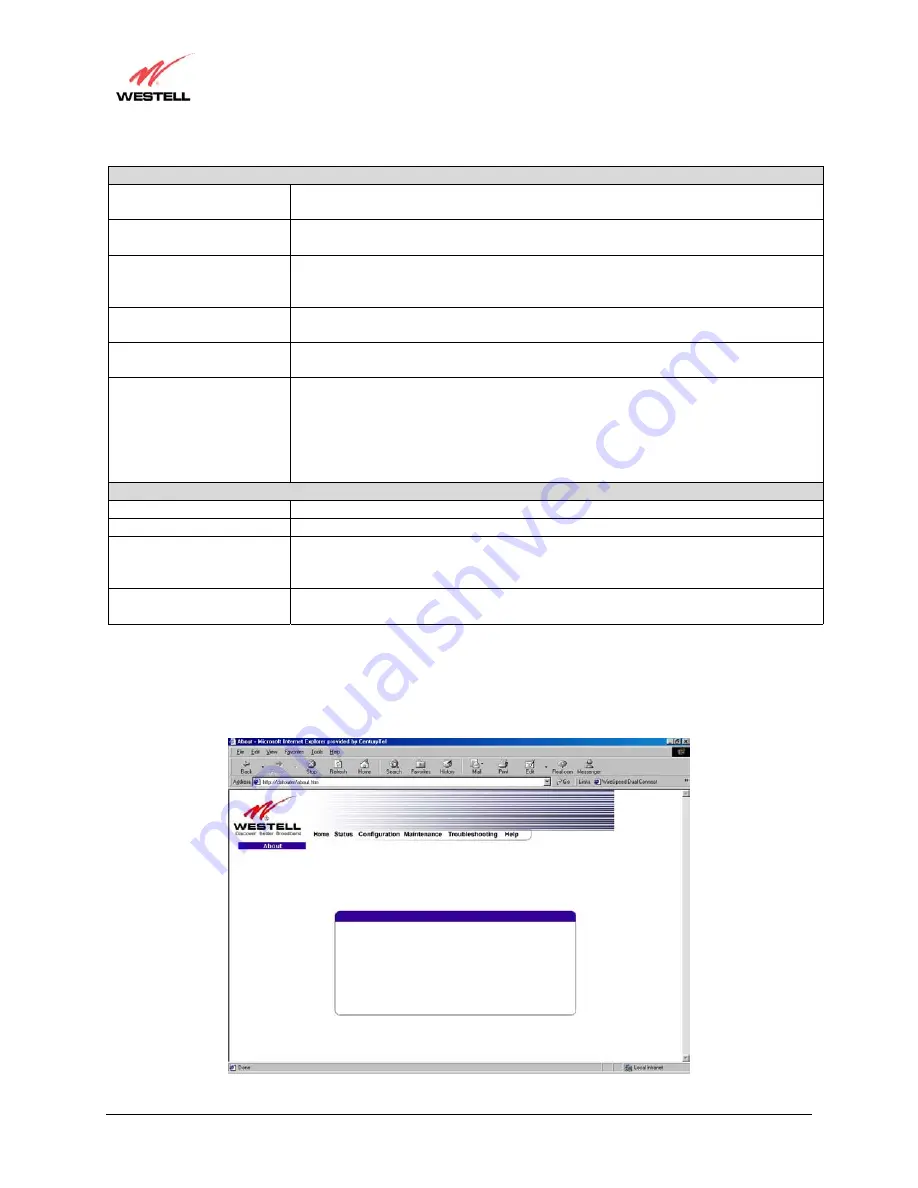
About 

 
The following settings will be displayed if you select 

About

 from the 

Status

 menu.  


The actual information displayed in this screen may vary. 

Model Number       A90-210010-04 
Serial Number        xxxxxxxxxxxx 
Mac Address           xx-xx-xx-xx-xx-xx 
Software Version    VER:xx.xx.xx 
Software Model:     NAT Combo 
Description:            WireSpeed Dual Connect 
Boot Loader            VER:xx.xx.xx 

Summary of Contents for Wirespeed 2100

Page 1: ...Copyright 2003 Westell Inc 030 300198 Rev D Printed in the United States of America March 2003 WIRESPEED DUAL CONNECT NAT ROUTER MODEL 2100 USER GUIDE...

Page 2: ...ystem Requirements 4 5 Installation Information 5 6 Installing the USB Drivers 11 7 Configuring the Router for Internet Connection 24 8 Setting Up Macintosh OS X 34 9 Setting Up Advanced Configuration...

Page 3: ...e the same phone line for simultaneous voice fax communications and high speed Internet access eliminating the need for dedicated phone lines for voice and data needs The Plug and Play feature means t...

Page 4: ...onnected to a telephone line For earlier products the REN is separately shown on the label If requested this number must be provided to the telephone company Excessive RENs on a telephone line may res...

Page 5: ...one interface The termination on an interface may consist of any combination of devices subject only to the requirement that the sum of the Ringer Equivalence Numbers of all the devices does not excee...

Page 6: ...ystem CD ROM on hand Internet Explorer 4 x or Netscape Navigator 4 x or higher 32 MB RAM 10 MB of free hard drive space TCP IP Protocol stack installed 10 100 Base T Network Interface Card NIC 4 2 Min...

Page 7: ...answering machine fax machine computer modem or any similar conventional device Failure to do so may degrade telephone voice quality and ADSL performance Install a microfilter if you desire to use the...

Page 8: ...ed in your computer go to section 5 4 2 1 Connect the power supply cord to the power connector marked on the rear panel of the Router Plug the other end of the power supply cord into a surge protected...

Page 9: ...m the connector marked on the rear panel of the Router marked to the DSL equipped telephone line jack on the wall IMPORTANT Do not use a DSL filter on this connection You must use the phone cord that...

Page 10: ...ernet cable from the Ethernet jack marked on the rear panel of the Router to the Ethernet port on your computer 4 Connect the USB cable from the USB connector marked on the rear panel of the Router to...

Page 11: ...up in process Flashing Yellow Modem failed self diagnostics Solid Yellow Modem is in safe boot mode READY No Light No Power Solid Green Ethernet link established Flashing Green Transmit or Receive Act...

Page 12: ...es B connector Connects the USB device to the PC 12V Power Barrel connector Power source Ethernet 8 pin RJ 45 modular jack Connects the Ethernet device to the PC Table 3 DSL Pinouts Pinout Description...

Page 13: ...ur PC including the operating system installed on your PC e g Microsoft Windows 98 6 1 Installing the Westell CD ROM 1 Place the Westell CD ROM that you received in the Router kit into the CD ROM driv...

Page 14: ...arch 2003 WireSpeed Dual Connect NAT Router User Guide Figure 6 Add New Hardware 2 Windows 98 Click the option button for Search for the best driver for your device Recommended See Figure 7 Click Next...

Page 15: ...8 Windows 98 4 Windows 98 Select the option button The updated driver Recommended Westell Dual Connect Modem See Figure 9 Click Next Note If Figure 9 does not appear at this step and Figure 10 appears...

Page 16: ...0 Click Next Note The drive letter may vary Figure 10 Loading Device Driver 6 Windows 98 Remove the Westell CD from the CD ROM Drive Next insert the Windows operating system CD into the CD ROM Drive S...

Page 17: ...ion Figure 13 Windows 98 If the Operating System CD is not available or if Figure 13 pops up again you will need to manually specify the location of the files The required files may be stored on your...

Page 18: ...Windows 98 10 Windows 98 Click Yes to restart your computer See Figure 16 Figure 16 Restart the Computer Congratulations You have completed the software installation for the USB drivers After the comp...

Page 19: ...o your PC the Found New Hardware window appears See Figure 17 In a few moments the Add New Hardware Wizard window appears See Figure 18 Click the option button for Automatic search for a better driver...

Page 20: ...the System Settings Change screen appears the USB drivers are installed properly See Figure 21 Click Yes Figure 21 Restart the Computer Congratulations You have completed the software installation fo...

Page 21: ...ver for Windows 2000 1 After you have connected the Westell Dual Connect Router to your PC the Found New Hardware window appears See Figure 22 In a few moments the Found New Hardware Wizard window app...

Page 22: ...dware Device Drivers window appears Select Search for a suitable driver for my device recommended See Figure 24 Click Next Figure 24 Search for Device Driver 3 Windows 2000 The Driver Files Search Res...

Page 23: ...2000 The Driver Files Search Results window appears See Figure 26 Click Next Note The drive letter may vary Figure 26 Driver Files Search Results 5 Windows 2000 The window below confirms that the PC...

Page 24: ...SB drivers After your computer has restarted the Router is ready for use Refer to the Internet Service Provider ISP installation manual to install the software required for your Internet connection Yo...

Page 25: ...ed loading the drivers See Figure 30 Click Finish Figure 30 Windows XP Congratulations You have completed the software installation for the USB drivers The Router is now ready for use Refer to the Int...

Page 26: ...se this information when you set up your account parameters Account Parameters are required before connecting to the Internet If you are at a screen and need help click on the Help button to learn mor...

Page 27: ...count parameters into the User Name screen they will be displayed as shown in the screen below Click on next if you want your account parameters to take affect Click on reset if you do not want the ac...

Page 28: ...Click on next NOTE Depending on your Internet Service Provider the VPI VCI screen may come pre configured and it will be displayed here In this case you will not be able to change any values in this s...

Page 29: ...successfully completed your Account Profile setup Click on done You must reset your Router in order to capture your new settings If you click on Cancel your new settings will not take affect Click on...

Page 30: ...xplained in section 5 INSTALLATION INFORMATION of this User Guide NOTE If no DSL sync is established the connect button in this screen will not be displayed To determine if the DSL sync is established...

Page 31: ...below will appear briefly When the PPP Status displays Connecting this indicates that you are establishing a PPP session NOTE The Router will handle transmission rates up to 8 Mbps Your actual DSL rat...

Page 32: ...lick OK to disconnect the PPP session The PPP Status in the Connection Overview screen allows you to view the state of your ISP connection If you click the disconnect button in Connection Overview scr...

Page 33: ...and you may select any service from this list By selecting your specific NAT service and setting up a NAT profile you will ensure that the appropriate ports on your Router are open and that the requi...

Page 34: ...area network Select a device from the Host Device pull down arrow and click on done NOTE You can attach multiple NAT services to your profile However for each NAT service that you attach you must fir...

Page 35: ...03 WireSpeed Dual Connect NAT Router User Guide If you select details the screen below will be displayed It contains the service name type protocol and port information for the NAT service you selecte...

Page 36: ...omputers Macintosh computers must use the Router s Ethernet installation Refer to page 6 for installation instructions via Ethernet Opening the System Preference Screen After you have connected the We...

Page 37: ...on at the System Preferences screen the Network screen will be displayed Select New Location from the Location field Naming the New Location After selecting New Location from the Network screen the fo...

Page 38: ...e IP Connection To verify that the computer is communicating with the Router follow the instructions below 1 Go to the Apple icon in the upper right corner of the screen and select System Preferences...

Page 39: ...eating a User Account In the address window of your Internet Explorer web browser type Http dslrouter Press enter on your keyboard The Getting Started screen will be displayed You may now set up your...

Page 40: ...rough the various screens of your Westell Router the active page that you have selected will appear in the left hand window of the homepage screen shown below 9 1 Home If you have set up your account...

Page 41: ...New Connection screen as defined in section 7 to establish a new user profile and click on new Next click on OK in the pop up screen to save your new connection If you don t want to add a connection...

Page 42: ...ting this feature allows the Router to automatically re establish your PPP session upon demand Always On Selecting this feature allows the Router to establish an always on PPP session if it goes down...

Page 43: ...ll traffic in packets Passed Monitors information traffic that was successfully received IN or transmitted OUT in packets Dropped Monitors information traffic that was not successfully received IN or...

Page 44: ...del Router application type Description Product description Boot Loader Version of boot loader software 9 3 Configuration VC Configuration The following settings will be displayed if you select VC Con...

Page 45: ...Router will allow Broadcast IP packets to from the WAN When this setting is NOT CHECKED the router will block Broadcast IP packets to from the WAN This setting is only valid if one of the Virtual Chan...

Page 46: ...ongly recommends that you do not change any values in this section If you experience any problems please reset your Router via the external hardware re set button or via the procedure defined under th...

Page 47: ...ncapsulation of the IP protocol Status The protocol status VC x PPPoE Settings IP Address Displays the IP network address that your modem is on Gateway Displays the router IP Gateway address DNS Prima...

Page 48: ...urposes This field allows you to enter a Domain Name for your Router To add a Domain Name in the field under User Assigned DNS type in your new domain name and click Set Static Host Assignment Host Na...

Page 49: ...want to add a new Host Name and IP address to your DNS server enter your Router s Host Name and IP Address in the fields provided in the Static Host Assignment section Click on add If you clicked on a...

Page 50: ...enabled NOTE If you enable Public LAN you must enter your values in the fields Your Internet service provider may support dynamic setting of the Private LAN values however IP assignment will not overw...

Page 51: ...00 00 00 Seconds must be between 0 and 59 minutes must be between 0 and 59 and hours must be between 0 and 23 dd days hh hours mm minutes ss seconds Disabling the DHCP Server If you click on the pull...

Page 52: ...uter User Guide If you clicked on save in the preceding DHCP Configuration screen the following pop up screen will appear Click on OK Enabling the DHCP Server If you want to enable your DHCP Server se...

Page 53: ...for DHCP Server If you clicked on save in the preceding DHCP Configuration screen the following pop up screen will appear Click on OK Private LAN Configuration The following settings will be displayed...

Page 54: ...splays the Router s IP address Subnet Mask Displays the Subnet Mask which determines which portion of an IP address is controlled by the network and which portion is controlled by the host DHCP Start...

Page 55: ...Lease Time field Hours must be between 0 and 23 Check the Hours value in the DHCP Lease Time field Public LAN Configuration The following screen will be displayed if you select Public LAN Configurati...

Page 56: ...AN DHCP Server Enable box the following screen will be displayed Click on the Public LAN Enable box to enable Public LAN NOTE By enabling the Public DHCP Server you automatically disable the Private L...

Page 57: ...may be displayed via pop up screens If this occurs check settings in the Public LAN Configuration screen Warning Message Check Public LAN DHCP Settings Start Address is not part of the Subnet Check th...

Page 58: ...re you can enable Single Static IP To disable Static NAT select Service Configuration from the Configuration menu Next click on the static NAT button Select the device from the Static NAT Device pull...

Page 59: ...nable the following pop up screen will appear Click on OK to enable this device for Single Static IP Click on Cancel to abort If you clicked on OK in the pop up screen the following pop up screen will...

Page 60: ...ing screen will be displayed This screen shows that the Router is being reset You must now re establish your PPP session To do this you must first go to your homepage and click on connect Next select...

Page 61: ...ngle Static IP for this device STOP After you enable Single Static IP you must reboot your computer and establish your PPP session If you clicked on disable in the preceding screen the following pop u...

Page 62: ...Connect NAT Router User Guide If you clicked on OK in the preceding screen the following screen will be displayed This screen shows that the Router is being reset You must now re establish your PPP se...

Page 63: ...o to section 9 8 NAT Services Current Profile Displays the NAT Network Address Translation services that you have selected Service Name Drop down selection menu of NAT Network Address Translation serv...

Page 64: ...you selected A New Service Profile 1 from the Current Profile pull down arrow the screen below will be displayed This screen shows that you have chosen to create a new NAT profile You may create up t...

Page 65: ...may edit the profile If you select edit from the Service Configuration screen the following screen will be displayed By selecting the edit feature you can make changes to your Service profile by addin...

Page 66: ...red into the Profile Name field If you want save the new NAT profile click on save If you do not want to save the new NAT profile click on close If you clicked on save in the Edit NAT Profile screen t...

Page 67: ...NAT service and setting up a NAT profile you will ensure that the appropriate ports on your Router are open and that the required application traffic can pass through your LAN For a list of supported...

Page 68: ...etwork Select the device from the Host Device pull down arrow and click on done NOTE You can attach multiple NAT services to your profile However for each NAT service that you attach to your profile y...

Page 69: ...ice If you select delete you will remove that NAT service profile from your Router Click on close in the Service Details screen to continue NOTE If you want to set up additional Advanced Service Confi...

Page 70: ...Custom is an advanced configuration option that allows you to edit the firewall configuration directly NOTE only the most advanced users should try this If you select Edit from the Security Level scr...

Page 71: ...need to reset the Router to factory default settings push the reset button on the rear of the Router If you clicked save in the User Define Firewall Rules screen the following pop up screen will be di...

Page 72: ...will be displayed This screen gives a detailed explanation of the Firewall Rules ATM Loopbacks If you select ATM Loopbacks from the Configuration menu the following settings will be displayed Enable A...

Page 73: ...screen the Custom Service screen will guide you through the steps of creating an advanced NAT service entry via the define custom service button NOTE Westell strongly recommends that you do not chang...

Page 74: ...Range fields and click on next to continue Adding Port Forwarding Ports If you made changes in the Global Port Range screen and clicked on next the following screen will be displayed You may either cl...

Page 75: ...rotocol The type of Protocol that is used to run this NAT service TCP Transmission Control Protocol UDP User Datagram Protocol UDP Port Forwarding Trigger Ports To select Port Forwarding Trigger Ports...

Page 76: ...on next You can repeat this step for each port range that you want to add up to 10 trigger ports When you are finished adding ports to the Local Trigger Port Range you must click on close to accept t...

Page 77: ...atic NAT button NOTE In the following screen the default account profile is labeled Default However if you have renamed default account profile you must select the name you created as the default If y...

Page 78: ...e Service Configuration screen will be displayed showing that Static NAT is enabled for the device you selected Disabling Static NAT If you want to disable Static NAT click on the static NAT button in...

Page 79: ...ng screen will be displayed select a device from the Static NAT Device pull down box and click on disable This will automatically disable Static NAT for the device you select If you click on disable i...

Page 80: ...guration Select this button if you want to store all of the current configuration data so that it can be recalled later Backed up configuration becomes Current configuration Select this button if you...

Page 81: ...gs are displayed Packet The packet number Time The time that the packet was sent Interface The type of protocol interface Direction The direction of transmission Rule The internal rule that caused the...

Page 82: ...nance menu After you enter your data into the appropriate settings click on change Enter Administrative Name NOTE This changes the Systems Administrator password not the PPP password Type the name of...

Page 83: ...access rights to the Internet service provider NOTE The password should be at least 4 characters long and should not exceed 32 characters Do not type a blank space or asterisks in the Password field T...

Page 84: ...reen will retrieve the software update file and display any available update information You must be connected to the Internet to use this option NOTE If you click on check for web update and the page...

Page 85: ...cal update now button in the Update Device screen to select the upgrade file from your PC s hard drive This screen allows you to upgrade the software on your Router Click Browse and go to the location...

Page 86: ...ed Dual Connect NAT Router User Guide Select the appropriate upgrade file from your browser The file name will appear in the field labeled Upgrade File Click on upload file This screen shows that the...

Page 87: ...show that the file upload has completed and that the Programming Flash is being erased to prepare the Flash storage area for upload of the new file Programming Flash is a temporary storage area for u...

Page 88: ...030 300198 Rev D 86 March 2003 WireSpeed Dual Connect NAT Router User Guide The screen below shows that the Router is being reset...

Page 89: ...ut has not synchronized with the opposing device PPPoE Indicates that a PPPoE session is or is not established Possible responses are Session UP A valid PPPoE session has been detected No Session Curr...

Page 90: ...cess The Router has successfully obtained the resolved address The IP address is shown below the host name input box No Response The Router has failed to successfully obtain the resolved address Host...

Page 91: ...d list of the Router s connection status and system information You can view this information and then save it to the directory of your choice Running a Diagnostic To run a diagnostic select Diagnosti...

Page 92: ...an option from the LOGS drop down box If you select ALL the following screen will display the logged results of the diagnostic test You can click on the clear diagnostic log button to clear the conte...

Page 93: ...s menu and select File then select Save As from the drop down menu At the Save Web Page dialog box select your computer s desktop as the destination to save the log file You can choose a different loc...

Page 94: ...umber of Unicast packets received on the ATM port In Octets The number of bytes received on the ATM port Out Errors The number of outbound packets that could not be transmitted due to errors Out Disca...

Page 95: ...nterface In Octets The number of bytes received on the Ethernet interface Out Errors The number of outbound packets that could not be transmitted due to errors Out Discard Packets The number of outbou...

Page 96: ...heir chipset Line Mode The operational mode Modes supported are No Mode Multi Mode T 1413 Mode G DMT Mode and G LITE Mode Data Path The data path used either Fast or Interleaved Transceiver Informatio...

Page 97: ...ber of frames received that had a Multicast class destination IP address In Broadcast Frames The number of frames received that had a Broadcast class destination IP address In Errors The number of pac...

Page 98: ...DHCP Server DHCP Server This setting allows the ADSL router to automatically assign IP addresses to local devices connected to the LAN Westell advises setting this to enabled for the private LAN OFF D...

Page 99: ...er Software Version Router application software version number Software Model Router application type Description Description of the Router protocol processing application software Boot Loader Router...

Page 100: ...rd The Router has an administrators password This password protects the Router from any unauthorized modifications to the configuration setting in the Router The following settings are displayed Chang...

Page 101: ...Router If you have tried the approach above and the Router still does not synchronize contact your service provider PPPoE The PPPoE status indicates if a PPPoE session is established i e if the PPPoE...

Page 102: ...g is a list of the possible responses Self Test Success The Router is operating correctly Flash Corrupt Explanation The self test process has detected a problem with internal flash memory Solution Res...

Page 103: ...ation There must be a host name entered in the input box could not test Explanation Test could not be executed because of Router status PING Select PING to check IP continuity to a remote computer eit...

Page 104: ...of local hosts A static host assignment is needed only if the new device does not support any of the well known protocols The following settings are displayed DNS Configuration Screen Domain Name The...

Page 105: ...of security you wish to have on your local network All security levels except None protect against known Internet attacks and devices that attempt to gain remote access to your Router The following se...

Page 106: ...s for Domain Name System This is an Internet standard that facilitates communication among devices This allows a name to be used when specifying a device instead of an IP address Normally you want thi...

Page 107: ...l devices DHCP End Address If DHCP is enabled for Private LAN This setting specifies the end address of the IP address pool used for automatic configuration of local devices DHCP Lease If DHCP is enab...

Page 108: ...ttings that would allow the PPP address received from the network to be propagated to a single LAN device behind the modem Single Static IP WAN IP Address This is the PPP IP address the ISP has assign...

Page 109: ...hat uniquely identifies you with your ISP Account Password The Account Password is a key phrase or text string that verifies your identify to the ISP V VC Configuration VC Configuration Screen VC Conf...

Page 110: ...ssenger 4099 TCP 5190 TCP Asheron s Call 9000 9013 UDP 28800 29000 TCP Battlecom 2300 2400 TCP UDP 47624 TCP UDP Battlefield 1942 UDP 14567 22000 23000 to 23009 27900 28900 Black and White 2611 2612 T...

Page 111: ...by one for each person Hotline Server 5500 5503 TCP 5499 UDP HTTPS 443 TCP UDP ICMP Echo 4 ICMP ICQ OLD 4000 UDP 20000 20019 TCP ICQ 2001b 4099 TCP 5190 TCP ICUII Client 2000 2038 TCP 2050 2051 TCP 20...

Page 112: ...2644 TCP 8000 TCP Quake 2 27910 UDP Quake 3 27660 UDP Each computer playing QuakeIII must use a different port number starting at 27660 and incrementing by 1 You ll also need to do the following 1 Rig...

Page 113: ...ts Try starting with 7779 7781 and add ports if needed 27900 server query if master server uplink is enabled Home master servers use other ports like 27500 Port 8080 is for UT Server Admin In the UWeb...

Page 114: ...e warranty Any attempt to repair or modify the equipment by anyone other than an authorized Westell representative will void the warranty Repairs Westell will repair any defective Westell equipment wi...

Page 115: ...ts for USB Pentium Class PC or above Microsoft Windows 98 2000 ME or XP installed Operating system CD Internet Explorer 4 x or Netscape Navigator 4 x or higher 32 MB RAM 10 MB of free hard drive space...

Page 116: ...ion Less than 8 watts typical from 120 VAC Connectors DSL LINE 6 pin modular jack Power connector PC USB Series B connector Ethernet 8 pin RJ 45 modular jack EMC Compliance FCC Part 15 Class B Safety...

Page 117: ...f the SOFTWARE or any portions thereof may be made by you or any person under your authority or control 2 Licensor s Rights You acknowledge and agree that the SOFTWARE and the User s Manual are propri...

Page 118: ...te of Illinois You submit to the jurisdiction of the state and federal courts of the state of Illinois and agree that venue is proper in those courts with regard to any litigation arising under this A...

Reviews: