background image

6 of 13

WX-501-0531 • 01.22

the driver to the settings currently saved on the Click 301, erasing any unsaved changes. 

Upgrade

 can be used 

to manually upgrade to the most current firmware for your device. 

Hex View

 changes the view of certain settings 

in the driver to hexadecimal.


Clicking the 

Quit

 menu exits the driver and returns you to the Click Supervisor main page.

Expert

The Expert driver allows you to see all possible settings and fields, both those available in other drivers and those 

available only through this driver. The driver is divided into three tabs—

System

Ethernet

, and 

Diagnostics

—which 

are then subdivided further.
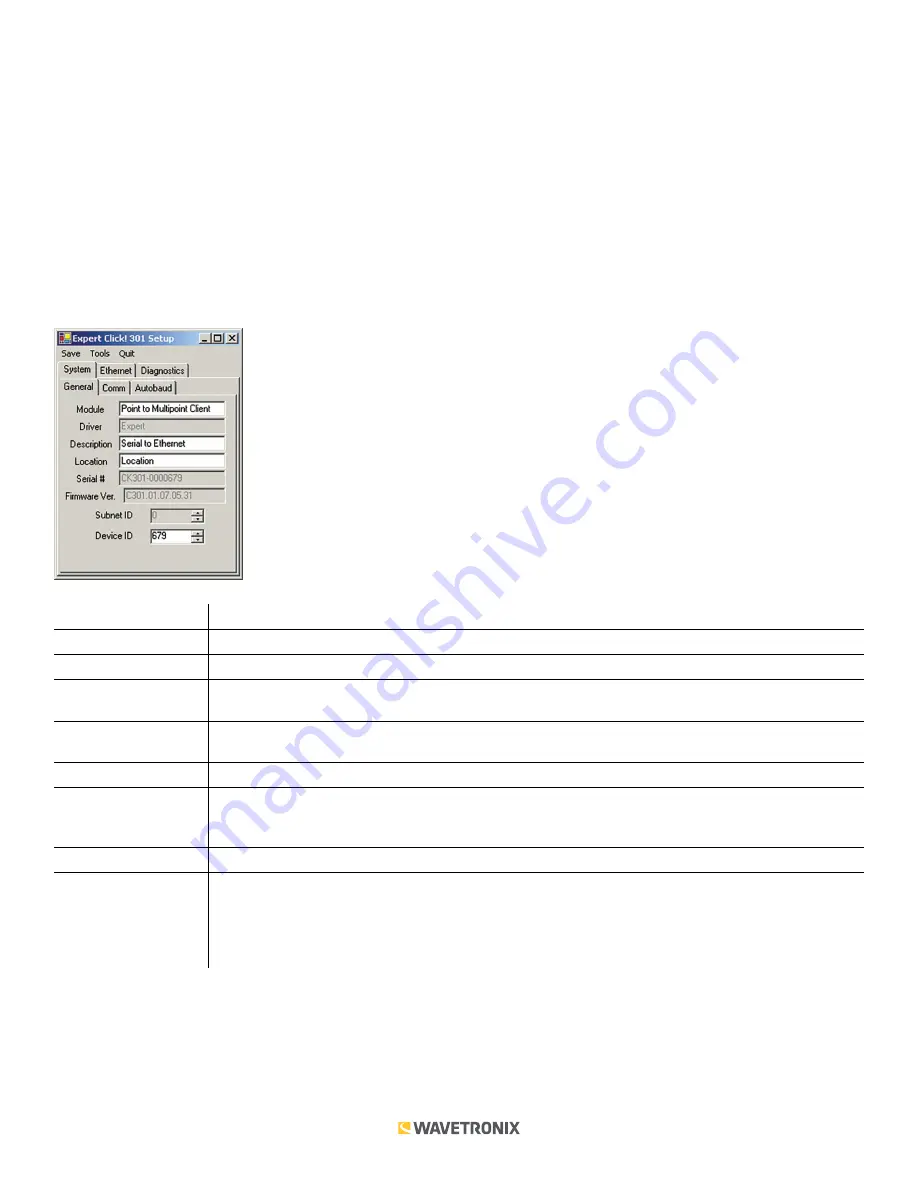
The 

System > General

 tab combines elements of the Setup and About tabs from the other drivers (see the figure 

and table below).

Setting

Description

Module

Shows the last driver (besides Expert) that was loaded onto the device. 

Driver

Names the driver you are currently working with.

Description

Shows a description of the device being configured. This is only for your information and does not 

affect the operation of the device.

Location

Displays the location of the device being configured. This is only for your information and does not 

affect the operation of the device.

Serial Number

Displays the serial number of your device.

Firmware Version

Shows the version of firmware your device currently has installed. If Click Supervisor detects a 

discrepancy between this version and the most current version it currently has access to, you will 

be prompted to upgrade when you connect to the device.

Subnet ID

Shows the subnet ID number. This option is currently not available.

Device ID

Gives the ID number of the device being configured, which is used to identify the device when 

you are connecting to it. By default, this number is the last five digits of the serial number, which 

can be found under the About tab or on the barcode sticker on the bottom of the device. It is 

recommended that you do not change this number unless another device on the network has the 

same ID number.

The 

System > Comm

 tab allows you to configure how the Click device communicates (see the figure and table below).

Summary of Contents for click 301

Page 1: ...uration see the figure below Mode Switch LED Indicators RS 485 Connector RS 232 Connector Ethernet Connector T Bus Connector TOP FRONT Communication Ports The back of the Click 301 features a 5 position connector that plugs into a T bus connector and provides power and RS 485 communication to the device It also passes RS 485 communication from the module to all other devices on the T bus The top o...

Page 2: ...ched A quick press and release of the push button will exit out of any mode and return the unit back to normal operation The table below and the following sections describe the different operating modes Mode LED Definition Autobaud Green solid To autobaud the Click 301 press the push button then release when the green LED turns on Reset Red flashing To reset the Click 301 to factory defaults press...

Page 3: ...Use the list below to find the appropriate driver for your application If you intend to connect from your TOC to the Click 301 to a sensor use the SmartSensor driver If you intend to connect from your TOC to a Click 301 to another Click 301 to the sensor use the Point to Point driver To see advanced settings use the Expert driver This driver which exposes every available field for the Click 301 sh...

Page 4: ...another device on the network has the same ID number Baud Rate Allows you to change the baud rate at which the device connects to the sensor IP Address Lets you view and change the IP address currently assigned to the device Each Click 301 defaults to an IP address of 172 16 0 13 IP Port Lets you view and change the IP port currently assigned to the device Each Click 301 defaults to 10001 In addit...

Page 5: ...o the item in question If no problems are detected a green circle will appear Once you have finished use the menu bar at the top of the screen to save your settings return to the Select Driver screen and more The Save menu allows you to save your settings Select Save to File to save your settings to a file Selecting this will open a directory box allowing you to name your settings file This file w...

Page 6: ...eing configured This is only for your information and does not affect the operation of the device Location Displays the location of the device being configured This is only for your information and does not affect the operation of the device Serial Number Displays the serial number of your device Firmware Version Shows the version of firmware your device currently has installed If Click Supervisor...

Page 7: ...device autobauds see the figure and table below Setting Description Command Allows you to set the command sent from the device during the autobaud process Don t change these values unless instructed to by Wavetronix Technical Services Response Shows the response the device is expecting from the above command Don t change these values unless instructed to by Wavetronix Technical Services SmartSenso...

Page 8: ...onfiguring should connect to Each Click 301 defaults to a remote IP address of 172 16 0 14 Remote TCP Port Allows you to enter the port of the Click 301 that the Click 301 you re configuring should connect to Each Click 301 defaults to a remote port of 10001 Auto Increment Increments the local port number for new outgoing connections automatically The range of auto incremented port numbers is 50 0...

Page 9: ...of the web server port number The valid range is 1 65535 The default port is 80 The Ethernet Channel Connect tab defines how the unit makes a connection see the figure and table below Setting Description Incoming Connection Allows you to configure how the device reacts to incoming connections over the network Never rejects all external connection attempts Accept DTR accepts external connection req...

Page 10: ...ached serial device It accepts AT style modem commands and handles the modem signals correctly Input Buffer Allows you to choose circumstances under which the input buffer will be flushed On Active clears the input buffer when a connection is initiated from the device to the network On Passive clears the input buffer when a connection is initiated from the network to the device At Disconn clears t...

Page 11: ...e disconnect request Inactivity Timeout Sets the amount of time there can be no activity on the serial line before the device drops the connection Telnet Name Port Password Lets you enter either the Telnet name you re using or the password for the serial port depending on which of those two boxes Telnet Mode or Port Password is checked The Ethernet Channel Packing tab allows you to configure packi...

Page 12: ...e host list supports a minimum of 1 and a maximum of 12 entries Each entry contains an IP address and a port number The host list is flowed onto three third level tabs If you need to enter more than the three host IP addresses on the first screen go to the IP 4 9 and IP 10 12 third level tabs The three third level tabs below Ethernet Hostlist allow you to configure the hostlist see the figure and ...

Page 13: ...our settings Select Save to File to save your settings to a file Selecting this will open a directory box allowing you to name your settings file This file will always be saved in the Wavetronix folder created when you installed Click Supervisor under Wavetronix ClickHome Drivers 301 User You can also select Save to Device to save your settings to your Click 301 Note If you do not save your settin...

Reviews: