background image

EJECTING A DVD 

DETAILED DV-1 OPERATION 

46 


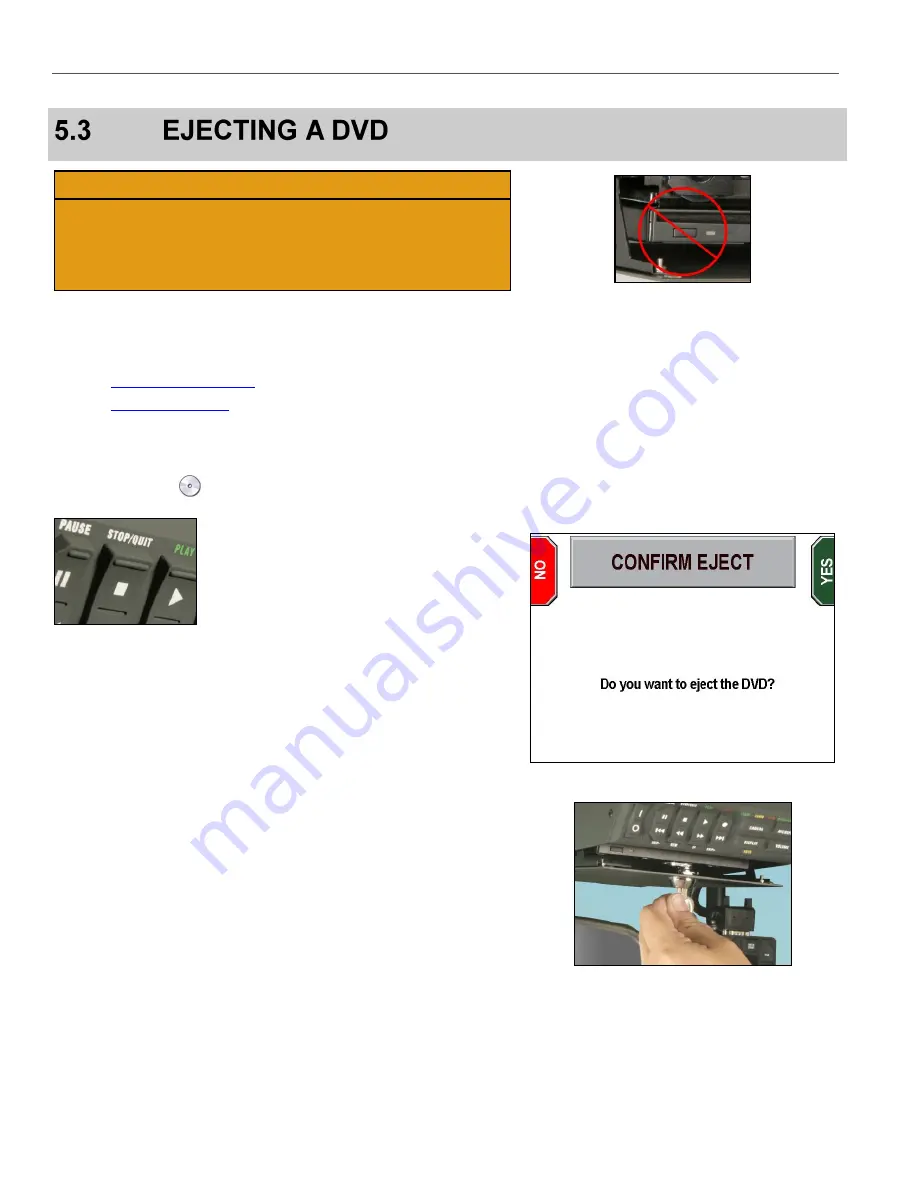
CAUTION! 

Do not use the 

Manual Eject Button

 on the DVD drive to eject 

discs because the system may not be done writing to the disc. 
Use only the 

STOP/QUIT

 key. Manually ejecting a DVD when 

the system has not finished burning files onto the disc may result 
in an unplayable DVD. 


Before ejecting a DVD, the officer may use one of the following 
methods to ensure that the system has burned all pending files to 
the DVD: 


The 

DVD Disc Information

 screen (see page 126) 


The 

DVD Status Icons

 (see page 21) 

If all recorded events show completed on the 

DVD Disc Information


screen (e.g., 

Completed Recordings: 9 of 9

) or the status icon 

shows a valid disc 

, and then the DVD can be ejected safely. 


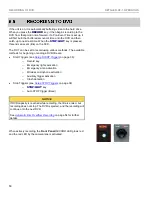
To eject a DVD, ensure that the drive door is unlocked, and then 
press and hold the 

STOP/QUIT

 key for at least 2 seconds. 

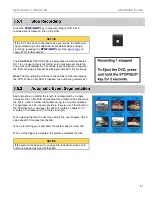
The 

CONFIRM EJECT

 screen is displayed. 

Press 

YES

 to eject the DVD, or press 

NO

 to exit and return to the 

main screen. 


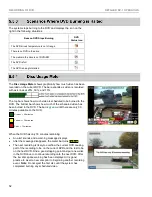
The message, 

The DVD will be ejected when all pending 

video has been recorded

 briefly displays on the screen. 

Open the DVD drive door and wait for the system to automatically 
eject the DVD. 

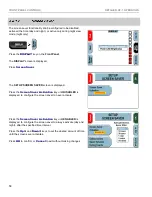
If the drive door is locked, 

Open drive door


flashes across the 

screen. Using the key provided with the system, unlock and open the 
DVD drive door, and the system will eject the DVD automatically. 


Holding the DVD from each side, remove it from the DVD drive slot 
and place in a protective sleeve or case. Insert a new DVD into the 
drive, close the DVD drive door, and lock it with the key. 


Summary of Contents for DV-1 guide

Page 1: ...WGD00071...

Page 2: ...1 Firmware Version 7 0 and above SAFETY WARNINGS To prevent fire or shock hazard do not expose the DV 1 unit to rain or moisture To avoid electrical shock do not disassemble the DV 1 housing or place...

Page 3: ...r s Record 14 3 DV 1 System Overview 15 3 1 DV 1 System Description 15 3 2 Accessories and Input Devices 16 3 3 Software Utilities 16 3 4 Permission Levels 17 3 5 Connections and Cable Diagrams 18 3 6...

Page 4: ...Burning is Halted 52 5 5 4 Disc Usage Meter 52 5 5 5 Automatic Disc Overflow Recording 54 5 5 6 Covert Mode 55 5 6 Split Screen Display 55 5 7 Closed Captioning Text on DVD Playback 56 5 7 1 DVD Manag...

Page 5: ...ity 97 9 1 Fleet Manager Utility Overview 97 9 2 Event Tags 97 9 2 1 Adding an Event Tag 98 9 2 2 Editing an Event Tag 99 9 3 Factory Default Settings 102 10 Troubleshooting 107 10 1 DVD Write Errors...

Page 6: ...ment Mode 130 12 2 Evaluation Mode 131 12 2 1 Extend Evaluation Mode Time 132 12 2 2 Unlock Evaluation Mode 134 Glossary of Terms 135 Index 137 Figures Figure 1 Overhead Unit 15 Figure 2 Modular Unit...

Page 7: ...ailable in the industry The management of WatchGuard Video places an emphasis on developing individual character qualities essential for true success and the company is dedicated to maintaining a cult...

Page 8: ...s menus used to perform procedures Notices cautions or warnings The right side of each page usually contains the resulting screen an error message or a success message Once familiar with DV 1 operatio...

Page 9: ...V 1E provide the following additional functionality to the DV 1A and DV 1B Combined power and I O ports One locking connector provides more current carrying ability for the unit Audio visual A V port...

Page 10: ...e process on the main board For the most current DV 1 technical specifications go to http watchguardvideo com dv1 specs WatchGuard Video Attn Customer Service Department 415 Century Parkway Allen Texa...

Page 11: ...or moisture o Has been dropped Take the following precautions while driving Comply with all local traffic rules and regulations The driver must not watch or operate the device or any component thereof...

Page 12: ...period it is determined that the WatchGuard Video system was internally changed modified or repair attempted the system warranty will become null and void To ensure environmental compliance disposal o...

Page 13: ...cept those parts and components excluded below PARTS AND COMPONENTS NOT COVERED Warranty excludes normal wear and tear such as frayed or broken cords broken connectors scratched or broken display or p...

Page 14: ...ovided shipping label or after the first ninety 90 days the purchaser will be responsible for any shipping charges to the WatchGuard Video factory or to an approved service center All return shipping...

Page 15: ...mages and date time stamps that are organized on a DVD Startup Menu For an overview of DV 1 operation see the DV 1 Training Video at http watchguardvideo com dv1 dv1 training videos DV 1 features incl...

Page 16: ...ding The following devices come with the DV 1 Forward facing and cabin cameras either a combination camera includes two high resolution color cameras or separate cameras o Combination camera includes...

Page 17: ...1 in accordance with the configuration established by the Supervisor Supervisor o Add or delete users o Determine operational parameters of the DV 1 e g start stop triggers default user settings etc o...

Page 18: ...reless Microphone Cable Connects the DV 1 to the wireless microphone system 4 Cabin Microphone Cable Captures audio from inside the vehicle 5 A V Connects audio video components to the DV 1 6 GPS Ante...

Page 19: ...the DV 1 to the Rear Auxiliary Camera 4 Network Cable Connects the DV 1 to a network 5 Wireless Microphone Cable Connects the DV 1 to the wireless microphone system 6 Cabin Microphone Cable Captures...

Page 20: ...13 Rewind 60 90 120 or 180 seconds depending on the video quality 14 Play 15 Fast forward 60 90 120 or 180 seconds depending on the video quality 16 Record 17 Skip forward to next chapter 18 Recordin...

Page 21: ...pensation 2 Zoom Out Manual 3 Auto Zoom 4 Zoom In Manual 5 Nightview Mode 6 Focus Near Manual 7 Cabin Camera 8 Auto Focus 9 Infrared Array 10 Focus Far Manual No Disc Formatting Detecting Ejecting Val...

Page 22: ...DVD STATUS ICONS DV 1 SYSTEM OVERVIEW 22 This page intentionally left blank...

Page 23: ...Play back video starting with current time o Define a new event start stop using the Record After the Fact RATF feature Status Info Information about the DVD hard drive system user and devices System...

Page 24: ...the main camera display screen Many of the configuration settings in this section can be done easily using WatchGuard s Fleet Manager Utility The Fleet Manager Utility is a Windows 7 Vista XP applicat...

Page 25: ...D permission is set to YES See Manage Permissions for Settings on page 80 for details on setting officer permissions Press MENU SYSTEM SETTINGS Set Time Date Dept Vehicle ID Officer Names Enter Vehicl...

Page 26: ...NAGE OFFICER NAMES screen is displayed Supervisor access is required unless the Add Edit Officer Names permission is set to YES See Manage Permissions for Settings on page 80 for details on setting of...

Page 27: ...right to allow character insertion Press OK to confirm or Cancel to exit without making changes Supervisor access is required unless the Add Edit Officer Names permission is set to YES See Manage Perm...

Page 28: ...left and right to allow character insertion Press OK to confirm or Cancel to exit without making changes Officer names can only be deleted after a Supervisor PIN has been entered Follow the steps list...

Page 29: ...missions for Settings on page 80 for details on setting officer permissions The following input devices can be configured Radar Fan Lights sirens and brakes GPS system Press MENU SYSTEM SETTINGS Setup...

Page 30: ...een terms are as follows Display Target Speed Displays speed of target vehicle Display Fast Lock Speeds Fast displays the fastest vehicle in a group of cars Lock displays the locked vehicle speed of t...

Page 31: ...or disable the sensor inputs for lights siren brake lights auxiliary input and crash detection CAUTION Proceed carefully when changing these settings If the Emergency Lights sensor input is set to NO...

Page 32: ...the optional GPS receiver there will be a GPS antenna connector on the back of the system and you will have the ability to set the GPS to begin monitoring the receiver A GPS antenna is shown on the ri...

Page 33: ...Service personnel U S customers call 1 800 605 6734 or email customerservice watchguardvideo com prior to selecting this option International customers contact your local distributor The objective of...

Page 34: ...Press OK to save the current calibration or Cancel to exit without making changes Supervisor access is required unless the Set Pre Post Event Times permission is set to YES See Manage Permissions for...

Page 35: ...or Cancel to exit without making changes Press MENU SYSTEM SETTINGS Setup Recording Criteria Set PRE POST Event Recording If prompted to login follow the steps listed in Supervisor and Administrator L...

Page 36: ...g to start based on certain start and stop triggers NOTICE In order for recording to start based on a specific trigger the input for that trigger must be monitored See Lights Siren and Brake Lights on...

Page 37: ...eature has been configured to have a value other than NONE See GPS Setup on page 32 for information on setting up the GPS values 4 7 2 1 1 Setup Patrol Speed Trigger The Patrol Speed trigger needs a s...

Page 38: ...ystem ends recording Selecting NEVER means that the system will not auto stop recording based on inactive triggers Press the Prompt to Confirm Key to select whether or not the system requests confirma...

Page 39: ...Quality Mode Guide Quality Setting Typical Resolution Maximum 2 Hour 2 0 Hours 720x480 Normal 4 Hour 3 8 Hours 480x480 Long Play 6 Hour 5 5 Hours 352x480 Extended 8 Hour 7 5 Hours 352x480 Indicates r...

Page 40: ...red setting Press the Next key to select between Magnification Level and Hold Time Press OK to confirm or Cancel to exit without making changes On screen terms are as follows Magnification Level Front...

Page 41: ...Changing the Display On Screen Text in This Vehicle setting does not affect what text information is recorded on the DVD in the Closed Captioning Layer From the Manage On Screen Text screen press Disp...

Page 42: ...the DVD s Closed Captioning Layer as well as what displays on screen From the Manage On Screen Text screen press Set Text Fields to Record If prompted to login follow the steps listed in Supervisor an...

Page 43: ...ed in the Supervisor Menus When an officer makes a permissible change to any of their settings in the menu system those changes are saved immediately A Department Default profile can be saved which wi...

Page 44: ...om officer B then officer A s preferences immediately become the same as officer B s preferences Press MENU SYSTEM SETTINGS Save or Restore Officer Preferences The SAVE OR RESTORE OFFICER PREFERENCES...

Page 45: ...or to using the DV 1 Press MENU SELECT OFFICER NOTICE The Officer Name can be displayed as on screen text as well as recorded to the DVD s Closed Captioning Layer See Manage On Screen Text on page 40...

Page 46: ...ows a valid disc and then the DVD can be ejected safely To eject a DVD ensure that the drive door is unlocked and then press and hold the STOP QUIT key for at least 2 seconds The CONFIRM EJECT screen...

Page 47: ...imultaneously recording new events both active or intentional recording plus background recording However the DVD drive will pause any burning activity while in Video Review mode From the video review...

Page 48: ...he start of the current chapter If not the review location only skips back to the start of the current chapter See Automatic Event Segmentation on page 51 for a description of how titles and chapters...

Page 49: ...ficer to specify a start and stop time to define a new event All available video between the two times becomes the next event on the DVD From the video review screen press Define a New Event Start Sto...

Page 50: ...ds for beginning or ending a DVD title are Start Triggers see Setup START Triggers on page 36 o Record key o Emergency lights activation o Emergency siren activation o Wireless microphone activation o...

Page 51: ...ecording at the top is the number of the recording on the DVD When a new DVD is inserted the numbering restarts at 1 Each recording no matter the length is represented by a single navigable title on t...

Page 52: ...h of the scheduled video has been burned to the DVD The bar is green until there are only 30 minutes available on the DVD Green 30 minutes Yellow 30 minutes Red 10 minutes When the DVD has only 30 min...

Page 53: ...disc full condition is imminent Be prepared to insert a new DVD When the DVD has only 2 minutes remaining An alert sounds and a warning message is displayed The disc usage meter bar remains red The di...

Page 54: ...be done after the event has concluded or while the event is still being recorded Insert a new DVD and format it by pressing YES The 30 minutes of overflow video are added to the 2 nd DVD as a new titl...

Page 55: ...g continues and the screen remains in split screen view Press the STOP QUIT key again to stop recording NOTICE Covert Mode differs from Dark Mode see page 57 Dark Mode only temporarily turns off the s...

Page 56: ...not shown on screen NOTICE Closed Captioning is generally handled by the television set not the DVD player Follow your television manufacturer s instructions for activating this feature If your televi...

Page 57: ...t the brightness level for the selection Dark Mode allows the system display and LEDs to be temporarily switched off Press the DISPLAY key on the Front Panel The DISPLAY screen is displayed Press Dark...

Page 58: ...Saver The SETUP SCREEN SAVER screen is displayed Press the Screen Saver Activation key until DISABLED is displayed to configure the screen saver to never activate Press the Screen Saver Activation ke...

Page 59: ...to define how the screen saver behaves when a trigger causes a recording to start The DEFINE BEHAVIOR DURING EVENTS screen is displayed Press the Exit Screen Saver On Auto Record Start Trigger key to...

Page 60: ...s the Up Down keys to set the volume level for one or more of the following selected items LIVE wireless Adjusts live feedback from the wireless microphone This allows someone in the vehicle to monito...

Page 61: ...de any manual controls The optional Rear Auxiliary Camera is controlled exclusively through the Camera Menu on the Front Panel Press the CAMERA key on the Front Panel The Camera Menu is displayed A li...

Page 62: ...ens the overall exposure compensates for darkening effect of sunrise sunset or bright lights in the background Auto Focus The camera focuses itself Nightview Optimizes the camera settings for nighttim...

Page 63: ...system automatically turns Night View on when it gets dark and manual focus is set to about 50 feet and turns it back off when it gets light and auto focus returns Press the NIGHT VIEW key on the Came...

Page 64: ...d to initiate the zoom sequence A Green LED indicates that the feature is ON active and a Blue LED indicates the feature is OFF inactive See Set the Auto Zoom on page 39 for details on setting the Mag...

Page 65: ...e Front Camera uses a vari focus lens system that maintains focus regardless of the magnification level Press the AUTO FOCUS key on the keypad to allow the camera to self focus Alternatively select ei...

Page 66: ...is used in the DV 1 there is no need for disc finalization before playing back on a computer or DVD player The DVDs that come out of the DV 1 are ready to play on your DVD player or computer Evidence...

Page 67: ...ERATION PLAYBACK ON COMPUTERS AND DVD PLAYERS 67 Below is the main window of the DMU To play a DVD click the Play Video button The Video Player screen is displayed Click the Load DVD link in the cente...

Page 68: ...PLAYBACK ON COMPUTERS AND DVD PLAYERS DETAILED DV 1 OPERATION 68 The DVD s main screen is displayed Click a title to play it...

Page 69: ...rn the cabin microphone ON or OFF Press Wireless Mic to turn the wireless microphone ON or OFF NOTICE Officer may or may not have permission to turn off some or all microphones See Set Microphone Beha...

Page 70: ...sults in distorted audio and the microphone is less likely to pick up a suspect s voice Placement 2 Clip the lapel microphone near the center of the belt Better sound balance from both the officer and...

Page 71: ...changes to system settings or functions View DVD information by pressing MENU STATUS INFO The SYSTEM STATUS INFORMATION DVD Disc Information screen is displayed by default There are up to three availa...

Page 72: ...transferred to the DVD Recording State Indicates whether or not the system is currently in an active recording mode DVD State Displays the current step in the burning process Completed Recordings Ind...

Page 73: ...space used for one track Number of Layers The number of layers on the DVD 1 or 2 View hard drive information by pressing MENU STATUS INFO Hard Drive On screen terms are as follows Video Quality The qu...

Page 74: ...GA Split screen FPGA version Power Board Power supply hardware version Main Board Motherboard hardware version Actual version information will likely be different than what is shown on the right View...

Page 75: ...is configured for the system Radar configured in Radar Setup on page 30 o T Target Speed o P Patrol Speed o L Locked Target Speed o F Fastest Vehicle Speed Accelerometer Reports the G force in each of...

Page 76: ...DEVICE INFORMATION SYSTEM STATUS INFORMATION SCREENS 76 This page intentionally left blank...

Page 77: ...d to a Supervisor Supervisor PIN numbers passwords can only be added edited and deleted by someone with an Administrator PIN number There is only ONE Administrator PIN per agency Any Supervisor PIN nu...

Page 78: ...nd then press Enter to select each number If you enter an incorrect number Invalid PIN is displayed and you must start over again Press Cancel before the fifth number is entered to exit without loggin...

Page 79: ...aking changes Auto OFF When Vehicle OFF can be configured with a 1 to 60 minute delay before the system shuts down Press the Up or Down key to select the Auto OFF When Vehicle OFF behavior then press...

Page 80: ...keys to set the behavior YES enables the behavior NO disables the behavior Press OK to confirm or Cancel to exit without making changes Each of these settings is used to allow or not allow an officer...

Page 81: ...les the permission NO disables the permission Press Next Page to display more settings Close DVD When Ejected determines when the Current DVD starts The default DV 1 behavior is to start the Current D...

Page 82: ...review this video zone Supervisor The user is prompted for a Supervisor login whenever this zone is entered Administrator The user is prompted for an Administrator login whenever this zone is entered...

Page 83: ...mer Service personnel U S customers call 1 800 605 6734 or email customerservice watchguardvideo com prior to selecting this option International customers contact your local distributor Use this proc...

Page 84: ...the case of an event such as a corrupted configuration file The configuration file stores information such as Officer Names PIN Numbers Supervisors Video Quality and Vehicle ID CAUTION This operation...

Page 85: ...ly used DVD The user will be prompted to reuse it The reset will clear out the database storing the video burned to the current DVD and all backup DVDs While the actual video is not lost when the reco...

Page 86: ...backups can be used to burn additional copies of previous DVDs This function is intended to recover DVD content that has been lost or destroyed Press MENU SUPERVISOR MENU Manage DVD and Hard Drive Se...

Page 87: ...ogin on page 78 The DUPLICATE PREVIOUS DVD screen is displayed Press the Up Down keys to select the DVD to duplicate Press OK to confirm or Cancel to exit without making changes The screen lists the l...

Page 88: ...the Supervisor name This allows a Supervisor to gain quick access to assist a non Supervisor officer Press MENU SUPERVISOR MENU Manage Supervisor Passwords If you have not previously logged in as Supe...

Page 89: ...page 78 for login instructions NOTICE Once a user has logged in as an administrator that administrator login stays current until the user exits the menu system The system will NOT ask for an Administr...

Page 90: ...PIN for the selected officer Press MENU SUPERVISOR MENU Manage Supervisor Passwords The system will ask for an Administrator PIN each time the SUPERVISOR PASSWORDS screen is accessed See Supervisor an...

Page 91: ...PIN number associated with the officer name will be removed The officer name will not be removed Press MENU SUPERVISOR MENU Manage Supervisor Passwords The system will ask for an Administrator PIN ea...

Page 92: ...u receive the update by email copy all the distribution files to a CD or DVD RW disc Power up the DV 1 Verify that all pending video has been burned to a DVD When no pending video remains press the ST...

Page 93: ...off the system at this point could cause it to become unusable When the phase finishes the system reboots automatically After a reboot the Now Upgrading bootloader screen is displayed This phase may...

Page 94: ...l the system powers off NOTICE You can also disconnect then reconnect power to the DV 1 unit if desired Once the system has powered off press the POWER ON key to power the system on Allow the system t...

Page 95: ...y remain powered off during an attempt to reboot If the system remains powered off for more than 1 minute press the POWER ON key When the system powers on the upgrade process continues automatically N...

Page 96: ...UPDATING DV 1 FIRMWARE SUPERVISOR ADMINISTRATOR FUNCTIONS 96 This page intentionally left blank...

Page 97: ...rsions of the Fleet Manager Utility is on the web at http watchguardvideo com support Event tags are defined in the Fleet Manager Utility and loaded into the DV 1 on a configuration CD When a DV 1 rec...

Page 98: ...the same The following example has 3 event tag screens The first two answers are required and the last one is optional Press the STOP QUIT key to end the recording The first ADD EVENT TAG screen is d...

Page 99: ...ress the and keys to navigate to the character s desired and then press Enter to select To erase an undesired character press Delete Special characters are as follows SP Space bar Uppercase lowercase...

Page 100: ...play additional details about the recorded event Press Play to play the recorded event Press Reburn to burn the event to a DVD Press Edit Tags to edit the event tags for the recorded event displayed T...

Page 101: ...odification on this example screen the officer must press the and keys to navigate to the character s desired and then press Enter to select To erase an undesired character press Delete Special charac...

Page 102: ...era Backlight Compensation Mode No Brightens overall exposure when a subject in foreground would otherwise appear dark due to strong backlighting Forward Camera Auto Zoom Hold Time Hold tight zoom for...

Page 103: ...Be Powered Off When Vehicle Is On Yes Allow officer to shut down the DV 1 while vehicle is on Automatically Turn On Both Microphones When Record Begins Yes 1st and 2nd Generation DV 1 Automatically sw...

Page 104: ...officer to select times for Pre and Post Event recording settings Allow Officers to Edit Department Name No Allow officer to enter edit the department name Allow Officers to Reuse DVD Discs Without E...

Page 105: ...ded to DVD Record to DVD Time and Date Yes Determines whether time date is recorded to DVD Record to DVD Crash Detection Yes Determines whether crash detection is recorded to DVD Record to DVD Brakes...

Page 106: ...lect the type of global positioning system GPS for the DV 1 Display GPS Speed Yes Determines whether GPS speed is displayed if GPS is configured Radar Type None Optionally choose the type of radar use...

Page 107: ...V 1 and turn it back on Sometimes the system will be successful in recognizing the DVD after a restart 2 If after a restart the DVD is still unrecognized and it is again prompting to reuse press the s...

Page 108: ...that the fan will be on full speed If the system is powered on and the temperature is in the 17 C to 70 C range the message shown at the right appears The system will NOT power off immediately It wil...

Page 109: ...a configuration files officer names and Supervisor passwords are deleted and it takes about one minute WatchGuard recommends performing a Quick Format before performing a Full Format to see if that fi...

Page 110: ...en The HARD DRIVE FORMAT screen appears Press Format to continue Config to format the hard drive to its maximum capacity or Cancel to exit without formatting If you cancel the operation the HARD DRIVE...

Page 111: ...allows the entire capacity of the hard drive to be used rather than limiting it to 40 GB WARNING This operation will cause all video on the hard drive to be lost If using the Supervisor menu press ME...

Page 112: ...displayed Press the Change Value key to select YES Use entire hard drive capacity Press OK to return to the HARD DRIVE FORMAT screen then Format to format the hard drive to use its entire capacity If...

Page 113: ...ive have become damaged or non responsive WARNING This operation will cause all video on the hard drive to be lost A Full Format creates a bad sector map and erases all contents of the hard drive This...

Page 114: ...he boot back door should only be accessed when directed by Customer Service personnel U S customers call 1 800 605 6734 or email customerservice watchguardvideo com prior to selecting this option Inte...

Page 115: ...es however if physically connecting to the DV 1 via an Ethernet connection the DV 1 s IP address must be correctly set to successfully communicate through the Ethernet port Two possible reasons for ne...

Page 116: ...y Grounding ONLY to the car frame or a terminal is not acceptable for reliable DV 1 operation The Intelligent Uninterruptible Power Supply Battery iUPS may require additional charge or may need to be...

Page 117: ...Settings on page 80 for details on setting officer permissions When the DV 1 is turned off or loses power for any reason the SET TIME AND DATE screen may be automatically displayed when power is resto...

Page 118: ...conds MM Month DD Day YEAR Year Time Zone Time Zone NOTICE If your system includes the GPS option the date and time are automatically updated using GPS time Unlock and open the DVD drive door and inse...

Page 119: ...s the emergency lights emergency siren or wireless microphone or press the RECORD key Press the STOP QUIT key to stop recording to DVD Each recorded event creates a title on the DVD NOTICE If the DV 1...

Page 120: ...for further details The Disc Usage Meter shows graphically how much video has been recorded on the current DVD The bar expands as video is recorded with axis lines at 25 50 and 75 The top bar shows ho...

Page 121: ...deo Review mode from the Main Menu Press MENU VIDEO REVIEW The REVIEW VIDEO FROM HARD DRIVE screen is displayed On the video review screen there are three choices View Previously Recorded Events See p...

Page 122: ...ng eject DVD Play Record Skip backward to the start of the previous chapter Rewind 60 90 120 or 180 seconds depending on the video quality Fast forward 60 90 120 or 180 seconds depending on the video...

Page 123: ...ch are built into the same enclosure It includes Camera Keypad controls on the camera back which control only the Front camera The Cabin camera has a fixed wide angle lens and it does not include any...

Page 124: ...Press the Screen Saver Activation key until ENABLED is displayed to configure the screen saver to always activate day and night after the specified time interval Press the Up and Down keys to set the...

Page 125: ...er may or may not have permission to turn off some or all microphones See Set Microphone Behavior on page 79 Press the VOLUME key on the Front Panel Press the Select Select keys to choose between LIVE...

Page 126: ...DE 126 View DVD disc information by pressing MENU STATUS INFO The DVD Disc Information screen is displayed by default as indicated by the red outline See DVD Disc drive and media on page 71 for a full...

Page 127: ...1 screen uses the term Maintenance to refer to the Loaner mode At the beginning of a system boot the screen shows how many days remain in the loaner time period When the boot process begins the Booti...

Page 128: ...o additional Loaner time can be created by changing the date time on the DV 1 unit Setting the date time of the unit forward reduces the number of Loaner days by the number of days the date time was s...

Page 129: ...t as necessary to enter the entire PIN If the PIN has five digits the Login key is pressed automatically after you enter the last digit If the PIN has four digits press the Login key after you enter t...

Page 130: ...service representative The representative will give you a four or five digit Unlock Unit PIN Press the OK key The UNLOCK UNIT screen is displayed Use the arrow keys to move to a digit in the PIN then...

Page 131: ...tion user of the number of days remaining in the evaluation time period when there are 5 days left Once the evaluation time period has reached 5 days each time the system begins booting the screen sho...

Page 132: ...uation time can be created by changing the date time on the DV 1 unit Setting the date time of the unit forward reduces the number of Evaluation days by the number of days the date time was set ahead...

Page 133: ...nter the entire PIN If the PIN has five digits the Login key is pressed automatically after you enter the last digit If the PIN has four digits press the Login key after you enter the fourth digit A b...

Page 134: ...e representative The representative will give you a four or five digit Unlock Unit PIN Press the OK key The UNLOCK UNIT screen is displayed Use the arrow keys to move to a digit in the PIN then press...

Page 135: ...recovery See Software Programs for Playback on page 66 for more information Fleet Manager Utility FMU A Windows 7 Vista XP software application used to create configuration files for loading batch set...

Page 136: ...GLOSSARY OF TERMS 136 This page intentionally left blank...

Page 137: ...aver 58 Connections 18 Contact Information 10 Covert Mode 55 Crash Detection 31 D Dark Mode 57 Data Corruption 109 113 Define a New Event 49 Department Default Preferences 43 Department Name setting 2...

Page 138: ...eed 30 Firmware updates 9 updating 92 Firmware update troubleshooting 94 Fleet Manager Utility 24 97 department default policies 103 department default preferences 102 event tags 97 factory default se...

Page 139: ...54 Overhead Unit cable connections 18 Owner s Record 14 P Permission Levels 17 Permissions setting 80 PIN Numbers 77 88 Playback controls 48 122 hide show menu 47 122 recorded events 47 121 software...

Page 140: ...ormation 71 devices 75 DVD disc 71 126 DVD drive 71 DVD MEDIA 71 hard drive 73 system 74 user 74 System Temperature 33 75 108 T Temperature Sensor calibration 33 Text Fields recording 42 Time and Date...

Page 141: ...INDEX 141 This page intentionally left blank...

Page 142: ...DV 1 User Guide WatchGuard Video 415 Century Parkway Allen Texas 75013 1 800 605 6734 Toll Free Sales 1 866 384 8567 Toll Free Support...

Reviews: