background image

Using In-Car 4RE DVR

Ending your shift

After you complete your shift, follow the procedures in this section before leaving your vehicle.
Your recorded events must be uploaded either wirelessly or from the USB thumb drive.

l

Uploading evidence wirelessly (

page 30

)

l

Uploading evidence using the USB thumb drive (

page 31

)

o

Removing the USB thumb drive using the STOP control (

page 32

)

o

Removing the USB thumb drive using the Transfer function (

page 33

)

l

Logging out of 4RE DVR (

page 34

)

l

Powering off your vehicle (

page 35

)

Uploading evidence wirelessly

You don't have to do anything to upload your evidence wirelessly. When your car is within
range of the agency network, the 4RE DVR automatically starts uploading. You should look for
the Upload icon on the screen.

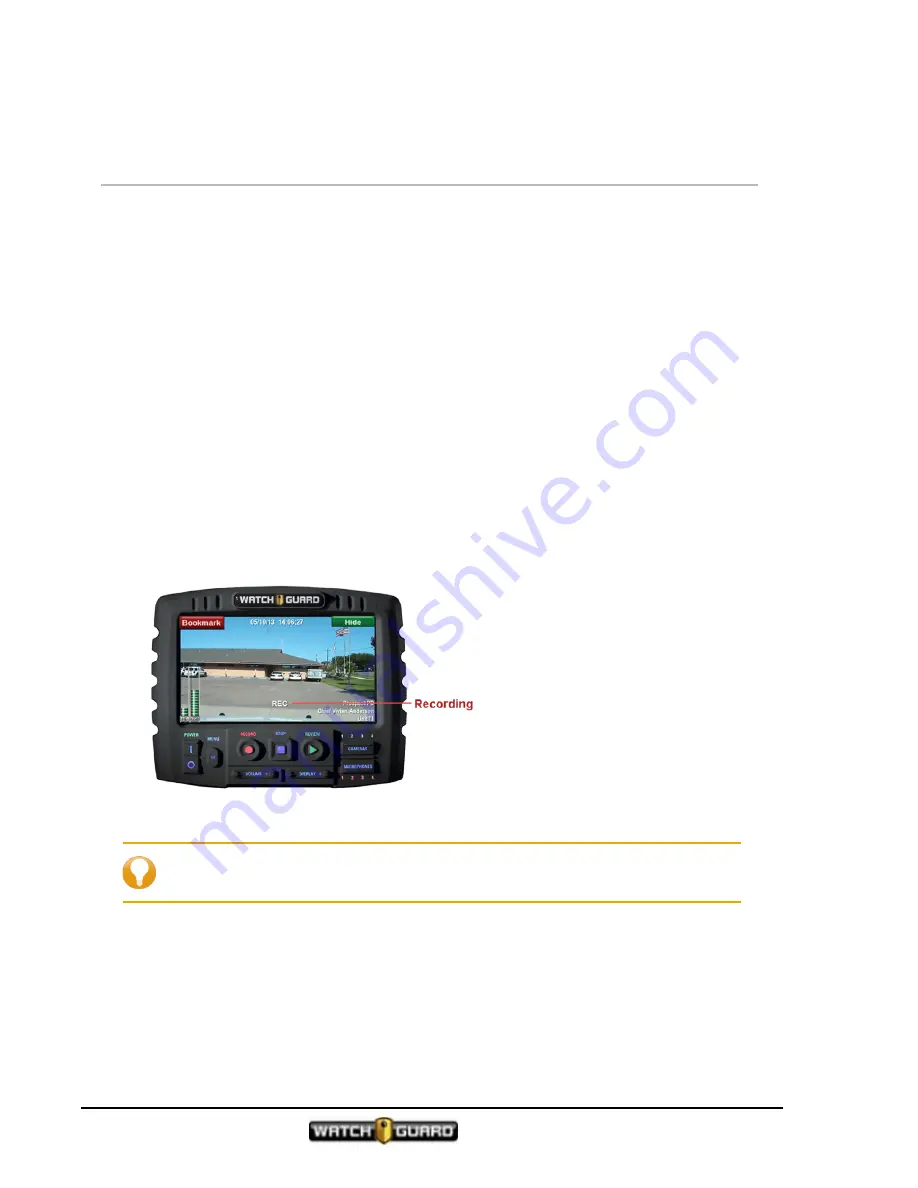
1. Verify the 4RE DVR is not actively recording.

REC is not visible on the screen.

Tip: REC

shows on the screen if 4RE is actively recording. The Record control

and LEDs on the control panel are lit.

30

4RE In-Car Video User Guide 4.0.6

WGD00089 Revision D

Summary of Contents for 4RE

Page 1: ...Version 4 0 6 Revision D WGD00089...

Page 2: ...stomer Service web portal https support watchguardvideo com hc en us Send us your suggestions Tell us about your experience and how you are using the 4RE DVR We will do our best to accommodate your su...

Page 3: ...your shift 17 Powering on your vehicle and 4RE 17 Pairing the wireless microphone with base 18 Associating the VISTA camera and base with 4RE 18 Logging in to the 4RE DVR 19 During your shift 21 Adju...

Page 4: ...3 Logging out of 4RE DVR 34 Powering off your vehicle 35 Understanding the 4RE System 36 4RE DVR overview 37 4RE DVR display 38 Display screen 38 Display Control Panel 38 Associating 4RE with a record...

Page 5: ...ontrol Panel 66 Live View 67 Active record setting icons 67 Upload status icons 67 Lock unlock icons 67 Camera settings 68 Name of agency officer and unit 69 Storage meters 69 Bookmark 70 Date and Tim...

Page 6: ...ontrol 79 4RE DVR System Peripherals 80 Auto start record 81 Auto stop record 81 USB thumb drive 82 Multiple updates on one USB thumb drive 82 Wireless radio 84 Working as 4RE DVR Administrator 85 Ove...

Page 7: ...recorded event 96 Performing maintenance 98 View logs 98 Capture state 99 Manage Recordings 100 Reset Recordings 100 Copy All Video to USB 101 Network settings 102 Format hard drive 103 Errors and Re...

Page 8: ...viii 4RE In Car Video WGD00089 Revision D Contents This page intentionally left blank...

Page 9: ...tion In this chapter l Welcome page 10 l About this document page 10 l Related documents page 10 l About the 4RE system page 11 l What s new in version 4 0 6 page 12 4RE In Car Video User Guide 4 0 6...

Page 10: ...Understanding the 4RE DVR system peripherals l Performing administrator tasks for 4RE l Errors and troubleshooting Note This guide covers the basic use of the 4RE DVR system It is not a comprehensive...

Page 11: ...ay to input information to the DVR while on your shift Cameras Three High Definition HD camera options offer multi camera split screen viewing on the display You can connect one HD camera and up to fi...

Page 12: ...28 l 4RE supports low bandwidth uploads of events such as over an LTE network New in version 4 0 l Distributed Multi Peer Recording that enables o Recording group in car 4RE and body worn VISTA WiFi...

Page 13: ...grade files page 82 l Smart Power Switch SPS acts as a power manager and is a required member for a recording group network page 39 o SPS functions as the central connection point of a group o SPS fun...

Page 14: ...14 4RE In Car Video User Guide 4 0 6 WGD00089 Revision D Introduction This page intentionally left blank...

Page 15: ...ar 4RE DVR Using In Car 4RE DVR In this chapter l Overview page 16 l Starting your shift page 17 l During your shift page 21 l Ending your shift page 30 4RE In Car Video User Guide 4 0 6 WGD00089 Revi...

Page 16: ...35 Recommended shift workflow Starting your shift l Start your vehicle ignition to power on the 4RE DVR page 17 l Pairing the wireless microphone with base page 18 or Associating the VISTA camera and...

Page 17: ...u can damage or lose data doing this We recommend that you use the vehicle ignition to power on and off See Powering off your vehicle on page 35 Powering on your vehicle and 4RE To get started n Start...

Page 18: ...n use only one wireless microphone with one microphone base at one time For more information See Microphones control on page 79 See theWatchGuard Wireless Microphone User Guide Associating the VISTA c...

Page 19: ...rol panel and touch the Officer button The Select Officer screen opens and shows a list of names 2 Select your name from the list then touch Login Your name shows as the logged in officer on the botto...

Page 20: ...e Find Officers screen 2 Enter your name 3 Select the correct name 4 Touch Find If you do not find your name in the list contact your supervisor or system administrator For more information see Office...

Page 21: ...RE system can record and display three cameras simultaneously With the optional 4RE Expansion Card the system can record and display six cameras simultaneously This includes one HD high definition and...

Page 22: ...recorded event when tagging your event if configured to allow Off no active camera streams are included in the event if configured to allow turning off the camera Changing and locking the Live View o...

Page 23: ...again Then the screen returns to the split screen Important Changing how the camera views show on the Display screen does not affect which camera streams are included in a recorded event Unless you d...

Page 24: ...Creating recorded events A recorded event is a unique protected segment of recorded l Video l Audio l Subtitles Recorded events are typically started by an auto start trigger such as emergency lights...

Page 25: ...nt between pressing the Record control and pressing the Stop control as protected You can stop the recorded event by pushing the Stop control Important If the 4RE DVR is powered on it is continuously...

Page 26: ...ry software The category is either Required or Optional For more information see Event tag category on page 73 3 Change the Resolution of the video you are saving if needed Note The presence of the Re...

Page 27: ...ent tag information with all recording group members If a member of the group does not receive the event tag information or chooses to enter its own tag then that member uses its own tag The member ev...

Page 28: ...is typically video that was not initially included as part of a recorded event You may want to make a recorded event of a recording that is not part of a recorded event If the video resides on the har...

Page 29: ...event The confirm message box opens 4 Touch Yes The Event Tag screen opens 5 Choose an Event Tag page 25 Answer the questions on the screen the same as you would when tagging an event during any event...

Page 30: ...drive using the Transfer function page 33 l Logging out of 4RE DVR page 34 l Powering off your vehicle page 35 Uploading evidence wirelessly You don t have to do anything to upload your evidence wirel...

Page 31: ...se data doing this We recommend that you use the vehicle ignition to power on and off Upload evidence over a cellular connection You can upload video over 3G or 4G cellular and WiFi via VPN connection...

Page 32: ...event record space on the USB thumb drive and on the 4RE DVR Warning If you do not remove the USB thumb drive safely you risk losing or corrupting evidence page 32 If your agency has an extended time...

Page 33: ...t came from 4RE recognizes that the events have been uploaded and releases the space on the DVR The space is available but is not written over until all other space is used If it does not get a confir...

Page 34: ...events back to the USB thumb drive is configurable page 31 See your Evidence Library documentation for more information Note You must return the same USB thumb drive to the same 4RE DVR for 4RE to fr...

Page 35: ...f the next officer forgets to login your name will remain on the recordings until someone else logs in or someone logs you out Powering off your vehicle The last step in the process is to power off yo...

Page 36: ...rstanding the 4RE System In this chapter l 4RE DVR overview page 37 l Associating 4RE with a recording group page 39 l Main Menu screen page 43 l Display Control Panel page 66 36 4RE In Car Video User...

Page 37: ...to the USB thumb drive compartment is typically kept by the in vehicle supervisor Some functions on the 4RE DVR are beyond the scope of in vehicle users Access to these functions requires an administ...

Page 38: ...splay screen Touch screen to make functional choices or view live video Control Panel Press controls to perform basic 4RE DVR functions Display screen The Display screen work areas include Live View p...

Page 39: ...role of power management As a required member of a local recording group network the Smart Power Switch l Functions as the central connection point The Smart Power Switch connects all of the members o...

Page 40: ...recording Only 4RE can stop a group recording The other members of the group sense when this happens and can choose to stop recording Each member of a group can stop on its own if configured but only...

Page 41: ...Through the recording group network the 4RE is informed by other group members when they start recorded events 4RE can then join the group recording by starting its own recorded event l Shares all ev...

Page 42: ...arting their own recorded events l Responds to group recording starts or stops by other group members The VISTA WiFi camera can start or stop its own recording event manually if configured to do so Mu...

Page 43: ...ew when on the Main Menu screen press Menu again The Main Menu contains the following functions l Review page 43 l Status page 46 l Officer log in or log out page 48 l Transfer page 49 l Record After...

Page 44: ...he Details button in upper right corner to review the details of the event The Event Details screen opens a Touch the Camera down arrow to choose an alternate camera view if you have multiple cameras...

Page 45: ...Touch the Review button on the Main Menu screen The Playback Selection screen opens 2 Touch the By Time button The Playback Selection By Time screen opens a Touch the Camera down arrow to choose an a...

Page 46: ...the Main Menu To access information about the state of the 4RE DVR 1 Touch the Status button on the Main Menu screen The video Storage screen opens Storage status is shown for the DVR hard drive and...

Page 47: ...e you are running Note WatchGuard Customer Service is the main user of these screens The version numbers shown in the pictures are examples The version information on your 4RE DVR may be different 4 T...

Page 48: ...touching the Officer button on the Main Menu If you are already logged in your name will be selected Important Log in to the DVR at the beginning of every shift The previous user will be logged out A...

Page 49: ...uch the Transfer button the Transfer screen opens with buttons to access information about l Status l Network page 51 l USB page 51 l VISTA page 52 Status The Status screen shows information about the...

Page 50: ...s on the Recordings to Transfer screen The Recordings to Transfer screen lets you know what events are on the 4RE DVR and which have been copied to the USB thumb drive Touch the Logs button to access...

Page 51: ...the 4RE DVR and Evidence Library server the Transfer Network screen shows that no connection is present USB The USB screen shows storage information about the USB thumb drive if it is present The Tran...

Page 52: ...is the target of the transfer The Events and Logs buttons work the same as described under Status page 46 For more information about transferring data from VISTA see the VISTA Wearable Camera User Gu...

Page 53: ...aining situation monitoring through the wireless microphone 1 Touch the Audio button on the Main Menu screen The Volume Settings screen opens Note You can also set the volume level from the Volume con...

Page 54: ...isplay settings 1 Touch the Display button on the Main Menu screen The Display Settings Brightness screen opens a Move the control on Screen Brightness all the way to the Min minimum to make the scree...

Page 55: ...creen saver activates If you select No the display remains active at all times Any changes you make are saved automatically 3 Touch the Camera Lights button The Display Settings Camera Lights screen o...

Page 56: ...s screen in consultation with your 4RE system administrator To access the Settings screen n Touch the Settings button on the Main Menu screen The Settings screen opens showing Camera Auto Zoom Setting...

Page 57: ...oftware To set your vehicle radar type 1 Touch the Radar button The Radar screen opens 2 Select the model of the radar in your vehicle If you have a radar system in your vehicle you must select the ra...

Page 58: ...ur system did not detect a true crash lower the setting raise the sensitivity 3 Touch Save in the upper right corner as needed Date Time The Date Time is typically set automatically in the 4RE unit by...

Page 59: ...the up and down arrows to change the values in each field Note You can also set the time zone in your Evidence Library software 4 Touch Save Diagnose and troubleshoot issues If an issue occurs with th...

Page 60: ...ator password After you enter a password you can access the protected areas on the Settings screen as long as you do not return to the Live View in between accessing those areas Diagnostics options Bu...

Page 61: ...Diagnostics Touch Details or any of the other buttons to test that functions are working correctly and to see information about the camera Camera Details Provides information about the selected camer...

Page 62: ...r password See Deleting an event from the 4RE DVR on page 95 Disp Buttons Lets you troubleshoot the buttons on the control panel Press a button on the control panel that matches an item on the screen...

Page 63: ...Lets you see the system GPS information HiFi Wireless Mic Lets you upgrade a WatchGuard HiFi Wireless Microphone For more information see the WatchGuard HiFi Microphone User Guide ReExport Event Lets...

Page 64: ...imum temperature Touch Screen Lets you troubleshoot your DVR touch screen As you touch each X on the screen the X changes to a If it does not change your touch screen may have an issue Contact Custome...

Page 65: ...formation see the VISTA HD Wearable Camera User Guide Voltages Provides the current and historical voltage supply for the 4RE Supply and Clock Battery The operating range is from 8V to 18V Wireless Sh...

Page 66: ...wer on and off See Powering off your vehicle on page 35 Menu access or exit the system Main Menu page 71 Record start a recorded event page 25 Stop stop the recorded event page 72 Review play back a r...

Page 67: ...touch Hide in the upper right corner The Hide button changes to Show To add the user and status information back to the Live View touch Show Active record setting icons Recorded events are typically s...

Page 68: ...itions The feature can be ON OFF or set to automatically transition to ON when it gets dark and automatically transition to OFF when it gets light AUTO Note WatchGuard Video recommends that you keep t...

Page 69: ...only appears when a USB thumb drive is installed in the DVR The storage meters show how much video has been recorded to the hard drive and the USB thumb drive The meters show data only for recorded e...

Page 70: ...dence Library software You select the type of radar for 4RE to recognize and use the data from the radar You can also configure the radar settings on the Settings screen page 57 GPS The GPS displays t...

Page 71: ...he 4RE DVR is powered on it is continuously recording video to the hard drive When you start a recording and then press the Stop control the 4RE DVR protects the video and audio segment between the tw...

Page 72: ...ent Recorded events can be auto stopped page 81 but are typically stopped by pressing the Stop control once or twice depending on your configuration If you are in a multi peer recording group the Stop...

Page 73: ...tegory Required and optional event tag options Event tags are required or optional depending on how your agency classifies them A Required Event Tag remains on the display screen until you enter an an...

Page 74: ...uration You cannot downgrade the resolution With Resolution you can manually upgrade the quality of the saved video for a recorded event If the event tag answer that best applies to the recorded event...

Page 75: ...ound Note The presence of the Background button depends on your 4RE DVR configuration The Background button lets you manually include video from cameras that are in a background state when a recorded...

Page 76: ...answers The member event tag overrides the 4RE tag For more information see Associating 4RE with a recording group on page 39 Review control Access playback using the Review control You can review ev...

Page 77: ...screen brightness or drag the control on the screen 3 Touch Advanced to access the Display Settings screen page 54 Dark Mode Dark Mode makes the screen front panel and camera keypad fade to black The...

Page 78: ...econd SD camera in the 4RE system Camera 3 is only present if the Camera 4 connection is not used Auxiliary Aux cameras SD If present Camera 4 can be connected to between one and four auxiliary camera...

Page 79: ...system and their current state n Press the Microphones control Buttons appear on the Display screen representing each microphone The available states for each microphone depend on how your 4RE DVR is...

Page 80: ...eripherals 4RE DVR System Peripherals In this chapter l Auto start record page 81 l Auto stop record page 81 l USB thumb drive page 82 l Wireless radio page 84 80 4RE In Car Video User Guide 4 0 6 WGD...

Page 81: ...screen Auto stop record An Auto stop record setting prompts you when all of the auto start record settings have been inactive for a designated time period If you are alerted you can stop the recordin...

Page 82: ...ly keep the key to the USB thumb drive compartment Using an optional USB thumb drive with the 4RE System provides the following benefits l Creates a backup copy of all recorded events providing an ext...

Page 83: ...ahead and runs the upgrade if it only finds one file 3 Select the update you want to perform 4 Touch either OK or Cancel If you don t select anything and touch OK that is the same as Cancel If you to...

Page 84: ...adio you need one of the following l POE adapter WGA00383 l GB Ethernet Switch WGA00391 l Smart Power Switch WGA00574 This switch is needed for group recordings If your recorded events are not uploadi...

Page 85: ...ion page 88 l Updating 4RE firmware page 88 l Configuring a DVR with the USB thumb drive page 90 l Verifying configuration settings page 92 l Verifying 4RE DVR network information page 93 l Formatting...

Page 86: ...8 l Deleting an event from Evidence Library page 95 Some functions on the DVR are beyond the scope and use of normal users Permission to access administrative functions requires a password As an admin...

Page 87: ...ypes of passwords l Administrator l Supervisor Administrator password The 4RE DVR uses only one administrator password This password comes from the factory with the default value ABCDE1 Change this pa...

Page 88: ...ed you may need to update your systems WatchGuard Customer Service can tell you the latest software version available Note WatchGuard recommends that you maintain the same level of firmware across you...

Page 89: ...USB thumb drive on page 82 Upgrades to 4RE DVR and VISTA WiFi camera In car systems that include both a 4RE DVR and the VISTA WiFi camera can deliver upgrades to the DVR and the VISTA Camera The Smart...

Page 90: ...delivers key information to the 4RE DVR For information about how to provision a 4RE System see your Evidence Library software documentation Deploy a configuration manually Important Use one USB thum...

Page 91: ...deploy then touch Load Tip Each configuration listed on the Selected Configuration screen corresponds to a specific 4RE DVR listed in your Evidence Library software Select the configuration file appr...

Page 92: ...thumb drive containing recordings in the 4RE DVR Verifying configuration settings Access the configuration settings on the Diagnostics screen You can check to see that all the settings are as you inte...

Page 93: ...network information through the Diagnostics screen To access the network 1 Press Menu 2 Touch Settings on the Main Menu screen 3 Touch the Diagnose button 4 Touch the Wireless button to view your netw...

Page 94: ...mb drive When the USB thumb drive is reinserted 4RE searches to see if the recorded events were uploaded to the Evidence Library software Since everything on the USB thumb drive was erased in reformat...

Page 95: ...ent button 5 Enter the administrator password and touch Login The Recordings screen appears These are recorded events on the DVR 6 Touch the recorded event you want to delete and touch Details The Eve...

Page 96: ...he video is overwritten on the DVR you can recreate it using RATF page 28 ReExporting a recorded event ReExport lets you copy an event from the 4RE DVR to the USB thumb drive You might have to re expo...

Page 97: ...re recorded before this event Next Event shows events that have been recorded since this event 8 Verify this is the event you want to re export 9 Touch ReExport The following message screen appears 10...

Page 98: ...ure if you are instructed to by WatchGuard Customer Service To access the 4RE Maintenance Menu 1 Press Power on the control panel 2 Press Stop on the control panel when you see the boot progress bar t...

Page 99: ...Capture State information can help WatchGuard Customer Service troubleshoot system issues This option captures system information and writes it to the USB thumb drive You may need to send Customer Ser...

Page 100: ...ordings and Copy all Video to USB Reset Recordings Reset Recordings removes event descriptions without removing the video from the hard drive If you want to recreate an event use RATF page 52 Typicall...

Page 101: ...e see Status on page 46 2 Select the Copy All Video to USB button Copying all the video takes a while The following screen appears 3 Click OK to start the copy or Cancel to return to the Manage Record...

Page 102: ...ard drive to remove all of the videos Network settings This option lets you adjust the Network Settings of the 4RE DVR Typically the most common setting to be reset is the IP address on DVRs that are...

Page 103: ...intenance Menu screen 2 Choose the Quick or Full Format button Depending on which button you choose a message appears The Full Format is checking the media for bad blocks Doing this can take up to 1 h...

Page 104: ...ssage box to return to the Maintenance Menu screen 5 Touch the Reset button to reboot the DVR 6 Redeploy your 4RE DVR configuration file to the DVR See Configuring a DVR with the USB thumb drive on pa...

Page 105: ...rors and Recommendations Errors and Recommendations In this chapter l Errors page 106 l Recommendations and notes for using the 4RE DVR page 109 4RE In Car Video User Guide 4 0 6 WGD00089 Revision D 1...

Page 106: ...ssue with the Accelerometer This only affects crash detection and does not affect video recording Contact Customer Service Typically this means the balance of your crash detector is off Call Customer...

Page 107: ...8 The System cannot communicate with the Secondary Camera 179 The system lost communication with the Secondary Camera 200 System temperature exceeds maximum allowance Shutting down now The system is h...

Page 108: ...age 30 l Upload your evidence directly from the USB thumb drive page 31 278 Upgrade failed Contact Customer Service for assistance l Check the cables for the camera l Try another camera to ensure the...

Page 109: ...file l Changing how the camera views show on the DVR Display screen does not affect which camera streams are included in a recording unless you deactivate a camera all streams are included in a recor...

Page 110: ...Safety and Warranty Information Safety and Warranty Information In this section l Safety page 111 l Warranty page 113 110 4RE In Car Video User Guide 4 0 6 WGD00089 Revision D...

Page 111: ...distraction and cause an accident l Do not obstruct the field of view of the driver Installation cautions Do not install the device where it is l Exposed to rain or moisture l Exposed to excessive du...

Page 112: ...ideo system was internally changed modified or repair attempted the system warranty will become null and void Proper disposal To ensure environmental compliance disposal of the 4RE should be in accord...

Page 113: ...deo WatchGuard Video is not liable for any direct indirect consequential or incidental damages arising out of the use of or inability to use the system even if the unit proved to be defective WatchGua...

Page 114: ...ack to full working order must be performed before issuing any new warranty The customer is responsible for the cost of the inspection equal to one hour of labor plus the standard costs associated wit...

Page 115: ...Display Menu Button Display Settings 54 Screen Saver 55 Settings camera lights 55 DVR Configure 90 deploy 12 62 83 91 92 106 display 38 control panel 38 screen 38 Live view 67 load configuration file...

Page 116: ...tion 33 Review button 76 Review recorded event 43 S select officer 48 set up camera 21 Settings button Auto zoom 56 Crash 58 Date Time 58 how to set 58 Diagnose 59 radar 57 Settings menu 56 smart swit...

Page 117: ...Index working in group 28 4RE In Car Video User Guide 4 0 6 WGD00089 Revision D 117...

Page 118: ...118 4RE In Car Video WGD00089 Revision D Index This page intentionally left blank...

Reviews: