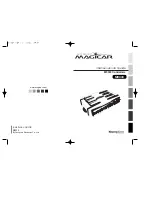
MagicSafe MS620
Installing MagicSafe
53
6
Installing MagicSafe
Note
If you do not have sufficient technical knowledge for installing and connecting
the components in vehicles, you should have a specialist install the alarm sys-
tem in your vehicle.
6.1
Tools required
For
installation and assembly
you require the following tools:
z
Measuring ruler (see fig. 3.4, page 4)
z
Centre punch (see fig. 3.5, page 4)
z
Hammer (see fig. 3.6, page 4)
z
Drill bit set (see fig. 3.7, page 4)
z
Drill (see fig. 3.8, page 4)
z
Screwdriver (see fig. 3.9, page 4)
For making and testing the
electrical connection
the following tools are required:
z
Diode test lamp (see fig. 3.1, page 4) or Voltmeter (see fig. 3.2, page 4)
z
Insulating tape
z
Heat shrinking sleeve
z
Hot air blower (see fig. 3.10, page 4)
z
Crimping tool (see fig. 3.11, page 4)
z
Soldering iron if required (see fig. 3.12, page 4)
z
Solder, if required (see fig. 3.13, page 4)
z
Cable bushing sleeves, if required
To
secure the receiver and the cables
you may require additional screws and cable
binders.
6.2
Installing the control device
➤
Select a suitable installation location (see Fig. 5, page 6).
When selecting the installation location, observe the following instructions:
Install the control unit
–
In the vehicle interior
–
With the main connection cable facing downwards
–
Under the dashboard
–
Not
in areas where strong electrical fields can interfere with it, e. g. ignition
cables or central controller electronics
–
Not directly
at ventilator nozzles.
➤
Where possible use existing drill holes in the vehicle.
MS-620.book Seite 53 Dienstag, 18. Oktober 2005 3:04 15


