background image

50

Telephone operation

Intercom

You can use the intercom feature for conversations between this deskset and a 

system deskset, or between two system desksets. 
The console and each deskset in the telephone system MUST be assigned a 

unique extension number for the intercom feature to work. The assignment is 

done when the deskset is initially set up.

Make an intercom call to an extension

1.  Press 

INTERCOM 

on the deskset when it is idle.

2.  Press   or   to scroll to a desired extension, then 

press 

MENU/

SELECT

.

-OR-

Use the dialing keys to dial the extension number.

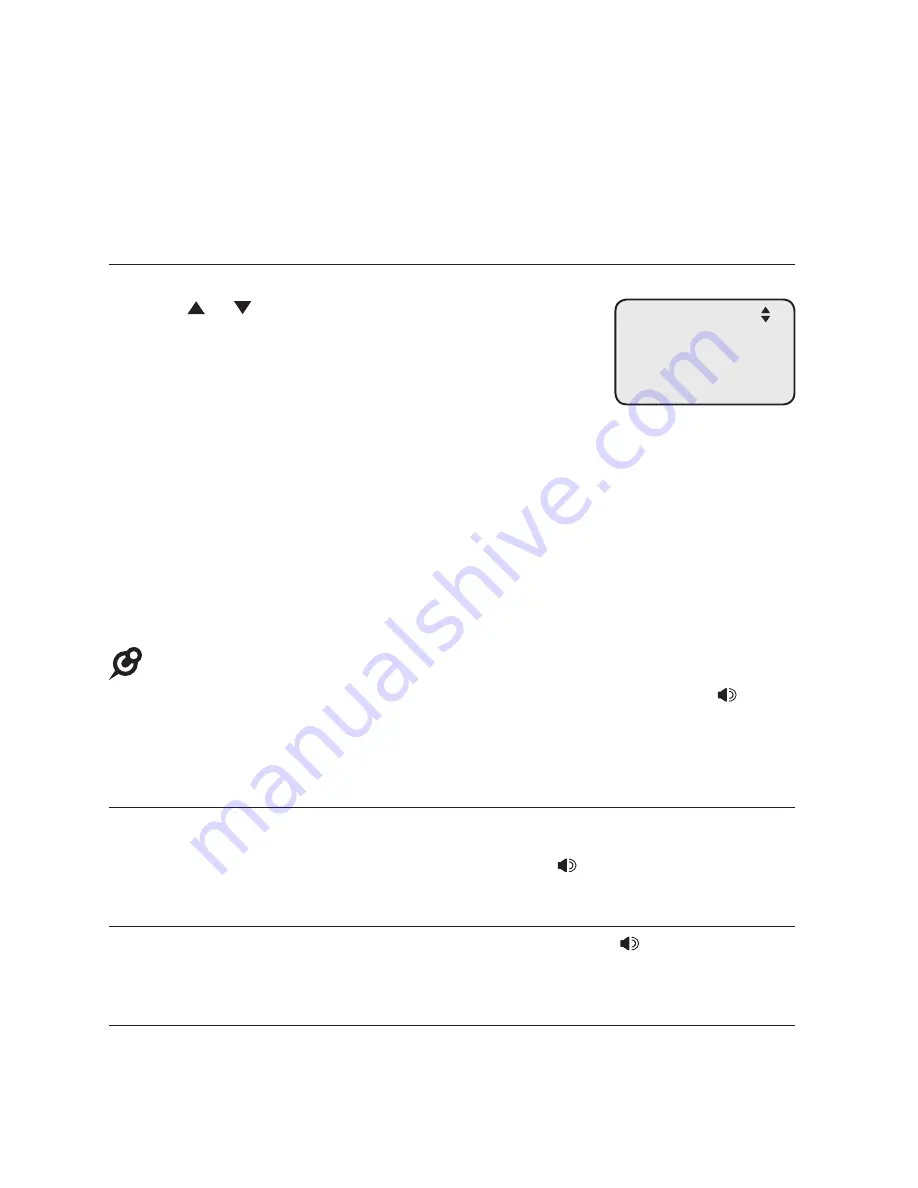
3.  The screen displays 

Intercom to: XX 

(

XX

 represents 

the extension number of destination device)

.

-OR-

If you have assigned extension numbers as one-touch entries (see 

Assign a 

one-touch entry

 on pages 53-54), you can initiate an intercom by pressing the 

desired one-touch button.
1.  When the deskset is idle, press the desired one-touch button, or press 

LOWER

 followed by the desired one-touch button.

2.  The deskset displays 

Intercom to: XX

 (

XX

 represents the extension number 

of the destination device). 

NOTES: 

• 

Before the intercom call is answered, you can cancel the intercom by pressing 

SPEAKER 


or 

CANCEL

.

• 

You cannot intercom an extension that is on a call.

• 

If all four telephone lines are in use, the intercom feature is not available.

Answer an intercom call

When you receive an intercom call, you hear a ringing tone and your screen 

displays 

Intercom from: XX 

(

XX

 represents the extension number of the 

calling device)

.

 Lift the handset or press 

SPEAKER

   to answer.

End an intercom call

Place the handset back to the deskset or press 

SPEAKER

   if you are using 

the speakerphone. 

Answer an incoming call during an intercom call

If you receive an incoming outside call during an intercom call, there is an  

alert tone.
To answer the call, press the corresponding line key (

LINE


1

-

LINE 4)

. The 

intercom call ends automatically.

Intercom to:

>Reception       11
 Meeting room    12
 Ext 13          13

Summary of Contents for EriseBusinessSystem UP406

Page 1: ...User s manual UP406 4 Line Office Phones Deskset Go to businessphones vtech com to register your product for enhanced warranty support and latest VTech product news...

Page 2: ...es Deskset Serial number Purchase date Place of purchase Both the model and serial numbers of your VTech product can be found on the bottom of the deskset Save your sales receipt and original packagin...

Page 3: ...gasoline vapors etc a leak of natural gas etc Do not use this product near water or when you are wet For example do not use it in a wet basement or shower or next to a swimming pool bathtub kitchen si...

Page 4: ...ce between portable wireless telephones and implanted cardiac pacemakers Supported by the U S Food and Drug Administration WTR recommends to physicians that Pacemaker patients Should keep wireless tel...

Page 5: ...ervice is necessary Deskset Ethernet cable Wall mount bracket Replacement directory card Handset with coiled cord installed Deskset power adapter Abridged user s manual Abridged user s manual UP406 4...

Page 6: ...ate time 31 LCD language 31 Home area code 32 Key tone 32 LCD contrast 33 Dial mode 33 Call privacy 34 Music on hold 34 Hold reminder 35 Phone rename 35 Set default 36 Customer support 36 Telephone op...

Page 7: ...information call log works 64 Caller ID operation 65 Memory match 65 Missed new calls indicator 65 Review the caller ID information 65 View dialing options 66 Dial a call history entry 66 Save a call...

Page 8: ...ave an entry or setting CANCEL While in a menu press to cancel an operation and exit the menu display LINE 1 LINE 4 keys Press to make or answer a call on the desired line pages 37 38 ANS SYS Press to...

Page 9: ...te an intercom call page 50 HEADSET When a corded headset is connected to the deskset press to make answer or hang up a call page 38 CONFERENCE Press to add another extension or outside line to an exi...

Page 10: ...etup pages 24 29 Registration pages 20 22 Customer Support page 36 Using menus Press MENU SELECT to show the main menu Press or to scroll through menu items Press MENU SELECT or SKIP to select a highl...

Page 11: ...On steadily when using a corded headset Speakerphone On steadily when using the speakerphone MUTE Mute Microphone is muted PRIV Call privacy On steadily when the call privacy feature is set to On REC...

Page 12: ...n when a telephone line is in use Flashes when the telephone line is on hold Flashes quickly when there is an incoming call or a transfer call HOLD On when a telephone line is on hold INTERCOM On when...

Page 13: ...t to the Ethernet network through this deskset The UP406 deskset supports intercom and call transfers between system extensions and is capable of connecting five parties on the same conference call Th...

Page 14: ...ve only one console in a system You can register only one UP407 cordless handset and one VTech IS6100 cordless headset to an UP406 deskset For optimal performance make sure you do not register more th...

Page 15: ...hernet network through the PC port Use only Supplied Adapter L4 L3 4 5 1 MS2085 Engraving MS2015 Engraving Use only Supplied Adapter of the deskset NOTES The PC port does not function when there is no...

Page 16: ...before use For customer service or product information visit our website at businessphones vtech com or call 1 800 595 9511 In Canada dial 1 800 267 7377 Avoid placing the deskset too close to Communi...

Page 17: ...esigned to hold the plug in place if it is plugged into a ceiling under the table or cabinet outlet 1 Plug the end of the coiled handset cord into the Use only Supplied Adapter L4 L3 4 L2 L1 2 5 1 MS2...

Page 18: ...ting Ethernet wall jack on page 8 Router Plug the large end of the deskset power adapter into an electrical outlet not controlled by a wall switch Route the Ethernet cable through the slots Route the...

Page 19: ...X XXX Press SELECT to proceed press MENU SELECT 2 The deskset displays Enter the name of the Console connecting to this phone Press MENU SELECT 3 The deskset displays Console s name The console s nam...

Page 20: ...eps 3 5 above to connect to console again 7 The deskset displays Starting It takes a while for the system to finish the startup and the deskset enters idle screen when the startup is done 8 Lift the h...

Page 21: ...t switch or router If you are installing more than one deskset in the system keep the first three sets of digits consistent and the last one different among different desksets For example if you enter...

Page 22: ...ELECT to continue 11 The deskset screen displays Connecting to Console It takes up to 60 seconds to complete the connection The screen displays Connected to Console Console represents the name of the...

Page 23: ...the Ethernet cable from the Ethernet switch or router 2 Put the corded handset aside Use a coin to rotate the handset tab 180 degrees The protruding edge holds the corded handset when the phone is mo...

Page 24: ...it locks into place 5 Install the wall mount bracket to the deskset as shown below Insert the upper tabs of the mounting bracket into the upper slots at the back of the deskset Press the lower tabs of...

Page 25: ...outlet not controlled by a wall switch 7 Align the upper wall mounting hole on the back of the deskset with the upper tab of the standard wall plate Make sure the lower wall mounting hole on the moun...

Page 26: ...op position follow the steps below 1 If the Ethernet cable and power adapter cord are bundled untie them first 2 Push the deskset up to remove it from wall Unplug the Ethernet cable from the Ethernet...

Page 27: ...or to scroll to Registration and press MENU SELECT or SKIP 4 Press MENU SELECT again or press SKIP to select Handset The deskset screen shows Registering handset Put handset on cradle to start 5 Place...

Page 28: ...t least five minutes before beginning registration Make sure the headset is out of the headset charger before you begin registration 2 On the UP406 deskset press MENU SELECT 3 Press or to scroll to Re...

Page 29: ...press MENU SELECT or SKIP 4 The deskset screen shows Deregister all devices Press SELECT to confirm Press MENU SELECT to confirm 5 The process takes up to 10 seconds to complete The deskset shows Han...

Page 30: ...y Supplied Adapter L4 L3 4 L2 L1 2 5 1 Use only Supplied Adapter jack on the side of the deskset Side view of the deskset NOTE The HEADSET button on the deskset controls only the corded headset For mo...

Page 31: ...croll to System Setup then press MENU SELECT or SKIP 3 Press or to scroll to Set Ext No then press MENU SELECT or SKIP 4 The screen displays Set Ext No Press REPEAT or SKIP to choose the desired exten...

Page 32: ...ECT or SKIP 3 Press or to scroll to Prime Line then press MENU SELECT or SKIP 4 Press or to choose the desired line then press MENU SELECT or SKIP To exit without making changes press CANCEL NOTE If y...

Page 33: ...isplays Obtain IP from DHCP server Press MENU SELECT to save the setting 7 The screen displays Obtaining IP from DHCP server Please wait The process takes up to one minute 8 The screen displays IP obt...

Page 34: ...NU SELECT or SKIP 5 The screen displays Enter static IP Use the dialing keys to enter a specific IP Press DELETE to delete a digit Press to add a dot Press REPEAT or SKIP to move the cursor to the lef...

Page 35: ...method Use this feature to change the connection mode of the deskset when you changed to a different Ethernet switch or router By default the discovery method is set to Mode B To change the discovery...

Page 36: ...is idle press MENU SELECT 2 Press or to scroll to System Setup then press MENU SELECT or SKIP 3 Press or to scroll to Network Info then press MENU SELECT or SKIP 4 Press or to browse through the netwo...

Page 37: ...off it is silenced for all incoming calls including intercom calls Ringer tone Use this feature to choose one of the ten ringer tones for incoming calls You can choose different ringer tones for diff...

Page 38: ...tting and return to the previous menu To exit without making changes press CANCEL LCD language This feature allows you to change the language used for all screen displays The language settings on the...

Page 39: ...s DELETE to delete a digit Press REPEAT or SKIP to move the cursor to the left or right 5 Press MENU SELECT to save the setting and return to the previous menu To exit without making changes press CAN...

Page 40: ...NCEL or REPEAT Dial mode The dial mode is preset to tone dialing If you have pulse rotary service you must change the dial mode to pulse dialing before using the telephone 1 When the deskset is idle p...

Page 41: ...hen you put a call on hold the caller will hear the music that comes with the deskset You can select a desired built in music for this feature or turn it off When this feature is turned off and you pu...

Page 42: ...e Use this feature to rename the deskset To change the setting 1 When the deskset is idle press MENU SELECT 2 Press or to scroll to Phone Settings then press MENU SELECT or SKIP 3 Press or to scroll t...

Page 43: ...s MENU SELECT or SKIP 3 Press or to scroll to Set Default 4 Press MENU SELECT or SKIP The screen displays Set phone to default settings Press SELECT to confirm 5 Press MENU SELECT The deskset reboots...

Page 44: ...on the corresponding line Making and ending a call To make a call from the deskset 1 Lift the handset or press SPEAKER OR To override automatic line selection press LINE 1 LINE 4 for the desired line...

Page 45: ...aling predialing 1 Enter the telephone number Press DELETE to make corrections 2 Lift the handset or press SPEAKER to dial OR To override automatic line selection press LINE 1 LINE 4 for the desired l...

Page 46: ...re independent While on a call press VOLUME to adjust the listening volume Mute Use this feature during a telephone conversation to silence the microphone You can hear the caller but the caller cannot...

Page 47: ...r you press HOLD To release the hold press line key LINE 1 LINE 4 of the line being put on hold Music on hold M O H is available on this deskset if you have turned on the Music on hold setting page 34...

Page 48: ...Other extensions can now join the call by pressing the corresponding line key LINE 1 LINE 4 To turn call privacy back on during a call 1 During the call press MENU SELECT 2 Press MENU SELECT to selec...

Page 49: ...NU SELECT 3 Press MENU SELECT to choose Start recording 4 The recording starts and the screen shows REC There is a beep sound NOTE To ensure that you are in compliance with any federal or state regula...

Page 50: ...t without making changes press CANCEL and continue with the conversation To access the call history while on a call 1 Press CALL HISTORY then press or to scroll to the desired entry 2 Press MENU SELEC...

Page 51: ...d number 2 Press or to view other recently called numbers 3 Press REPEAT or SKIP to choose Copy to DIR then press MENU SELECT 4 The deskset displays Enter Name Use the dialing keys to enter the name u...

Page 52: ...d display the most recently called number 2 Press or to view other recently called numbers 3 Press REPEAT or SKIP to choose Copy to 1 touch then press MENU SELECT 4 The deskset displays Press a 1 touc...

Page 53: ...action to speak with the other party and stop the auto redial attempts Press MUTE on the deskset then lift the handset press SPEAKER or HEADSET to speak with the other party After a call is placed if...

Page 54: ...ake another outside call The original outside call is put on hold When the external party picks up you can have a private conversation with that party OR Press INTERCOM The outside call is put on hold...

Page 55: ...of To turn call privacy off during a call on page 41 to turn off the setting temporarily 3 Any system extension can join the call by pressing the line key currently in use to join the conference unti...

Page 56: ...outside calls in a conference Number of extensions in a conference Outside lines available for other extension to use Console 1 1 2 1 2 1 2 1 1 2 2 0 Deskset 1 1 3 1 2 3 2 1 2 2 2 2 B Join a call in...

Page 57: ...le press the desired one touch button or press LOWER followed by the desired one touch button 2 The deskset displays Intercom to XX XX represents the extension number of the destination device NOTES B...

Page 58: ...g the corded handset or pressing SPEAKER You can resume the call by pressing the corresponding flashing line key LINE 1 LINE 4 on the deskset before the destination device answers the call 4 Put the c...

Page 59: ...to a desired extension then press MENU SELECT OR Use the dialing keys to enter the desired extension number 3 The destination extension rings and the call is answered by lifting the handset or pressi...

Page 60: ...ss MENU SELECT or SKIP 4 The screen displays Enter Number 5 Use the dialing keys to enter a telephone number up to 30 digits or an extension number Press DELETE to delete a digit Press REPEAT or SKIP...

Page 61: ...n assigned number the screen displays Replace 1 touch key memory Press MENU SELECT to replace the old number with the new one Review the one touch entry 1 When the deskset is idle press MENU SELECT 2...

Page 62: ...hoose Send tone then press MENU SELECT A T appears on the screen All numbers you enter after this will send touch tone signals during dialing You can store the flash signal required by some special se...

Page 63: ...a maximum of 15 alphanumeric characters including spaces for names and 30 digits for telephone numbers A convenient search feature can help you quickly find and dial numbers page 59 If there are alrea...

Page 64: ...ng keys Characters by number of key presses 1 2 3 4 5 6 7 8 9 10 11 1 1 2 a b c A B C 2 3 d e f D E F 3 4 g h i G H I 4 5 j k l J K L 5 6 m n o M N O 6 7 p q r s P Q R S 7 8 t u v T U V 8 9 w x y z W...

Page 65: ...to choose Add flash then press MENU SELECT An F appears on the screen 5 Press or to scroll to Done then press MENU SELECT To exit without making changes press CANCEL or press or to scroll to Cancel th...

Page 66: ...art a name search If there is an entry matching the letter you press the directory shows the first name beginning with that letter If there is no entry matching the letter you press the directory show...

Page 67: ...the number by lifting the corded handset or pressing SPEAKER or the desired line key LINE 1 LINE 4 Delete an entry 1 When a directory entry appears press MENU SELECT 2 Press or to choose Delete then p...

Page 68: ...res one during actual dialing Press or to choose Add pause then press MENU SELECT A P appears on the screen Store a signal for switching to temporary tone signaling If you have dial pulse rotary servi...

Page 69: ...ces Press or to choose Send tone then press MENU SELECT A T appears on the screen All numbers you enter after this will send touch tone signals during dialing You can store the flash signal required b...

Page 70: ...ge telephone service to use this feature Contact your telephone service provider if You have both caller ID and call waiting but as separate services you might need to combine these services You only...

Page 71: ...ermine who called to easily return the call or to copy the caller s name and number into your directory or one touch memory The time and date of the call and the caller s name and telephone number are...

Page 72: ...y pressing CALL HISTORY the screen shows XX New call s All new or missed entries are counted as missed calls Each time you review a call history entry with the icon NEW the number of missed calls decr...

Page 73: ...ly on the deskset to show different dialing options for local and long distance numbers before dialing or saving the telephone number in the directory Dial a call history entry 1 When in the caller ID...

Page 74: ...y service this signal is required for some special services Press or to choose Send tone then press MENU SELECT A T appears on the screen All numbers you enter after this will send touch tone signals...

Page 75: ...ID history press or to browse to the number you wish to delete 2 Press DELETE to delete the shown entry from the caller ID history 3 The screen displays Caller ID deleted OR 1 When in the caller ID hi...

Page 76: ...PRIVATE NAME The caller prefers not to show the name PRIVATE NUMBER The caller prefers not to show the phone number PRIVATE CALLER The caller prefers not to show the phone number and name UNKNOWN NAM...

Page 77: ...box is set to On 1 When the deskset is idle press ANS SYS 2 Press or to scroll to Private Mailbox then press MENU SELECT or SKIP 3 Press or to scroll to Priv MB ON OFF then press MENU SELECT or SKIP 4...

Page 78: ...psed Press MENU SELECT to stop recording To play the announcement 1 When the deskset is idle press ANS SYS 2 Press or to scroll to Private Mailbox then press MENU SELECT or SKIP 3 Press or to scroll t...

Page 79: ...d talk to the caller by pressing the corresponding line key LINE 1 LINE 4 Choose whether private incoming messages can be intercepted by the deskset during recording 1 When the deskset is idle press A...

Page 80: ...t without making changes press CANCEL Message date time The message date and time is set to Announce by default During message playback you hear the date and time the message was received You can chan...

Page 81: ...ncement but is not able to record a message If you choose 1 minute 2 minutes or 3 minutes the caller can record a message up to that specific time period If you choose Unlimited the caller can record...

Page 82: ...r SKIP 4 Press or to choose On or Off 5 Press MENU SELECT or SKIP to save the setting and return to the previous menu To exit without making changes press CANCEL or REPEAT Recording time Use this feat...

Page 83: ...End of the messages To listen to messages in the mailbox 1 While the deskset is idle press ANS SYS on the deskset 2 Press or to choose Play Messages then press MENU SELECT 3 Press or to choose Play n...

Page 84: ...e and time announcement to delete the message The system announces Message deleted Lift the handset to listen to the message playback through the handset earpiece Place the handset on the deskset or p...

Page 85: ...ss or to scroll to Record Memo then press MENU SELECT or SKIP 4 Lift the handset or face the deskset to record your memo The screen displays Record memo and the time elapsed Press MENU SELECT to stop...

Page 86: ...default code see Remote access code on page 73 to change it 4 You can also enter the following remote commands Remote commands 1 Press to play all new messages 1 Press to play all messages 2 Press wit...

Page 87: ...to record the message after the tone If the memory is full the system announces Memory is full when you try to record a memo by pressing 9 You cannot record new memo until some old messages in the mai...

Page 88: ...eregistered The cordless headset is deregistered from the telephone system Directory 0 entry There are no directory entries Directory memory full The directory is full You cannot save new entries unle...

Page 89: ...assigned to the deskset Number already saved The telephone number you have entered is already stored in the directory Number saved to 1 touch key The number is saved to the one touch memory Obtain IP...

Page 90: ...or a deskset extension Transfer Line X to The deskset is transferring a call to a system extension Unable to obtain IP Please check DHCP server The deskset is unable to obtain an IP address You may n...

Page 91: ...ry installing a new one My telephone base doesn t work at all Make sure the power cord is securely plugged in Make sure you plug the Ethernet cable securely and firmly into the deskset and the Etherne...

Page 92: ...both the console and deskset are directly connected to the same Ethernet switch or router My computer can t connect to the network after plugging the Ethernet cable through the PC port Use only Suppli...

Page 93: ...e call cannot be transferred If the destination telephone is on an outside call or intercom call with another system telephone the call cannot be transferred Check to make sure that each system extens...

Page 94: ...into the telephone try unplugging it and firmly plugging it in again If you are using the speakerphone when this problem occurs eliminate any background noise Noise from the television radio or other...

Page 95: ...cement make sure you speak in a normal tone of voice about nine inches from the deskset Make sure there is no background noise television music traffic etc when recording The private mailbox does not...

Page 96: ...ones If you hear clicks then it is not a touch tone telephone and cannot activate the answering system The answering system might not detect the remote access code when your announcement is playing Wa...

Page 97: ...ne base does not seem to be responding normally do the following in the order listed 1 Disconnect the power from the deskset 2 Wait a few minutes 3 Connect the power to the deskset 4 Wait for the desk...

Page 98: ...rms can sometimes cause power surges harmful to electronic equipment For your own safety take caution when using electric appliances during storms Cleaning your telephone Your telephone base has a dur...

Page 99: ...ctions outlined under the Limited Warranty If this equipment is causing harm to the telephone network the telephone service provider may temporarily discontinue your telephone service The telephone se...

Page 100: ...ns Operation of this equipment in a residential area is likely to cause harmful interference in which case the user will be required to correct the interference at his own expense This Class A digital...

Page 101: ...or TWO 2 YEARS from the date of purchase If VTech repairs or replaces a materially defective PRODUCT under the terms of this limited warranty this limited warranty also applies to repaired or replacem...

Page 102: ...e of purchase or receipt and Provide your name complete and correct mailing address and telephone number 7 Other limitations This warranty is the complete and exclusive agreement between you and VTech...

Page 103: ...nical specifications RF frequency band 1921 536MHz 1928 448MHz Channels 5 Operating temperature 32 F 122 F 0 C 50 C Telephone base voltage AC adapter output 5 1VDC 1200mA Ethernet Network Ports 10 100...

Page 104: ...ay 70 Deregister handset 22 Deregister headset 22 Deskset installation 10 15 Dialing options 66 Dial mode 33 Directory 56 62 Directory card 2 Display dial 60 E End a call 37 End a conference call 47 4...

Page 105: ...42 Redial 44 Register a deskset 12 15 Register a handset 20 Register a headset 21 Remote access 79 80 Rename deskset 35 Review call history 65 Review directory 58 Ringer melody 30 Ringer volume 30 S...

Page 106: ...gs Limited Specifications are subject to change without notice 2014 VTech Communications Inc All rights reserved 04 14 UP406_WEBCIB_V1 0 Document order number 91 007438 010 100 Source of music files f...

Reviews: