


Quick User Guide
page 14
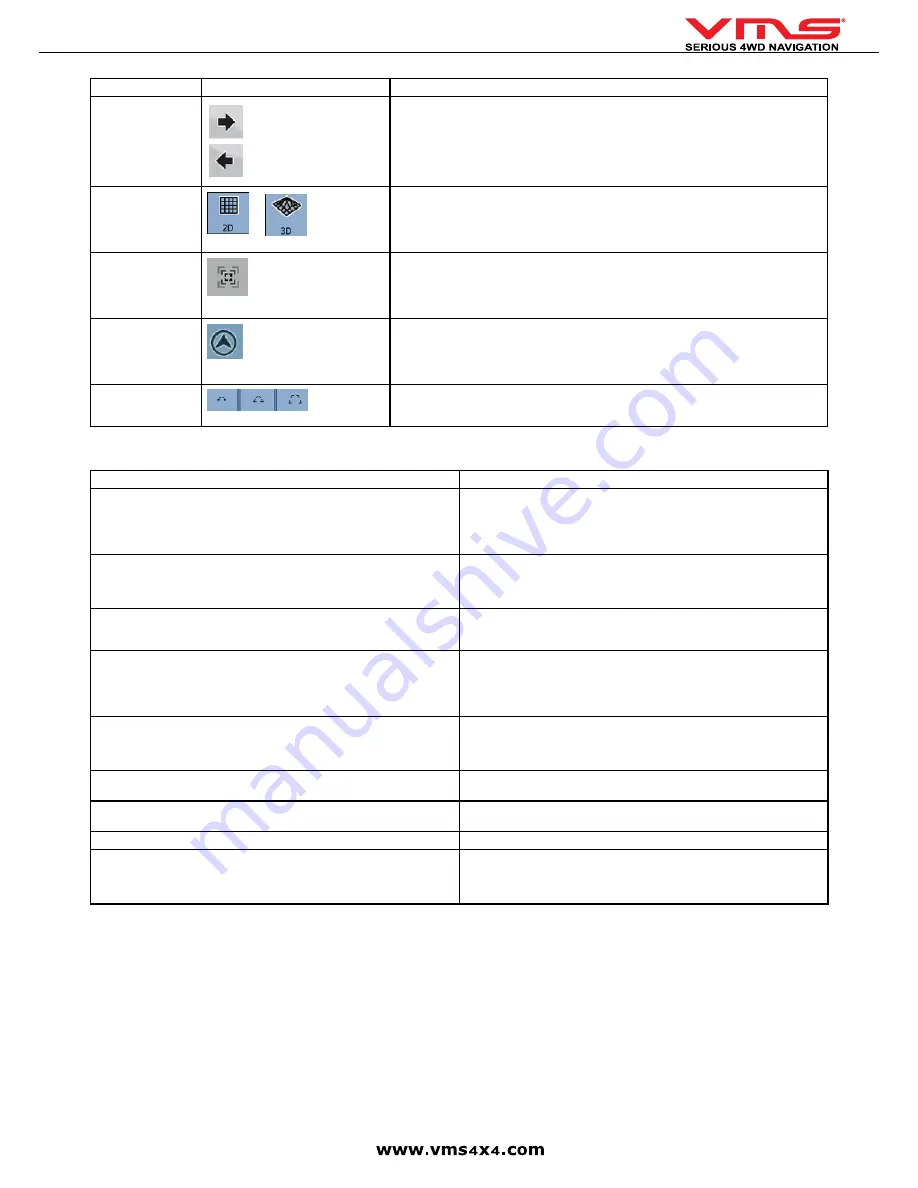
Action
Button (s)
Description
Changes the horizontal view angle of the map in 3D mode. When GPS position is available,
Street Nav always rotates the map so its top faces your direction of travel (Track-up orientation).
You can turn away from track up with these buttons if GPS position is available and you have
rotated the map, the button appears. Tap this button to re-enable the automatic map rotation.
Viewing modes
Gives you the following map perspectives in Street Nav:
• Classic top-down view (2D)
• Perspective view (3D)
The value always shows the mode the button switches to. If you are in 2D mode, you can see the
button and you need to tap it to switch to 3D mode.
Smart Zoom
Street Navigation can automatically rotate, scale and tilt the map and give you the optimal view:
• When you are approaching a turn, street navigation zooms in and raises the view angle to let
you easily recognise your manoeuvre at the next junction.
• If the next turn is at a distance, Street Nav zooms out and lowers the view angle to show you
the road in front of you. Tap this button once to enable Smart Zoom.
Returning to normal
navigation (back to the
GPS position with
automatic map
rotation)
Tap this button to move the map back to the current GPS position. If the map has been rotated in
3D mode, automatic map rotation is also re-enabled.
Tilt and zoom preset
buttons (available in
Advanced mode only)
Tap one of the preset buttons to set the tilt and zoom levels to fix, predefined values. Smart Zoom
is disabled. These buttons are available in 3D mode. Tap & hold any of the buttons to set its value
to the current tilt and zoom levels, or to reset it to its original value.
SETTINGS OVERVIEW
To change any of the following settings, press
[settings]
in the main menu.
Settings Category
Settings sub category
Map Screen:
• 3D settings
• Colour Profiles
• Elevation on 2D map
• Street names during navigation
• Land information
Sound
• Master Volume (Street Nav)
• Voice Guidance Volume
• Key Sounds
• Dynamic Volume
Route Settings
• Vehicle Type
• Road types used for route planning
• Route calculation method
Regional Settings
• Program language
• Voice profile
• Units (km/mile etc)
• Set Date & Time Format
• Time and Time zone settings
Navigation Settings
• Keep position on road
• Off route Recalculation
• Restore lock to position
• Automatic Overview
Warnings
• Warn when speeding
• Speed Camera warning
Menu Settings
• Animation
• Background
Device Settings
• Power Management
About Street Navigation
• Maps
• Credits
• Safety
• Legal
A detailed Street Navigation User Manual is available online:
www.vms4x4.com/vms_support
OFF ROAD GPS (Memory Map) BASIC OPERATION GUIDE
To start Memory Map, press
[Memory Map]
in the Off Road GPS console.
Summary of Contents for TOURING 7000 SERIES
Page 1: ...TOURING 7000 SERIES QUICK USER GUIDE...
Page 2: ...Quick User Guide page 2...
Page 22: ...Quick User Guide page 22...
Page 23: ...Quick User Guide page 23...


