background image

EN-54

INSTALLING VIDEOSTUDIO

Ulead

®

 VideoStudio is home video-editing software that makes editing movies as fun as shooting them.  Users can

make one in three easy steps using the new Movie Wizard mode. VideoStudio features fully customizable filters
and special effects and shares finished projects on diversified devices by supporting the latest formats.

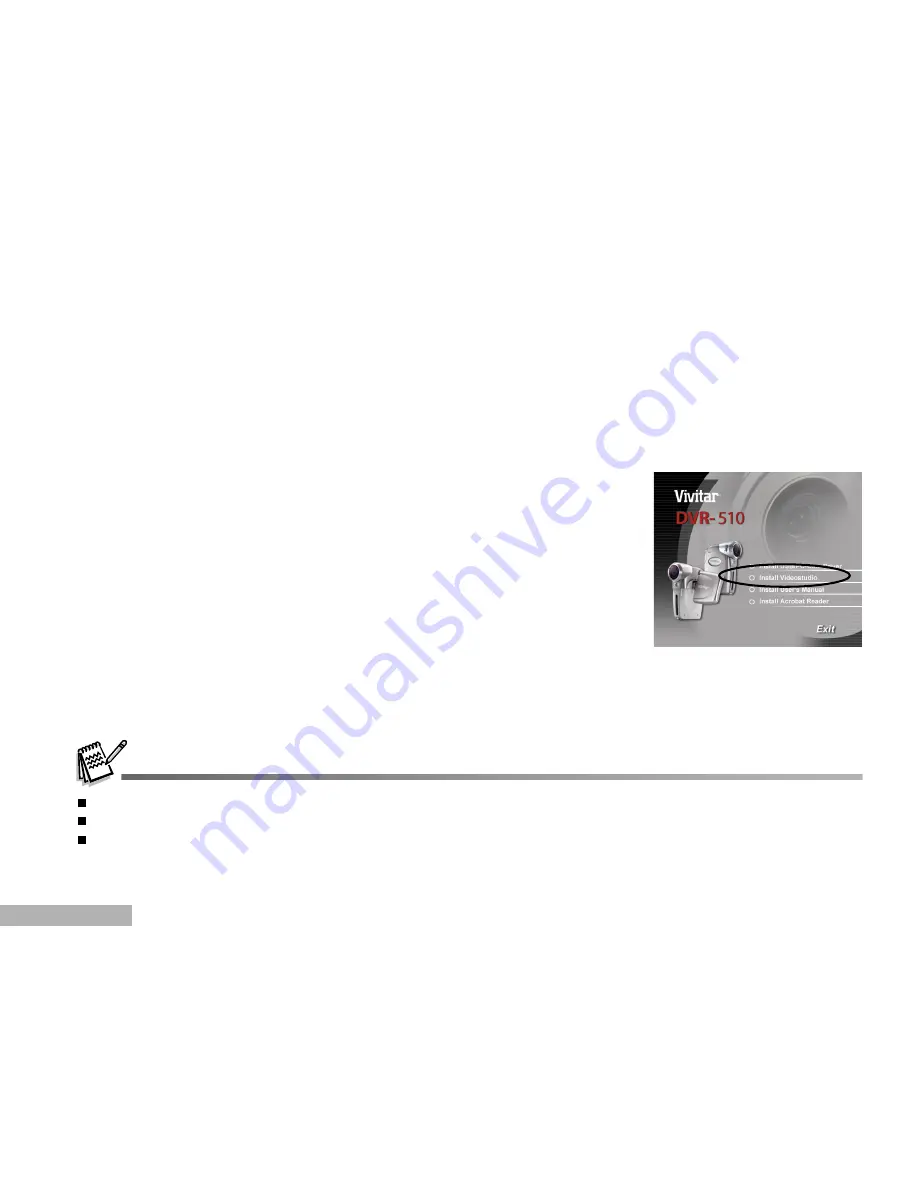
To install VideoStudio:

1. Insert the CD-ROM that came with the camera into your CD-ROM drive.

The welcome screen appears.

2. Click “

Install VideoStudio

”. Follow the on-screen instructions to complete

the installation.

For more information about the operation of VideoStudio application software, refer to its respective help documentation.
For Windows 2000/XP users, please make sure to install and use the VideoStudio in “Administrator” mode.
VideoStudio is not supported on the Mac.

Summary of Contents for DVR-510

Page 1: ...cations However there is no guarantee that interference will not occur in a particular installation If this equipment does cause harmful interference to radio or television reception which can be dete...

Page 2: ...nual This is due to the fact that different retailers often specify slightly different product inclusions and accessories to suit their market requirements customer demographics and geographical prefe...

Page 3: ...le change or repair the camera This might cause fire or electric shock For repair or internal inspection ask the store of purchase Do not use the camera in areas near water This might cause fire or el...

Page 4: ...mera This might cause damage to the camera Do not use the camera in humid steamy smoky or dusty places This might cause fire or electric shock Do not remove the battery immediately after long period o...

Page 5: ...batteries that pass the expiry date are exceptions might affect the number of pictures that can be taken Therefore to maximize their performance and lifetime we recommend that you fully charge the bat...

Page 6: ...ay Language 20 Setting the Date and Time 20 Formatting an SD Memory Card 21 Setting Image Resolution and Quality 22 PHOTOGRAPHY MODES 23 Capturing Still Images 23 Photo Frame 24 Recording Video Clips...

Page 7: ...driver Windows 98 users only 51 Step 2 Connect the DVR 510 to your computer 52 Step 3 Download still images video clips and audio files 53 INSTALLING VIDEOSTUDIO 54 INSTALLING ADOBE ACROBAT READER 55...

Page 8: ...You can connect the camera directly to a printer that supports PictBridge and perform image selection and printing using the camera s monitor screen and controls Provided editing software VideoStudio...

Page 9: ...is missing or if you find any mismatch or damage promptly contact your dealer Common product components DVR 510 Digital Camcorder User s Manual USB Cable Software CD ROM Common optional accessories S...

Page 10: ...EN 10 GETTING TO KNOW YOUR DVR 510 Front View 1 Lens 2 Microphone 3 Flash 4 Self timer LED 5 Tripod socket 6 Focus switch Normal mode Macro mode 7 SD card cover 8 Battery cover...

Page 11: ...Zoom in W Zoom out 4 State LED indicator 5 Image button 6 Earphone connector 7 A V terminal 8 USB connector 9 Strap holder 10 Speaker 11 LCD panel monitor 12 Menu button 13 Right Fast forward button...

Page 12: ...card indicator An SD memory card is loaded No SD memory card is loaded 8 Video quality SUPER FINE FINE NORMAL 9 Video resolution 640 x 480 pixels 320 x 240 pixels 10 Available recording time Before r...

Page 13: ...shots 6 Flash mode Flash off A Auto flash Auto flash with red eye reduction 7 Macro mode 8 ISO sensitivity AUTO 100 200 9 EV compensation 10 AWB White balance 11 Image quality SUPER FINE FINE NORMAL 1...

Page 14: ...eo Movie Playback 1 Folder and file name 2 Duration of current video Before playback Elapsed time During playback 3 Video playback mode icon 4 Battery power indicator 5 SD memory card indicator 6 Play...

Page 15: ...r 6 Sound level speaker volume 7 Playback indicator 8 Play mode indicator Play one file Play all files Play the selected files 9 Repeat indicator 10 Elapsed time 1 3 4 7 10 5 6 9 2 8 00 01 22 AUD_0001...

Page 16: ...AA size batteries to power the DVR 510 1 Slide the battery cover 2 Insert the batteries noting correct polarity or 3 Close the battery cover firmly Turning the Power On Off Press and hold the button u...

Page 17: ...up 2 The DVR 510 is ready to record images or movies LED indicator Blinking green USB communication transfer in progress LED indicator Blinking red Charging the flash Self timer indicator Blinking re...

Page 18: ...the card cannot be inserted check the orientation 3 Close the SD card cover firmly To remove the SD memory card make sure the camera is turned off Open the SD card cover then press lightly on the edge...

Page 19: ...on and rotation with the wrong direction may damage the hinge that connects the LCD monitor to the DVR 510 Avoid contact with the LCD monitor when moving the LCD panel Do not hold the DVR 510 by the L...

Page 20: ...ess the button after all fields are set To increase a value slide the zoom lever to the T side To decrease a value slide the zoom lever to the W side The time is displayed in 24 hours format Choosing...

Page 21: ...yed 3 Press to access the SYSTEM MENU 4 Select FORMAT with the zoom lever and press the button 5 Select YES with the zoom lever and press the button Formatting an SD memory card also erases the protec...

Page 22: ...ile size to be larger To change image resolution or image quality perform these steps below 1 Turn on the power by pressing and holding the button 2 Toggle the button to access in camera or movie mode...

Page 23: ...FINE 8 1 NORMAL 12 1 2048 x 1536 pixels SUPER FINE 4 1 FINE 8 1 NORMAL 12 1 1280 x 960 pixels SUPER FINE 4 1 FINE 8 1 NORMAL 12 1 640 x 480 pixels SUPER FINE 4 1 FINE 8 1 NORMAL 12 1 The above data s...

Page 24: ...n to display and select your desired photo frame 4 Press the button to capture a still image with photo frame Photo Frame You can set your desired photo frame before shooting There are 12 types of fra...

Page 25: ...o stop recording Approximate Duration of Recording Time The table below indicates the approximate time that you can record at each setting based on 32 MB internal memory 24MB available for image stora...

Page 26: ...utton to end the recording After a macro shot is taken DO NOT FORGET to reset the lens to the normal position Flash mode is automatically set to off once you switch to Macro mode Normal Mode This mode...

Page 27: ...he subject appears closer by sliding the zoom lever to the T side The subject appears farther away by sliding the zoom lever to the W side 3 Press the button to capture a zoomed image To record video...

Page 28: ...s too far away for the flash to be effective A Auto flash The flash fires automatically to suit the photographic conditions Auto flash with Use this mode to reduce the red eye when you want to take na...

Page 29: ...apsed To cancel the self timer during operation press again the button Once the self timer has been activated and the button has been pressed you can not slide the zoom lever The table below will help...

Page 30: ...start playing back the video clips follow the steps 1 4 above then press the button A press of the buttons during playback allows fast forward play fast reverse play To pause video playback press the...

Page 31: ...of the video equipment you are going to connect to the DVR 510 then turn all devices off 1 Connect one end of the A V cable to the A V terminal of the DVR 510 2 Connect the other end to the A V input...

Page 32: ...ange from 1x to 8x within 16 stages 1 0x 1 5x 2 0x 2 5x 3 0x 3 5x 4 0x 4 5x 5 0x 5 5x 6 0x 6 5x 7 0x 7 5x 8 0x and thumbnail display During zoom playback the outer frame indicates the entire image whi...

Page 33: ...MENU is displayed 6 Select PROTECT with the zoom lever and press the button 7 Select ONE FILE or ALL FILE with the zoom lever and press the button 8 Select LOCK by pressing the buttons and press the b...

Page 34: ...the button 4 Press the button The PLAYBACK MENU is displayed 5 Select SLIDE SHOW with the zoom lever and press the button 6 Set the playback interval with the zoom lever and press the button The slide...

Page 35: ...utton The PLAYBACK MENU is displayed 6 Select DELETE FILE or DELETE ALL with the zoom lever and press the button DELETE FILE Delete the current still image video clip DELETE ALL Delete all still image...

Page 36: ...ICTBRIDGE with the zoom lever and then press the button 4 Select SIZE or BORDERLESS with the zoom lever and select its print type with the buttons Then press the button to confirm the selection SIZE Y...

Page 37: ...ge with file name 7 Use the zoom lever to select PRINT Then press the button to confirm the print settings and start printing 8 The printing starts and the figure shown on the right hand side appears...

Page 38: ...button 2 Toggle the button to go to SELECT MODE 3 Select MP3 with the zoom lever and press the button The MP3 LIST appears on the screen Button operations Playlist During playback Power off press hold...

Page 39: ...ime for voice recording is over 1 hour Playing Back Audio Files 1 Turn on the power by pressing and holding the button 2 Toggle the button to go to SELECT MODE 3 Select AUDIO with the zoom lever and p...

Page 40: ...he button The MP3 AUDIO MENU appears on the screen 5 Select DELETE with the zoom lever and press the button SELECT Delete the selected audio or MP3 file ALL Delete all audio or MP3 files in a single o...

Page 41: ...on the screen 3 Select the desired option item with the zoom lever and press the button 4 Select the desired setting with the zoom lever and press the button 5 To exit from the menu press the button...

Page 42: ...g under incandescent lights FLUORESCENT 1 Cool white fluorescent W3900 4500K FLUORESCENT 2 Day white fluorescent W4600 5400K SHADE For recording outdoors on a cloudy day EV Your DVR 510 adjusts the ex...

Page 43: ...een 3 Select the desired option item with the zoom lever and press the button 4 Select the desired setting with the zoom lever and press the button 5 To exit from the menu press the button SIZE This s...

Page 44: ...ky accounts for a large area on the screen negative compensation People illuminated by a spotlight in particular against dark background Printed matter comprising white text on blackish paper Weak ref...

Page 45: ...e pixilated grainer the image will appear AUTO Auto adjustment 100 Equivalent to ISO100 200 Equivalent to ISO200 DATE PRINT The capture date can be printed directly on your still images This function...

Page 46: ...ton 7 To exit from the menu press the button DELETE FILE Delete the current file YES Enable deletion NO Disable deletion DELETE ALL Delete all files YES Enable deletion NO Disable deletion PROTECT Set...

Page 47: ...press the button 6 Select the desired setting with the zoom lever and press the button 7 To exit from the menu press the button PLAY MODE SINGLE Play only one audio or MP3 file SELECT Play the select...

Page 48: ...his function will delete all still images video clips and other data recorded on the internal memory or external memory card Memory card cannot be formatted if it is write protected YES Formats the in...

Page 49: ...e and time on the screen Y M D Year Month Day D M Y Day Month Year M D Y Month Day Year DATE SETUP This sets the date and the time Refer to section in this manual titled Setting the Date and Time for...

Page 50: ...is sets video output system of the video equipment that you are going to connect to the DVR 510 NTSC NTSC system PAL PAL system RESET This returns all basic settings to the DVR 510 s default settings...

Page 51: ...XP 64MB RAM 128MB hard disk space CD ROM drive Available USB port Step 1 Install the USB driver Windows 98 users only Windows 98 computers The USB driver on the CD ROM is exclusively for Windows 98 c...

Page 52: ...movable disk is actually the memory or memory card in your DVR 510 7 Double click on the removable disk and locate the DCIM MP3 and AUDIO folders 8 Double click on the folders to open it to find more...

Page 53: ...de these folder s Select the files that you want and then choose Copy from the Edit menu Open the destination location folder and choose Paste from the Edit menu You may also drag and drop image files...

Page 54: ...devices by supporting the latest formats To install VideoStudio 1 Insert the CD ROM that came with the camera into your CD ROM drive The welcome screen appears 2 Click Install VideoStudio Follow the o...

Page 55: ...er installed in your computer Adobe Acrobat Reader is included on the camera CD ROM Using Adobe Acrobat Reader you can read the user s manual and print sections of interest 1 Insert the CD ROM that ca...

Page 56: ...r Manual on the CD ROM is that you have Acrobat Reader Adobe Reader installed on your computer Updates to this manual and versions in other languages may be found on the Vivitar website www vivitar co...

Page 57: ...driver same as USB driver this is needed on ACC Windows systems Step 2 Connect the DVR 510 to your computer Step 3 Run your application software i e Yahoo Messenger Video conferencing or video editing...

Page 58: ...with the camera into your CD ROM drive The welcome screen appears 2 Click Install USB PC Cam driver Follow the on screen instructions to complete the installation After the driver installation is com...

Page 59: ...er in your Windows operating system restart your computer Then select Programs MYDSC2 PC Cam You can then use your DVR 510 as a web cam allowing others to see you online Simply follow the instructions...

Page 60: ...EN 60 CONNECTING THE DVR 510 TO OTHER DEVICES...

Page 61: ...XIF 2 1 DCF 1 0 JPEG ASF Video PictBridge support PC CAM support Lens F no 3 5 Focal length 7 7mm Focus range Normal 1 1m infinity Macro 0 6m 1 1m LCD monitor 2 0 LTPS color LCD High resolution 130K p...

Page 62: ...files or use a different memory card Slide the write protect tab to UNLOCK Select a different flash mode Toggle the button to access in camera mode Slide the focus switch to the normal mode Check all...

Reviews: