


IFU-08, Rev D | Date: November 2019
Page 10 of 39
Chapter 4
Using the VistaPoint Dashboard
When pairing is complete, you will be shown the VistaPoint dashboard with vital signs (see Figure 11
below). Do the following, as directed by your care team:
•
Keep the VistaTablet device powered on and charged. Keep the VistaTablet device near the
VitalPatch biosensor much as possible (less than 30 feet) to ensure constant monitoring.
•
Use the dashboard to observe vital signs and monitor VitalPatch battery life.
•
If directed by your care team, take oxygen saturation, blood pressure, or weight readings.
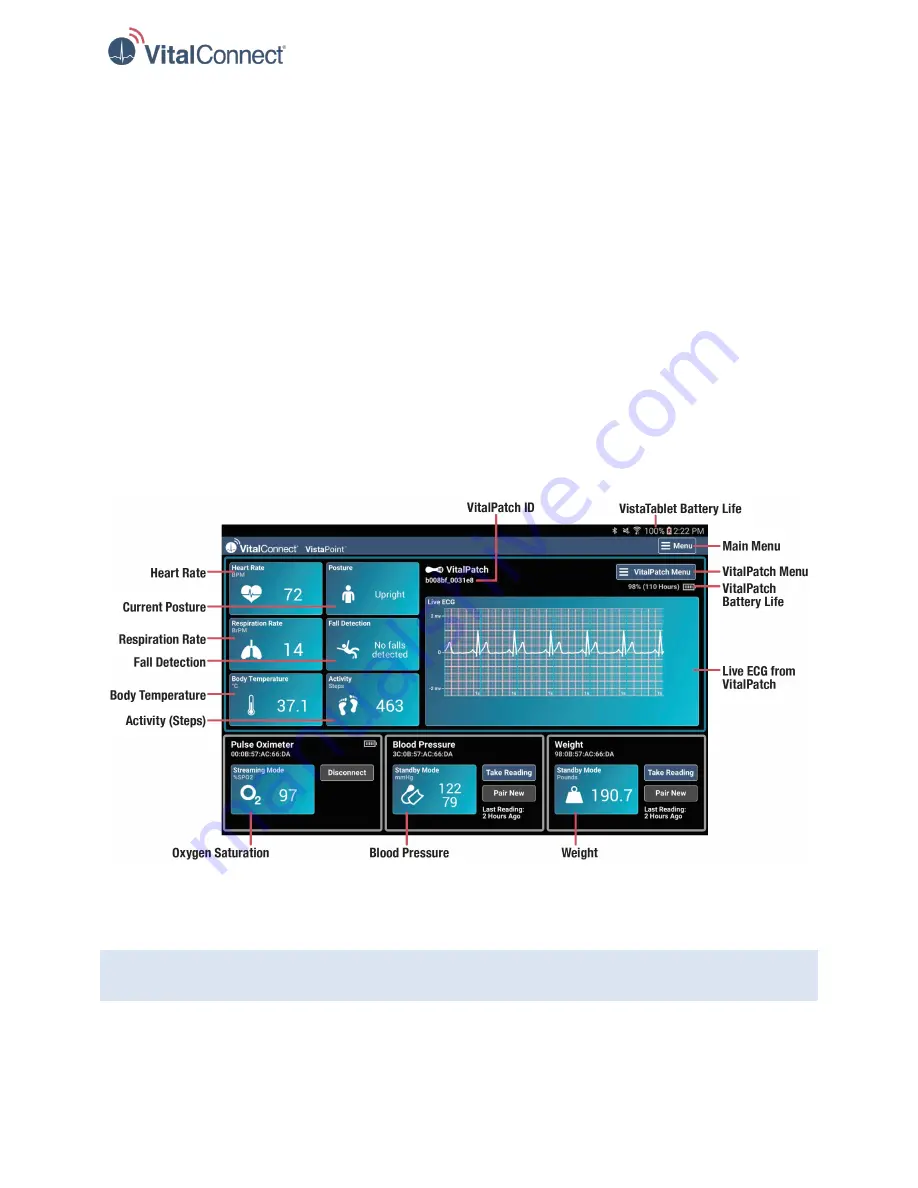
Verify Correct Display of Vital Signs
After pairing and calibrating, verify that data is flowing from the connected VitalPatch biosensor to the
VistaPoint application. Streaming data will be displayed on the dashboard. Ensure that the biosensor
identifier above the ECG screen matches the identifier on the biosensor’s adhesive backing and/or pouch.
A matching identifier provides confirmation that the correct biosensor is connected. Additionally, verify
that the posture reflected on the dashboard matches the patient’s current posture.
Figure 10: VistaPoint Dashboard with Data Flowing from VitalPatch
To refresh the application at any time, swipe from the top of the screen down.
Note:
Images with displayed values are for demonstration purposes only and do not necessarily reflect
clinically representative data.