background image

User Manual CopyBox Standard CD-DVD Duplicator - 

Introduction


Page 4 van 29 


Introduction 

 
The CopyBox Standard duplicator is a stand-alone CD/DVD copy system specifically designed to quickly and easily duplicate 
DVD’s and CD’s. The CopyBox Standard duplicators are available in three versions; Stand-Alone, with built-in hard drive and PC-
connected. The CopyBox Standard duplicators are available with 1, 3, 5, 7, 9 and 11 burners. 
 
Main advantages of the CopyBox: 


Quick, easy and inexpensive duplication of recordable CD and DVD. 


Suitable for all users, with no computer knowledge required. 


Standalone operation, no PC or software required. 


Fast copying at up to 24 x DVD write speed. (One copy in 5 minutes) 


Support for all recordable CD and DVD formats. 


Support for dual-layer (8.5 GB) DVD recordable. 


Simple operation through buttons and a LCD display on the control panel at the front. 


Available in three versions (Stand-Alone, with HDD, PC-connected) for all specific copying needs. 


Warranty 

 
General Warranty 
 
On all CopyBox systems a standard carry-in warranty of two years applies. The warranty covers breakdowns or faults due to 
defect in materials or workmanship. It does not cover wear & tear, gradual deterioration in performance, failure caused by, use 
of unauthorised or unsuitable software, connection to incompatible equipment, ingress of moisture, fluid or foreign bodies, 
physical or electrical stress, connection to an electrical supply for which it has not been adjusted, lightning strike, incorrect 
storage, operation or use of the product in unsuitable environments or inappropriate applications, incorrect installation, 
accidental damage or damage caused by negligence or misuse, unauthorised modification, incorrect adjustment or repair by 
persons other than trained personnel. The following additional warranty provisions shall also apply: 
 

 The warranty will automatically expire if the warranty seals have been broken or removed. 


 The optical drives in a CopyBox duplicator are sensitive to certain types of pollution. We advise: 


§


Do not smoke near the CopyBox duplicator. 

§


Do not place the CopyBox in the same room as laser printers and photocopy machines. 

§


Do not expose the CopyBox to fine dust particals such as construction debris. 


Pollution of the CD/DVD drives is not covered under warranty. 


Disclaimer 

 
The main function of the CopyBox is making copies of DVD’s and CD’s which are in users possession and duplication of self-
produced CD’s or DVD’s. Copying and duplicating DVD’s and CD’s which are not in users possession is illegal and may result in 
criminal prosecution. 
 

Summary of Contents for CopyBox Standard

Page 1: ...CopyBox Standard CD DVD Duplicator User Manual v10 0...

Page 2: ...User Manual CopyBox Standard CD DVD Duplicator Page 2 van 29...

Page 3: ...11 11 Burn Mode 17 11 12 Display Time 17 11 13 Button Sound 18 11 14 Device Info 18 11 15 System Info 18 11 16 Quick Erase 18 11 17 Full Erase 18 11 18 Auto Close Tray 19 11 19 Quick Compare 19 11 20...

Page 4: ...adual deterioration in performance failure caused by use of unauthorised or unsuitable software connection to incompatible equipment ingress of moisture fluid or foreign bodies physical or electrical...

Page 5: ...now ready for use Installation of the CopyBox 1 with USB connection For installation of the CopyBox 1 with USB connector please see page 26 of this manual Installation of CopyBox 3 5 7 and 9 PC connec...

Page 6: ...simulated without the DVD or CD recordables actually being written This function can be used when there are problems reading from a master disc or burning recordable discs Using option 12 6 Burn In t...

Page 7: ...r duplicating It checks whether the master disc and copies are 100 identical The Compare function can not be used with Audio CD and Video CD formats Select the Compare function with the Up or Down but...

Page 8: ...display 8 Select Source The Select Source function allows either the DVD reader one of the DVD writers or the optional hard drive to be selected as source drive The source drive is the drive from whi...

Page 9: ...D requires five partitions of 1 GB partition letters B C D and E also will be reserved The next free partition after loading the DVD will be partition F Select the Image function in the main menu usin...

Page 10: ...button to view the details of the master disc Press Enter button again to view the details of the target image If the comparison is successful the following information will appear on the LCD display...

Page 11: ...fferent hard drive partitions Besides a main title also two sub titles can be entered for each partition Each line can contain 12 letters or numbers Select the Edit function with the Up or Down button...

Page 12: ...s Enter button 9 10 Load Image Method By default the partition letters are automatically assigned to image files on the internal hard drive This function allows partition letters to be selected manual...

Page 13: ...Up or Down button To end the CD composition press the Enter button and choose Yes or No The CopyBox will burn the selected audio tracks on the target CD s After the tracks are copied press the Enter b...

Page 14: ...tion select Move with the Up or Down button Confirm your selection with the Enter button Then choose a hard drive partition where the audio tracks need be moved to Confirm your selection with the Ente...

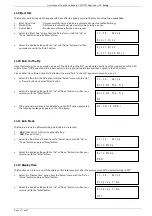
Page 15: ...utton and press Enter button Select the desired language and confirm with the Enter button 11 2 Burn Speed This function allows the different maximum write speeds for CD DVD and Audio CD to be set man...

Page 16: ...the Auto Verify option from the Setup menu with the Up or Down button and press Enter button The default setting is Off Select the desired setting with the Up or Down button Confirm your selection wi...

Page 17: ...he Burn On The Fly option from the Setup menu with the Up or Down button and press Enter button Select the desired setting with the Up or Down button Confirm your selection with the Enter button If th...

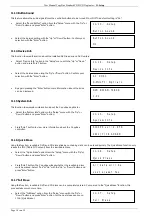
Page 18: ...option in the Setup menu with the Up or Down button and press Enter button Press Enter button to view more information about the CopyBox controller 11 16 Quick Erase Using this function rewritable DV...

Page 19: ...aster disc 1 byte 1 Kbytes 10 Kbytes 100 Kbytes 1 Mbytes 10 Mbytes 100 Mbytes with the Up or Down button and confirm with the Enter button Not available on the CopyBox 1 11 20 Tray In Out This functio...

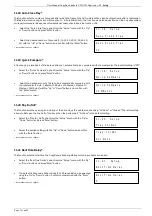
Page 20: ...quality are used or when discs are dirty or scratched The default setting is Off Select the Disc Redetect option from the Setup menu with the Up or Down button and press Enter button Select the desir...

Page 21: ...he default setting is On Select the underrun Protect option in the Advanced Setup menu with the Up or Down button and press Enter button Select On or Off with the Up or Down buttons and press Enter bu...

Page 22: ...can be selected with the Up or Down button Confirm your selection with the Enter button After the hard drive or partition is checked the following message appears on the LCD display 12 6 Burn in Using...

Page 23: ...tton and press Enter button The hardware test will start Follow the instructions on the LCD display All tests are shown on the LCD display When the entire test is completed successfully the following...

Page 24: ...he Enter button Not available on the CopyBox 1 Please Note Once the USB option has been activated an additional menu item 12 USB Mode will be available in the main menu of the CopyBox In this case the...

Page 25: ...otbutton Setup Two of the five function buttons on the controller CopyBox F1 and F2 can be assigned if desired to a different function from the main menu The F1 function button uses the Burn Speed fun...

Page 26: ...lowing steps to properly set the CopyBox Switching USB Connection On Off Turn the CopyBox on by pressing the On Off button on the front Once the CopyBox has started appears the Copy function in the LC...

Page 27: ...e files can be managed on the hard drive of the CopyBox The USB connection on the CopyBox must be activated before the Image Manager software is started Once the Image Manager software is launched the...

Page 28: ...SB 2 0 port of a PC with the supplied USB cable The flat USB connector is to be connected to the PC the square end has to be connected to the rear of the CopyBox 1 The installation of the PC connected...

Page 29: ...xh 41 x 18 x 56 cm 1 11 lxbxh 41 x 18 x 60 cm Weight 1 1 4 7 kg including DVD drives 1 3 8 0 kg including DVD drives 1 5 10 3 kg including DVD drives 1 7 13 0 kg including DVD drives 1 9 15 7 kg inclu...

Reviews: