


25
Visit
help.c5k.info
for more information and support
4.2 Manual Configuration of Additional Indoor Monitor/s
Continued on next page
g
1. If prompted to choose Apartment or Villa, select
Villa
, then select
OK
. Press
Quit
to exit One-key configuration. If
not prompted, proceed to the next step.
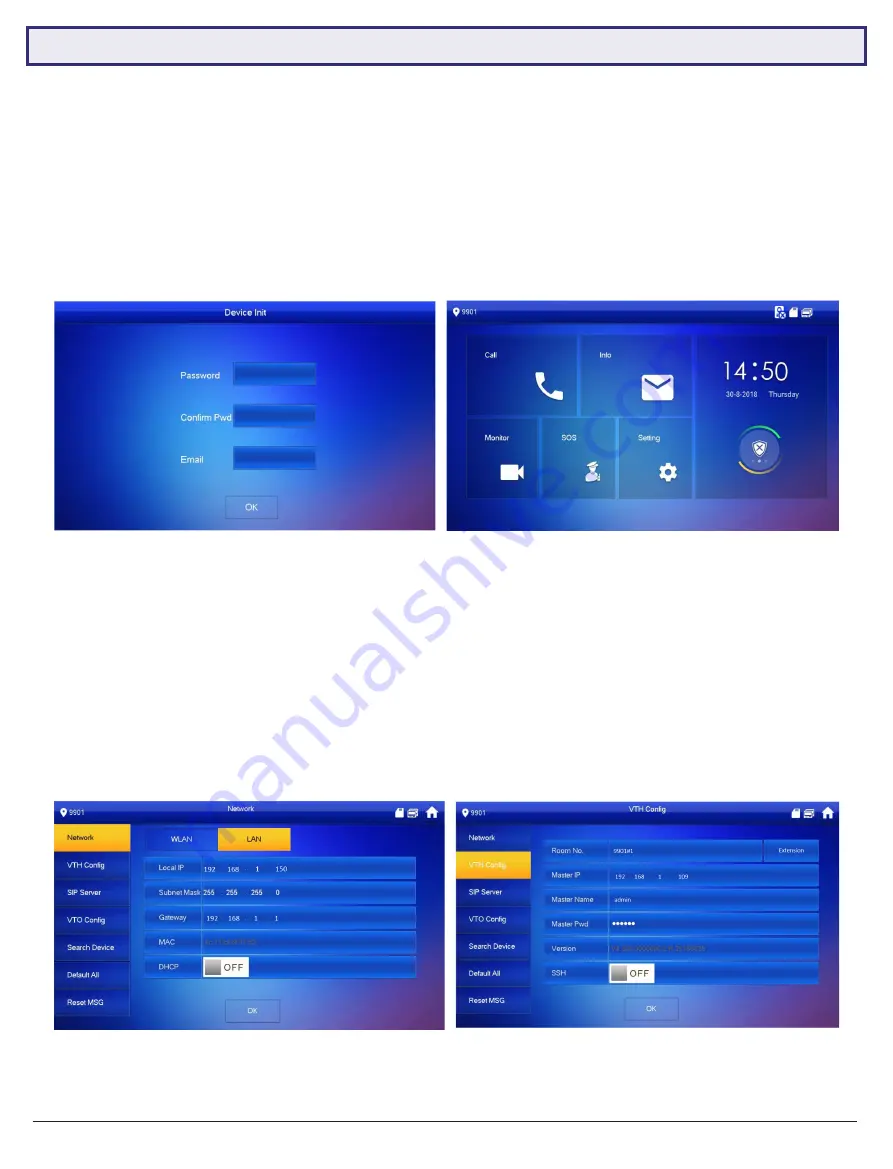
2. Initialize the Indoor Monitor by entering a 6 digit
password
(888888) and email. Select
OK
. (Fig 4.10)
3. If prompted with
Do you want to do quick configuration?
, Select
Cancel
.
Follow the steps below to add an additional Monitor to the system. These steps will allow the additional Monitor(s) to
ring when the first Indoor Monitor does. Before starting, you will need to know the IP address, password and room
number of the Master Indoor Monitor. The intercom system must have a minimum of one Door Station and one Indoor
Monitor connected and working, before following the below steps.
4. Press and hold down the
Settings button
- after 6 seconds, a prompt will appear. Enter your
password
(888888).
Select
OK
. (Fig 4.11)
5. Select
Network
and set the
IP Address, Subnet Mask and Gateway
to suit your existing intercom products. (Fig
4.12)
6. Select
VTH Config
and tap on Master so it changes to
Extension
, then set the
Room No.
The Room Number will
be the same as the Master Indoor Monitor’s Room Number, but with a different number as the last digit to indicate
which extension it is (i.e if 9901#0 is the Master’s room number, then the first extension will be 9901#1, the second
extension will be 9901#2 and so on). (Fig 4.13)
7. Enter the
Master IP & Master Pwd
. This will be the Master Indoor Monitor’s IP address and Password (The one
you set after first turning it on). (Fig 4.13)
Fig 4.10:
Device Initialisation
Fig 4.11:
Main Menu
Fig 4.12:
Network Settings
Fig 4.13:
VTH Config