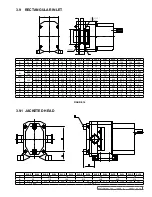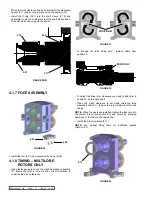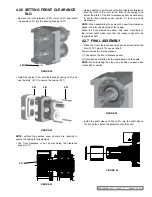
fIGURE 86
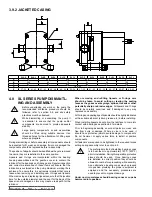
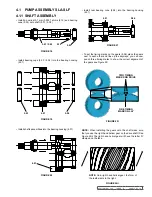
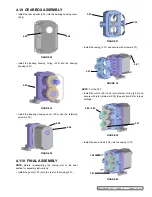
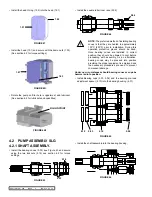
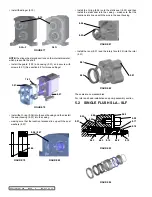
fIGURE 89
fIGURE 90
fIGURE 87
8.09
fIGURE 88
8.19
8.20
fIGURE 85
8.08
8.09
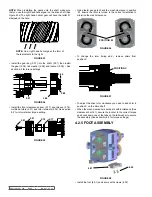
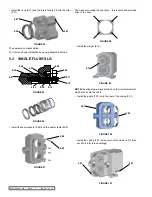
fIGURE 92
8.06
8.17
8.18
fIGURE 93
8.04
8.03
fIGURE 91
3.01
7.03
4.07
SECTION TSM 288
ISSUE
A
PAGE 25 OF 36
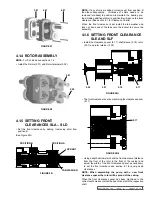
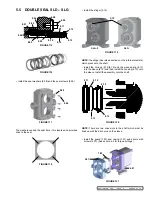
• Install the slinger (5.15)
NOTE:
the slinger has raised sections on the internal diameter,
which press onto the shaft
• Install the O-ring (8.19) onto the sleeve (8.20) and then
install the sleeve onto the shaft and secure with the grub
screws (8.14)
NOTE:
The shaft has two location grooves which the grub
screws in the seal sleeve locate into. (See Figure 89 and
Figure 90)
The washers overlap the seal bore – this locates and provides
drive to the seal.
• Install the seal washers (8.08) and the seal screws (8.09)
• Install the O-ring (8.06), lip-seal (8.17) and the cir-clip (8.18)
into the seal housing and then install the seal housing (8.16)
into the casing
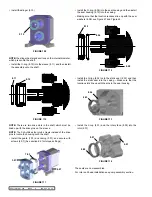
• Install the O-ring (8.04) onto the static seal (8.03) and then
install the static seal into the casing – ensure that the location
slots line up with the pins in the seal housing
• Install the guard (7.03) and casing (3.01) and secure with
screws (4.07) (see section 6.2 for torque settings)

