11
REAR PANEL ASSEMBLY
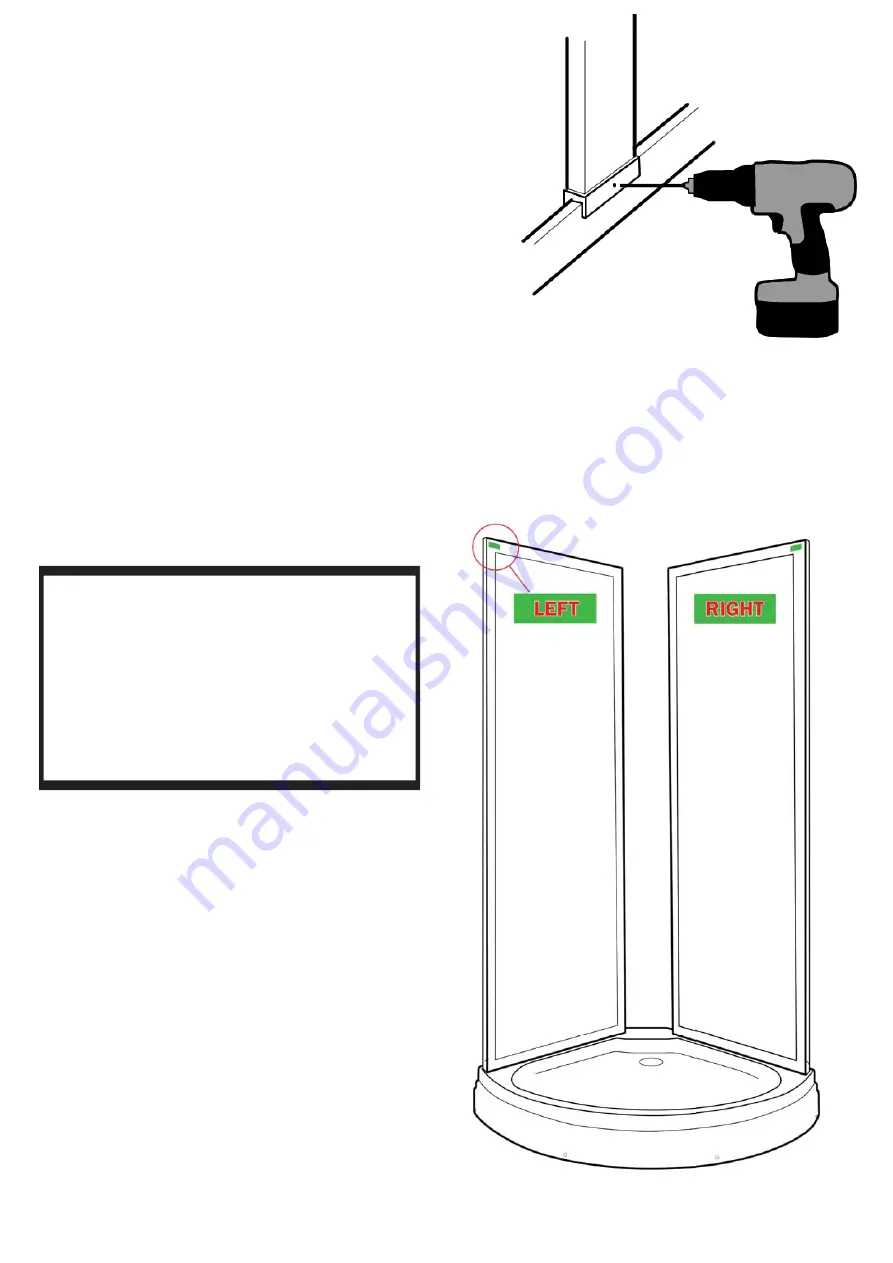
Locate the two rear, framed glass panels. Each
is marked (LEFT or RIGHT).
The inside edge to
go to the center control panel will be flat. The
outside end to connect to the frame work will
have a 'T' end
Facing the shower from the front, the panels fi t
according to their label.
Now position the Central Tower Panel between the
rear panels.
Align the holes on the rear panels to those in the
tower and fi x in place with the screws provided.
Using 8 of the shorter screws, fi x through the rear
glass panel fi xing holes into the central tower. DO
this on both long sides of the tower.
NOTE: A bead of sealant can be run
between the joining faces of the back
panels and Center Tower to provide an
extra level of water protection.
You should consider doing this on all
panels with meeting faces then simply
wipe off any excess so non will be 'on
show'
CAUTION WHEN DRILLING - ONLY DRILL
THROUGH THE INNER SINGLE LAYER OF FRAME
Re-fi x the SEAL TRIM back on the inside of the
lower curved frame.
SECURING THE
VERTICAL SECTIONS
Using the supplied bit, drill holes
on the inside of the cabin, look
for the holes in the grey ends
caps and drill a small hole into
the curved frame section and
fasten with screws from the
screw pack.
Repeat this process on both
panels, top and bottom.
Summary of Contents for Essence Range
Page 2: ......
Page 25: ......
Page 26: ......
Page 27: ......
Page 37: ...FOR TECHNICAL ASSISTANCE PLEASE CALL 0871 526 5926 ...


