English - 95 -
J
J
Connectivity
Wired Connectivity
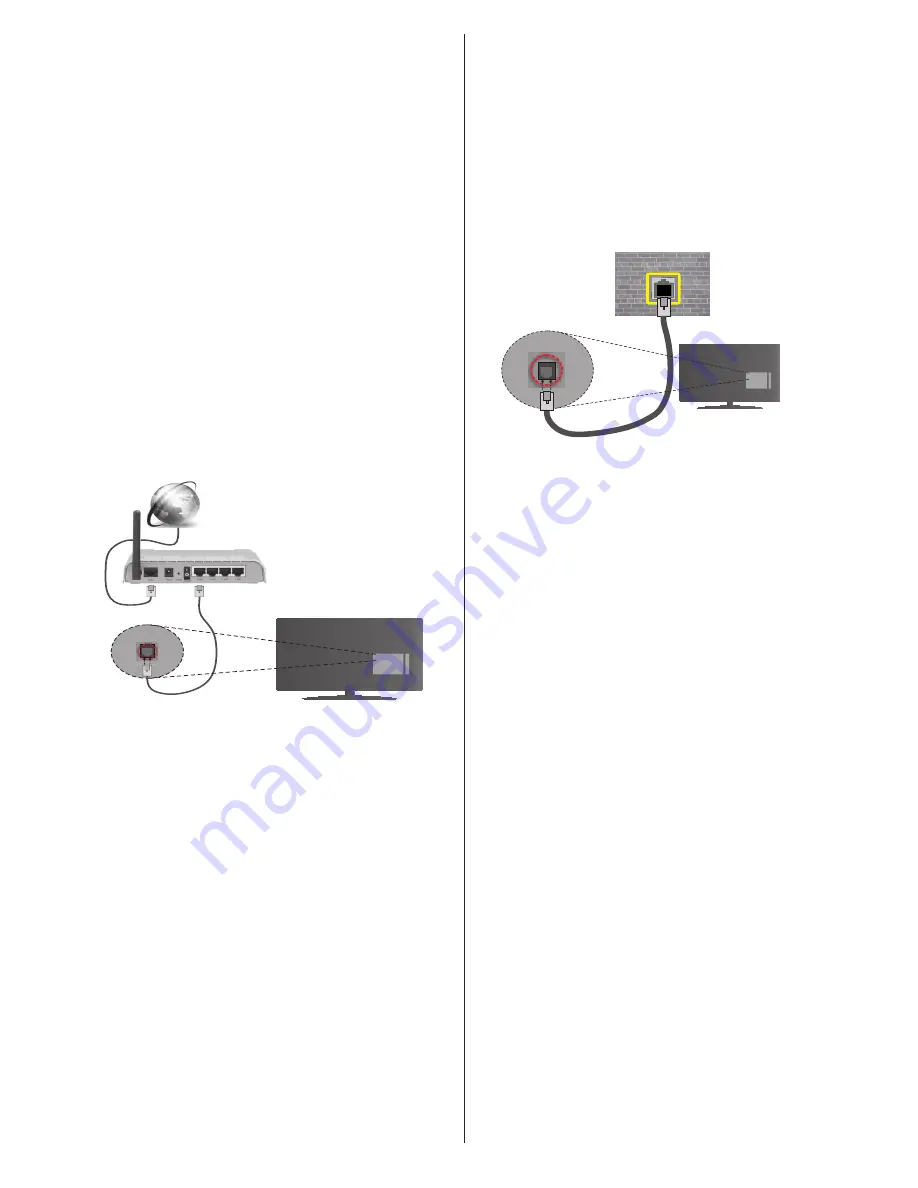
To Connect to a Wired Network
•
You must have a modem/router connected
to an active broadband connection.
•
Ensure that Nero Media Home software
is installed to your PC (for Audio Video
Sharing function). See “Nero Media Home
Installation” section.
•
Connect your PC to your modem/router.
This can be a wired or wireless connection.
•
Connect your TV to your modem/router
via an ethernet cable. There is a LAN port
at the rear (back) of your TV.
Broadband ISP connection
LAN (ethernet) cable
LAN input on the rear side of the TV
•
To access and play shared files, you must
select the Media Browser. Press the Menu
button and select Media Browser. Press OK
to continue. Select the desired file type and
press OK. You must always use the Media
Browser screen to access and play shared
network files.
•
PC/HDD/Media Player or any other
devices that are compatible should be used
with a wired connection for higher playback
quality.
To configure wired settings please refer
to the Network Settings section in the
System>Options Menu.
•
You might be able to connect your TV to
your LAN depending on your network’s
configuration. In such a case, use an ethernet
cable to connect your TV directly to the
network wall outlet.
LAN input on the rear side of the TV
network
wall socket
Configuring Wired Device Settings
Network Type
The Network Type can be selected as Wired
Device, Wireless Device or Disabled, in
accordance with the active connection to the
TV set. Select this as Wired Device if you are
connecting via an ethernet.
Internet Speed Test
Highlight Internet Speed Test and press
the OK button. TV will check the internet
connection bandwidth and display the result
when complete.
Advanced Settings
Highlight Advanced Settings and press the
OK button. On the next screen you can
change the IP and DNS settings of the TV.
Highlight the desired one and press Left or
Right button to change the setting from
Automatic to Manual. Now you can enter the
Manual IP and / or Manual DNS values. Se-
lect the related item in the drop down menu
and enter the new values using the numeric
buttons of the remote. Press the OK button
to save settings when complete.
Summary of Contents for 40UA9300
Page 1: ...TELEViZYON KULLANIM KILAVUZU OPERATING INSTRUCTIONS 4K 3D SMART 40UA9300 40 LED TV...
Page 173: ...iOS ANDROID...
Page 174: ......
Page 175: ......


