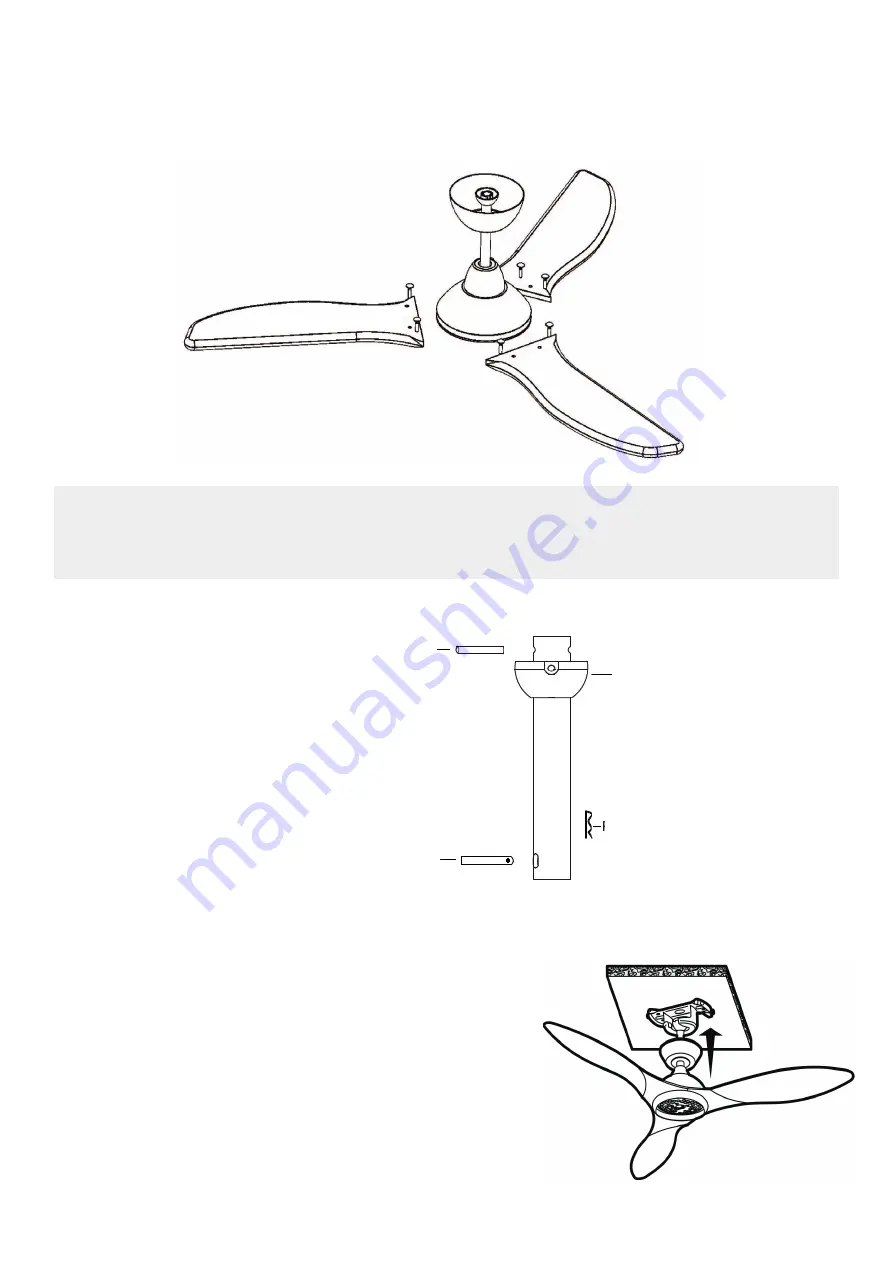
4. Remove ball and bolt from downrod,
insert wiring loom into and through
downrod.
5. Attached downrod to the coupler on fan motor using bolt
and inserting R pin. Ensure downrod is clamped with two
screws on the coupling to prevent shaking and wobbling
during fan operation.
6. Assemble the coupling cover and canopy over the downrod,
then re-assemble the hanger ball.
7. Carefully lift the fan assembly up to the hanging bracket.
Pin
Hanging Ball
R-Pin
Bolt
Warning: Electric Drills can over tighten screws and damage thread causing inconsistent balance and
rattling during operation. Blades damaged from the use of electric drills cannot be repaired and will
not be covered under warranty)
3. Take out the corresponding screw on the motor, point the fan blade hole at the corresponding hole on
the motor, and tighten it with the removed screw. Tighten all screws with screw driver, NO electric drill
to be used during assembling. Fan Supplied with 5” and 10” downrod options, please select one that
obtains desired height.
9


