background image

CAMSETW8


VELLEMAN 


1. 


2. 


scanning for all available channels 

1. Press loop key once to start 
2. Press loop key again to confirm 

and scanning begins 


lock or unlock the keys of the remote 

control 

In normal mode, press once to lock, 
" " flashes; press again to unlock, " " 
flashes 


Remarks: 


Press 


to select one channel. 


Press 

 to scan channels automatically 


Press 

 or 

 to stop scanning the channels. 


Press 

once after the setting is done to lock the remote control against unintentional touching or interference 

from other IR remote controls. The icon " " is now displayed; the keys on the remote control no longer work when 
the remote is locked. Just press 

 to unlock the remote again (" " is displayed). 


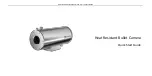
8. Camera Channel Set-up 


The channel number for the camera is printed on the camera. Use the channel button to select the same channel for 

the receiver as for the camera. The image is now displayed on the TV.


9. General Guidelines 


Protect the device against water and don't put objects containing water (e.g. vases) on top of the device 


Turn off the camera/receiver if the system is not in use.


Use the adapter to connect /disconnect the device with/from the mains.


Do not cut off the DC power cable to try and use it with a different power source


10. Specifications 

 
Operating temperature 

-10

 to +50°C/ +14 to +122°F


Storage temperature 

-30

 to +85°C/ -22 to +185°F


Operating humidity 

85% RH 


Camera 

 
Imaging sensor 

CMOS 

Total pixels 

628 x 582 (PAL); 510 x 492 (NTSC) 

Viewing angle 

62° 

Transmission frequency 

2.400 to 2.483MHz 

Transmission power 

10mW/CE; 2mW/FCC 

Modulation type 

FM 

Bandwidth 

18MHz 

Power supply 

8V DC 

Effective range (line of sight) 

100m (under ideal circumstances) 

Consumption current 

80mA & 120mA (IR ON) 

Night vision range 

7m 

Dimensions (W x D x H) 

Ø 44 x 56mm (without bracket) 

Weight 

220g 


Summary of Contents for CAMSETW8

Page 1: ...recycling service Respect the local environmental rules If in doubt contact your local waste disposal authorities Thank you for buying the CAMSETW8 Please read the manual thoroughly before bringing t...

Page 2: ...V mode 6 Use the channel button to set the same channel on the receiver as on the camera The picture of the cameras is now displayed on the monitor TV 7 Rotate the lens for optimum focus 8 Adjust the...

Page 3: ...button to select the same channel for the receiver as for the camera The image is now displayed on the TV 9 General Guidelines Protect the device against water and don t put objects containing water e...

Page 4: ...oestel of de verpakking geeft aan dat als het na zijn levenscyclus wordt weggeworpen dit toestel schade kan toebrengen aan het milieu Gooi dit toestel en eventuele batterijen niet bij het gewone huish...

Page 5: ...4 Sluit de adapter DC 12V 300mA aan op de ontvanger Stel de voedingsschakelaar in de ON stand De voedingsindicator licht op 5 Schakel de monitor TV in en selecteer A V mode 6 Stel met de kanaalknop he...

Page 6: ...te vergrendelen Zo kunt u de knoppen niet onopzettelijk indrukken en beschermt u de afstandsbediening tegen storing door andere IR afstandsbedieningen Het icoontje wordt nu weergegeven De knoppen wer...

Page 7: ...vari ren naargelang het weer de plaats storing of obstakels Reservecamera CAMW5 De informatie in deze handleiding kan te allen tijde worden gewijzigd zonder voorafgaande kennisgeving CAMSETW8 ENSEMBL...

Page 8: ...upteur d alimentation 6 Installation 1 Installez la cam ra l endroit de votre choix et r glez l angle 2 Connectez l adaptateur avec chaque cam ra 3 Connectez le r cepteur avec un moniteur TV l aide d...

Page 9: ...pour s lectionner canal 1 Pressez pour balayer les canaux automatiquement Pressez ou pour arr ter le balayage Pressez 1 x apr s le r glage pour verrouiller les touches L appareil est alors prot g cont...

Page 10: ...rant 250mA Dimensions La x D x H 106 x 150 x 43mm sans antenne Poids 250g Fr quence de canal canal 1 2 414MHz canal 2 2 432MHz canal 3 2 450MHz canal 4 2 468MHz La plage d mission effective d pend des...

Page 11: ...g 3 1 antena 2 ptica 3 soporte universal 4 conexi n de alimentaci n 5 Descripci n receptor v ase fig 4 1 pantalla para la se al IR 2 antena 3 selector de canal 4 LED de visualizaci n del canal 5 conex...

Page 12: ...n 2 canales al pulsar los botones 1 4 3 Confirme con el bot n loop El aparato empieza a explorar 1 2 Explorar para todos los canales disponibles 1 Pulse el bot n loop 1 x para empezar 2 Confirme con e...

Page 13: ...FM Ancho de banda 18MHz Alimentaci n 8V CC Rango efectivo rayo visual sin obst culos 100m en condiciones ideales Consumo de corriente 80mA 120mA IR ON Alcance del rango nocturno 7m Dimensiones An x P...

Page 14: ...hen wenden Sie sich f r Entsorgungsrichtlinien an Ihre rtliche Beh rde Danke f r den Kauf der CAMSETW9 Lesen Sie Ihre Bedienungsanleitung sorgf ltig durch berpr fen sie ob Transportsch den vorliegen S...

Page 15: ...ng bekommen 8 Regeln Sie die Helligkeit den Kontrast und die Farben des Monitor Fernsehers 9 Entfernen Sie die Batterie Isolierung der Fernbedienung ffnen Sie das Batterieladeger t und legen Sie eine...

Page 16: ...d stellen Sie keine Vasen auf das Ger t Schalten Sie die Kamera den Empf nger aus wenn Sie das Ger t nicht verwenden Verwenden Sie das Netzger t um das Ger t an das vom Lichtnetz anzuschlie en zu tren...

Page 17: ...weg 33 9890 Gavere Belgi Declare on our own responsibility that the finished product s Verklaren op eigen verantwoordelijkheid dat het afgewerkte product D clarons sous notre propre responsabilit que...

Page 18: ...icht den folgenden Normen und oder anderen normativen Dokumenten Es conforme a la s siguiente s norma s y o a uno o varios otros documentos normativos EMC ETS 301 489 3 v1 2 1 2000 LVD EN 60065 2002 R...

Reviews: