


To configure the ACT365-VCU to use DHCP addressing, log in to the ACT365-VCU web interface (see
Accessing the ACT365-VCU web interface
on page 17), then:
1. Click the
Network Settings
tab.
2. Under
Static IP Settings
, delete values for
Gateway
,
IP Address
and
Subnet Mask
.
3. Click
Apply
to save changes.
The unit reboots. After reboot, DHCP addressing is in effect.
You can optionally enter a
Site Name
and
VCU Description
in the
VCU Information
section on
the
Network Settings
tab. This information helps to identify the units and may assist Vanderbilt
support if you need help.
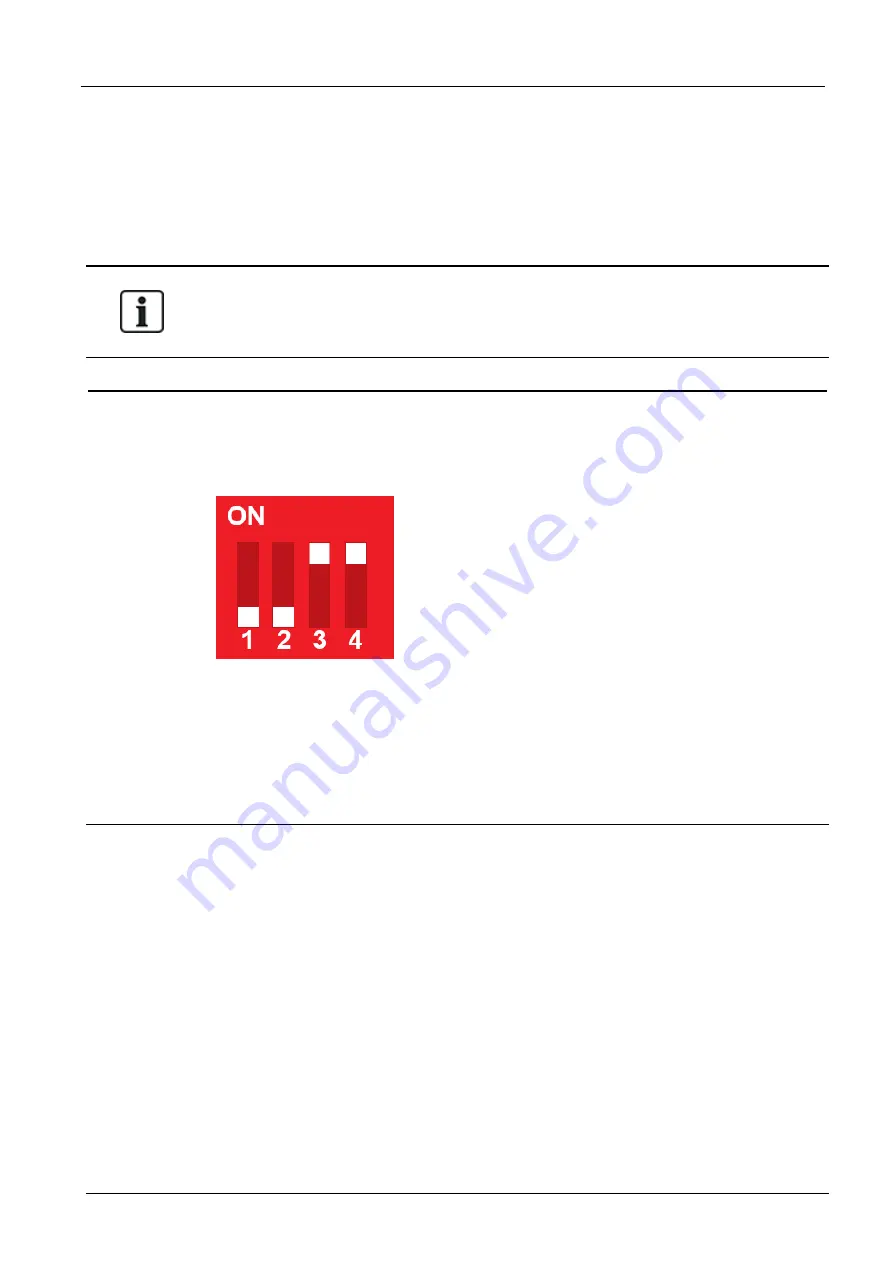
5.7.1 Reset the ACT365-VCU hardware to use DHCP
If an ACT365-VCU has an invalid IP address, or the unit is no longer accessible on its known IP
address, the red LED will flash on unit boot. You can reset the ACT365-VCU to use DHCP using the
following procedure:
1. Set the DIP switches as follows:
When the blue lights start to flash, this indicates that the IP reset is complete.
2. Set the all DIP switches to OFF.
The unit reboots automatically.
After reboot, the unit is back on DHCP.
5.8 Stream Settings on ACT365-VCU
Video quality can be configured from the
Stream Settings
tab in the ACT365-VCU web interface. The
settings apply to all cameras connected to the ACT365-VCU. If a particular camera does not support
the selected values, the next available values will be used instead on that camera.
ACT365-VCU / ACT365-VCU2A / ACT365-VCUPoE – Installation and Operating Instructions
Configuring ACT365-VCU
© Vanderbilt 2019
25
A-100528-b
20.05.2019


