- 10 -
g
We thank you for having purchased this product that will hereafter
also be referred to as “tool”, “machine”, or “electric chain saw”.
!
!
IMPORTANT! The electric chain saw is suitable for cutting wood
(felling small trees, sectioning felled trunks, cutting branches on
felled trunks).
Pruning or trimming trees with the operator off the ground is
prohibited.
These instructions contain information deemed necessary for proper
use, knowledge and standard tool maintenance. Additional com-
prehensive information on cutting techniques must be acquired by the
user, from specific book and publications or by attending specialised
courses with practical training.
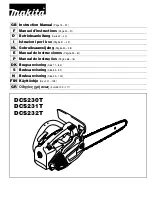
MACHINE DESCRIPTION (FIG. A)
1 Battery compartment
2 Rear handgrip
3 Rear hand guard
4 ON/OFF switch
5 On lever release button
6 Oil tank cap
7 Front hand grip
8 Front hand guard/ emergency chain brake lever
9 Oil level inspection window
10 Bar
11 Bar cover
12 Chain
13 Spike bumper
14 Electric motor cooling vents
15 Battery release device
16 Bar fixing pin
17 Bar fixing wheel
18 Housing
19 Sprocket
20 Air discharge holes
21 Bar grooves
22 Oil hole
23 Oil hole
24 Operation light
25 Chainstay
26 Chain tensioner plate
SYMBOLS
Carefully observe the symbols in fig. B and memorise the respective
meaning. Correct interpretation of the symbols allows safer use.
1 Model, technical data, batch number.
3 Certification Marks
4 Before starting-up, pull the front hand guard.
5 Oil for lubricating the chain.
V Volt
Hz Hertz
~ alternating current
W Watt
m metres
mm millimetres
“ inches
s seconds
kg kilograms
n
0
speed when idle
min
-1
rotations per minute
dB decibel
INSTALLATION
WARNING! The manufacturer declines all responsibility for any
direct and / or indirect damage caused by an incorrect electrical
connection.
WARNING! Before performing the following operations, make sure
that the battery is not inserted in the appliance
TRANSPORT
To transport the appliance always use its packaging; this will protect
it from impacts, dust and humidity which can compromise its regular
operation. During transport, disconnect the battery from the appliance.
HANDLING
Hold the appliance by the handle and bring it to the side without
touching the ground; after use place it gently.
COMMISSIONING
In the place that you will use the electrical appliance it is worth
considering:
- that the area is not damp and that adverse weather conditions are
not present.
- that a large operational area free of impediments is provided around.
- that there is good lighting.
- which is used in the vicinity of the main switch with differential (for
the battery charger).
- that the power supply system is earthed in compliance with the
standards (only if the electrical appliance is of class I, ie equipped
with a plug with earth cable).
- that the ambient temperature is between 10 ° and 35 ° C.
- that the environment is not in a flammable / explosive atmosphere.
Remove the appliance and the components and visually check their
perfect integrity; at this point proceed to a thorough cleaning.
CHARGING THE BATTERY (Follow the instructions attached to the
charger)
WARNING! Before using the electric saw, the battery must be
fully charged.
WARNING! Only charge with a charger designed for this type of
device. Using an unsuitable battery charger can cause the battery
to malfunction, and in certain cases, fire.
To keep the battery efficient, do not discharge it completely.
Perform a subsequent full top-up:
- After each use.
- At least every 4 months, even if not used.
- If during work you notice a noticeable drop in the performance of
the appliance.
INSERTING AND REMOVING THE BATTERY (fig.D)
- Insert the batteries through the guides on the battery compartment.
(Item 1)
- Remove the battery from the tool housing by acting on the release
device on the batteries (pos.15)
WARNING! The machine works exclusively by inserting both bat
teries. Do not use batteries with different capacities.
ASSEMBLY INSTRUCTIONS
IMPORTANT! Before carrying out any operation on the chain saw,
disconnect the batteries from the appliance.
IMPORTANT! Always use protective gloves when handling the
chain.
BAR WITH “NO TOOLS” TENSIONING, WITH TENSIONING PLATE
1. Assembly of the bar, the chain, and the housing (Fig. C)
- Place the chain saw on a flat surface and remove the housing (18)
by unscrewing the wheel (17).
- Insert the chain (12) around the bar (10) being careful to assemble
it in the correct direction.
- Pass the chain around the sprocket (19) and positioning the bar


