background image

Serial ATA 4-Drive NAS

User Guide

Protecting Local Disks - 116

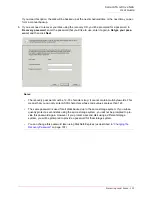
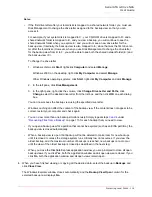
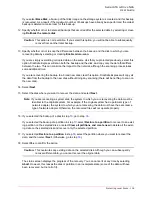
6. When the confirmation message appears, click 

Yes

.

The disk or partition is recovered to exactly its state at the date and time of the selected backup.

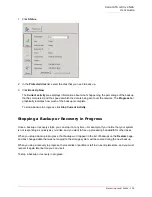
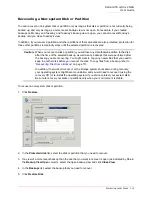
To let you monitor the progress of this activity, the 

Status

 page appears automatically. The 

Current 

activity

 area displays the percentage of the recovery that has completed, and the speed at which the 

data is being sent over the network. The 

Progress

 bar graphically indicates how much of the recovery 

is complete.

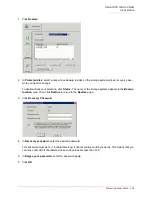
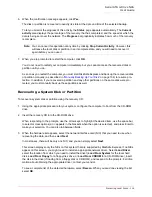
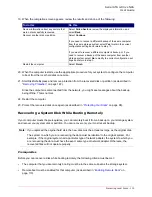
7. When you are prompted to restart the computer, click 

OK

.

You do not need to restart your computer immediately, but you cannot access the recovered disk or 
partition until you do.

As soon as you restart the computer, you must start DiskSafe Express and back up the recovered disk 
or partition manually (as described in 

“Manually Backing Up Your Disk”

 on page 104) to resume pro-

tection. In addition, if you recovered a partition and any other partitions on the same disk were pro-
tected, you must manually back up those partitions as well.

Recovering a System Disk or Partition

To recover a system disk or partition using the recovery CD:

1. Using the appropriate procedure for your system, configure the computer to boot from the CD-ROM 

drive.

2. Insert the recovery CD into the CD-ROM drive.

When responding to the prompts, use the arrow keys to highlight the desired item, use the space bar 
to select or clear options (an 

X

 appears in the brackets when the option is selected), and press Enter to 

make your selection. You can also tab between fields.

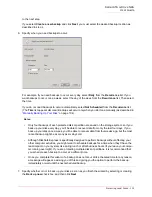
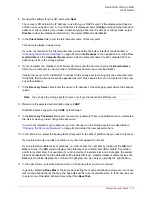
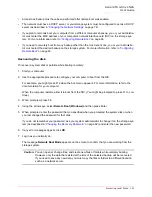
3. When the hardware list appears, select the network interface card (NIC) that you need to use when 

recovering the data, and then select 

Next

.

In most cases, there will be only one NIC, and you can simply select 

Next

.

This screen displays only the NICs on this system that are supported by DiskSafe Express. If no NICs 
appear on this screen, you might need to install an appropriate network driver. Select 

Load Driver

select the location from which you need to install the driver (

Load From System

 for the local hard 

disk, 

Load From Floppy

 for a floppy disk drive, or 

Load From CDROM

 for a CD-ROM drive), insert 

the disk in the drive (if loading from a floppy disk or CD-ROM), and respond to the prompts. For infor-
mation about obtaining the appropriate driver, contact your vendor.

To see a complete list of the detected hardware, select 

Rescan

. When you are done viewing the list, 

select 

OK

.

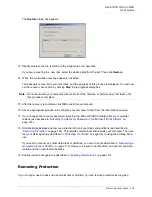
Note:  

You can cancel this operation at any time by clicking 

Stop Current Activity

. However, this 

will leave the local disk or partition in an incomplete state, and you will need to recover it 
again before you can use it.

Summary of Contents for USR8700

Page 1: ...Serial ATA 4 Drive NAS User Guide R46 1702 00 rev 0 8 04 07 ...

Page 2: ...SRobotics and a copy will be provided to you UNITED STATES GOVERNMENT LEGEND If you are a United States government agency then this documentation and the soft ware described herein are provided to you subject to the following All technical data and computer software are commercial in nature and developed solely at private expense Software is delivered as Commercial Computer Software as defined in ...

Page 3: ... Interface 25 Accessing the Web User Interface Using a Web browser 25 Accessing the Web User Interface Using the Storage System Console 26 Logging In to the Web User Interface 27 Navigating the Web User Interface 28 Browser Based Web User Interface Navigation 30 Adding Users 31 Creating Shared Folders 34 Accessing Shared Folders 37 Windows Users 37 Linux Users 42 Mac Users 43 Managing Your Storage...

Page 4: ...skSafe Express 91 Starting DiskSafe Express 95 Activating Your license 96 Protecting Your Disks 98 Manually Backing Up Your Disk 104 Stopping a Backup or Recovery in Progress 105 Changing the Backup Schedule 106 Changing the Recovery Password 107 Enabling or Disabling Remote Boot 109 Enabling Remote Boot 110 Disabling Remote Boot 111 Recovering Data 111 Recovering Files from a Backup 113 Recoverin...

Page 5: ...sing DiskSafe Express 144 Using the Recovery CD 145 Resetting the Recovery Password in the Microsoft iSCSI Initiator 145 Support Information Regulatory Information Manufacturer s Declaration of Conformity 149 Radio and Television Interference 149 UL Listing CUL Listing 150 For Canadian Users 150 CE Compliance 150 U S Robotics Corporation Two 2 Year Limited Warranty 1 0 GENERAL TERMS 151 2 0 CUSTOM...

Page 6: ...Serial ATA 4 Drive NAS User Guide vi ...

Page 7: ...ning off the computer before disconnecting a device from the storage system To avoid shorting out your computer when disconnecting a network cable first unplug the cable from the network adapter on the back of your computer and then from the network jack When reconnecting a network cable to your computer first plug the cable into the network jack and then into the network adapter Ensure that nothi...

Page 8: ...Serial ATA 4 Drive NAS User Guide Safety Instructions 8 ...

Page 9: ...of a system crash or disk failure With DiskSafe Express you can recover your local disks or partitions without having to reinstall or reconfigure the operating system or applications dramatically shortening recovery time Package Contents Physical Features Front The Serial ATA 4 Drive NAS system has the following status LEDs USR8700 Serial ATA 4 Drive NAS Installation CD ROM Power Cord Quick Instal...

Page 10: ...data protection In addition to a linear disk configuration in which all the disks are treated as independent entities the storage system supports several different types of RAIDs redundant arrays of independent disks This means that you can take advantage of the build in data protection and data duplication offered by advanced RAID levels If your storage system has multiple hard disks and one fail...

Page 11: ...ach up to two pass through printers to the storage system s USB sock ets and all users can access them Hardware Specification Processor Intel IOP80219 400 MHz Memory DDR 256 MB Flash 32 MB NOR Flash Hard Disks Up to four 3 5 SATA I hard disks 80 500 GB each Note The total amount of storage space cannot exceed 2 TB Maximum Capacity 2 TB Network Intel gigabit LAN port interface SATA Controller Intel...

Page 12: ... client server default IP address is 192 168 0 101 Supported Web Browsers Microsoft Internet Explorer 6 0 or newer Mozilla Firefox 1 06 or newer RAID Standard RAID 0 RAID 1 RAID 5 RAID 5 spare RAID 10 File Sharing Protocols CIFS SMB NFS Access Control Users have read only or read write access to shared folders Users access shared folders using passwords Note Refer to your printer s documentation f...

Page 13: ...es a shared folder named public which all Windows and Mac OS X users can access However you might want to create other shared folders as well For example in an office environment you might want to create a shared folder for company policies that everyone can view and separate folders for confidential business documents that only selected individuals can view or change In a home environment you mig...

Page 14: ...Configure your Storage System on page 20 If you bought your Serial ATA 4 Drive NAS with the disks already installed and configured and you do not want to change your disk configuration skip step one and proceed with Attaching USB Devices in step two on page 15 Step One Determine Your Configuration Before you start the physical installation of your storage system decide which configuration is best ...

Page 15: ...the storage system 3 Linear Independent disks 1 5 TB No Good RAID 0 Striping 1 5 TB No High RAID 5 Striping with parity 1 0 TB Yes Good 4 Linear Independent disks 2 0 TB No Good RAID 0 Striping 2 0 TB No High RAID 5 Striping with parity 1 5 TB Yes Good RAID 5 with Spare Striping with parity spare drive automatically rebuilds a failed drive 1 0 TB Yes Good RAID 10 Striping Mirroring 1 0 TB Yes Good...

Page 16: ...ng a flat surface such as a table or desk top flex the sides of the spacer apart from each other to release the screws 4 Make sure that the hard disk is a SATA disk It should have a SATA connector similar to the following 5 Slide the new hard disk into the tray connector end down and toward the back of the tray and fasten the screws on the sides of the tray 6 Slide the hard disk and tray back into...

Page 17: ...ble make sure that the power switch on the back of the storage system is set to the on position Then press and release the power button on the front of the storage system The power and Disk LEDs flash while the storage system is booting Once the system has finished booting the Disk LEDs stop flashing If the hard disk installation was successful the Disk LED is blue If there is a problem the Disk L...

Page 18: ...TA 4 Drive NAS 1 Insert the USRobotics Installation CD ROM into your CD ROM drive 2 If prompted select your preferred language then review the License Agreement and click Yes The installation CD prompts you to make a choice 3 Select Console Installation The installation wizard appears 4 Follow the on screen prompts to install the Storage System Console When installation is complete ...

Page 19: ...Click Finish Step Four Initialize the Hard Disks To initialize the hard disks follow these steps 1 Start the Storage System Console as follows Windows Vista or XP click Start All Programs Storage System Console Other Windows operating systems click Start Programs Storage System Console ...

Page 20: ...ystem Manager If you see the Login page your storage system was initialized and configured before you bought it You are finished with the installation procedure and can begin using your Serial ATA 4 Drive NAS system or you can reconfig ure your disks if you choose to do so Skip the remaining installation steps and proceed with Access ing the Web User Interface on page 25 ...

Page 21: ...sks be sure to wait until the Disk LED is blue before you click Scan 3 Click Browse and locate the USRobotics Installation CD ROM 4 Open Firmware fs usr 1 2 b609 pkg 5 On the System Initialization page click Upload The firmware on the storage system s internal flash memory is uploaded to the hard disks Note USRobotics strongly recommends that you install all the hard disks that you want to use in ...

Page 22: ... On the welcome page click Next The End User Software License Agreement page appears 2 If you agree to the terms select I accept the license agreement and click Next The Host Name page appears 3 Click Next to accept the default storage system name USR8700 OR Enter the name that you prefer and then click Next The storage system name can be up to 15 characters long and can include letters numbers an...

Page 23: ...ress automatically from that server If your network does not have a DHCP server the default IP address and subnet mask are used The default IP address is 192 168 0 101 and the default subnet mask is 255 255 255 0 To accept the default settings click Next Otherwise specify the desired settings and then click Next The Disk Configuration page appears The options that appear on this page vary dependin...

Page 24: ...ed adding disks select your configuration and click Next When you click Next the Disks to Back Up screen appears 6 In Number of disks to back up select the total number of disks that you plan to back up to this stor age system The maximum number of disks you can back up is 25 If you do not plan to back up any disks select 0 click Next and go to step 9 If you leave this field blank 70 of your stora...

Page 25: ... My computer right click the disk and select Proper ties Other Windows operating systems click Start My Computer right click the disk and select Properties Be sure to enter the entire capacity of each disk not just the amount of used disk space If a disk is smaller than 1 GB divide the number of megabytes by 1024 For example a 512 MB disk would be 5 GB 512 divided by 1024 is 5 Note Only 99 of the ...

Page 26: ...press see the Protecting Local Disks on page 89 9 in the confirmation window click OK The Configuration page appears and the system is configured according to the settings you speci fied Once the configuration is complete the system restarts Congratulations You have successfully completed the installation procedure Please register your Serial ATA 4 Drive NAS at www usr com productreg Caution If yo...

Page 27: ...page 72 and try to access it using a Web browser Using the Storage System Console you can access the Web User Interface only from a computer in the same subnet as the storage system but you do not need to know the name or IP address of the storage system or otherwise modify the network settings Accessing the Web User Interface Using a Web browser To access the Web User Interface using a Web browse...

Page 28: ... System Console on page 16 Running the Storage System Console Once you have installed the Storage System Console you can run it and access the Web User Interface 1 Start the Storage System Console as follows Windows Vista or XP click Start All Programs Storage System Console Other Windows operating systems click Start Programs Storage System Console As soon as you start the Storage System Console ...

Page 29: ...ther you access the Web User Interface using a Web browser or the Storage System Console the login page appears This ensures that only authorized individuals can change the storage system settings To log in enter the administrator user name and password and then click Log In The default administrator user name is admin and the default password is storage These are case sensitive However you can ch...

Page 30: ...e storage system how much disk space is allocated for shared folders how much is allocated for backups and how much is used for each Initially there is no used space This page also displays total number of shared folders and the number of networked computers backup clients that have backed up one or more disks on the stor Note Do not use the navigation bar while in the process of making changes to...

Page 31: ...password or delete the backups for a particular computer hard disk For more information see Managing Backups on page 61 and Chapter Protecting Local Disks beginning on page 89 Advanced Provides access to advanced storage system configuration options such as setting up e mail alerts upgrading the firmware removing USB devices changing the system network or disk Note The total storage capacity will ...

Page 32: ...played in the Address bar The history of the chosen item expands upon selection revealing a list of pages previously visited in that site Depending on the browser used either the pages titles or addresses are displayed Selecting the appropriate title or address opens that specific page Back and Forward Buttons Browsers that access the Web User Interface have Back and Forward buttons in their toolb...

Page 33: ...tly who can access what information In addition only Windows and Mac OS X users can use the guest user name If there are Linux users or Mac users who aren t using OS X in your network you must add users to allow those individuals to access any shared folders In Active Directory authentication mode you can add only Linux other Mac users When you add a Windows or Mac OS X user a folder with the same...

Page 34: ...ac OS X user CIFS or Linux Other Mac user NFS The page that appears next varies depending on the user type you selected Note Linux users and Mac users who are not using OS X access shared folders using the Network File System NFS In this environment access to shared folders is given to entire computers not to individual users of those computers However in Windows and Mac OS X environments each com...

Page 35: ...Serial ATA 4 Drive NAS User Guide Getting Started 33 Windows Mac OS X user CIFS Linux Other Mac user NFS ...

Page 36: ... need to create shared folders if your network includes Linux or other Mac users You can create up to 128 shared folders Users who can access and write to these shared folders can create additional sub folders for organizing the files they store there For this type of user Do this Windows Mac OS X user CIFS Enter the user name and password for accessing the shared folders You must enter the passwo...

Page 37: ...hared Folders The Shared Folders page appears 2 Click Add Note The Shared folders list includes usbdisk1 and usbdisk2 whether or not any USB disks have been connected to the storage system In addition shared folders created as the result of adding a Windows Mac OS X user do not appear in the Shared folders list ...

Page 38: ...hey have When you add a user to the list of authorized users for a shared folder or USB disk that change takes effect immediately However if you remove a user from the list of authorized users or if you change the user s access the change does not take effect until that user disconnects from the shared folder or USB disk or shuts down the computer For example the user Alice might have read write a...

Page 39: ...ments each computer user can have individual access to a shared folder If you created groups as described in Adding a Group on page 49 you can perform this step with the Group tab The Group tab displays all groups For example if you created a group named Group1 and added User2 and User3 to that group by default none of them are assigned access to the shared folder Select Group1 and click RO Read O...

Page 40: ...ies depending on your operating system 3 In Drive select the drive letter that you want to assign to the shared folder 4 In Folder enter the following storage_system shared_folder where storage_system is the name or IP address of the storage system and shared_folder is the name of the shared folder For example if the storage system name is Storage and the shared folder name is Photos you would ent...

Page 41: ...torage System Console on page 16 2 Windows Vista or XP click Start All Programs Storage System Console Other Windows operating systems click Start Programs Storage System Console As soon as you start the Storage System Console it automatically scans the network for storage sys tems This might take a few minutes As soon as the scan is complete the left pane displays a tree Note You can use the stor...

Page 42: ...olders that you want to access The storage system name expands to display all the available shared folders Those shared folders Note If you connect a storage system to the network after the Storage System Console has already scanned it or if you change the IP address of the storage system you must click Discover Storage Systems to scan the network again and update the tree in the left pane ...

Page 43: ...m 5 In Drive select the drive letter that you want to assign to the shared folder 6 To automatically connect to this shared folder each time you log on to Windows select Reconnect at Note All shared folders appear in the left pane However you can access only the ones that you are authorized to use If your storage system uses Active Directory authentication mode you must manually create a guest use...

Page 44: ...rage_system where storage_system is the name or IP address of the storage system 3 Mount the desired shared folder by entering the following command mount storage_system nas NASDisk 00002 folder my_directory where storage_system is the name or IP address of the storage system folder is the name of the shared folder and my_directory is the name of the directory that you created in step 1 If you inc...

Page 45: ...t a share select the name of the shared folder that you want to access and then click OK 4 Enter the user name and password for accessing this shared folder and then click OK If the guest user has access to this shared folder you can use guest as both the user name and pass word An icon with the name of the shared folder is created on the desktop 5 Repeat steps 1 through 4 for each shared folder t...

Page 46: ...Serial ATA 4 Drive NAS User Guide Getting Started 44 ...

Page 47: ...re you physically unplug them Changing the System Settings Change the storage system name or time and date settings as well as the administrator name or password for logging in to the Web User Interface Changing the Network Settings Change the workgroup name the storage system server s IP address the gateway or DNS server settings or the settings that allow the storage system to act as a DHCP or F...

Page 48: ...tion mode For that reason there is only one editable user shown above For more information about authentication modes refer to Changing the Authentication Mode on page 53 If you are using local authentication mode you can also put Windows and Mac OS X users into groups This makes it easier to give several users access to the same shared folder at once For example in an office environment you might...

Page 49: ...IP address or computer name but not the computer description Changing this information immediately disconnects that computer from the shared folders To modify a user 1 In the navigation bar click Users 2 Select the user that you need to modify 3 Click Edit The page that appears next varies depending on the type of user you selected Windows Mac OS X user CIFS Note To change the user name or compute...

Page 50: ...he same as the person s Windows user name and password the person will not be prompted to provide a user name and password when accessing the shared folders Linux Other Mac user NFS Enter the computer s IP address or the actual computer name in the computer s system configuration A single user can actually represent multiple computers In IP address or computer name you can use the wildcard charact...

Page 51: ...If you are using local authentication mode you can add a group modify the group membership or remove groups at any time If you are using Active Directory authentication mode you can view group membership but not add modify or remove groups Those actions can be done only on the Active Directory server Adding a Group In local authentication mode when you create a group you typically specify which us...

Page 52: ...long to this group and then click OK Note If the storage system uses Active Directory authentication mode and you select a Windows or Mac OS X user this button is dimmed To do this Do this Add all users to the group Click Add All Users All users move from Available users to Group members Add selected users to the group In Available users select the user s that you need to add and then click Add Se...

Page 53: ...connected to that shared folder and you subsequently remove her from the Executives group she will continue to have read write access to that folder until she disconnects or shuts down her computer The next time she connects she will continue to have access to the shared folder since she is still a member of the Marketing group but she will be able to only view the files there she will not be able...

Page 54: ...ared folder On the other hand if the Executives group had read write access to the Budget shared folder but Alice had read only access when you remove the group Bob and Carlos will no longer have access to the Budget shared folder since their access rights were determined by their group membership but Alice will continue to have read only access since that access right was granted to her on a user...

Page 55: ...count However the Active Directory administrator can create one on the Active Directory server With Active Directory authentication mode the clocks of the storage system and the Active Directory server must not differ by more than five minutes Errors will occur whenever the storage system tries to connect to the Active Directory server such as when you set the authentication mode when synchronizat...

Page 56: ...ssing the storage system 4 Click Change Authentication Mode If you are currently using local authentication mode the Active Directory Server page appears 5 In Primary server IP address enter the IP address of your primary Active Directory server 6 If desired enter the IP address of a secondary Active Directory server in Secondary server IP address This server is used if the primary Active Director...

Page 57: ...roups that will be able to access shared folders on the storage system enter the name in Organizational unit name up to 256 characters The unit must not have more than 100 subunits and the name must be pre ceded by a slash as in Sales If you omit an organizational unit name you can browse the Active Directory tree on the next page However if the tree has more than 100 subunits you must specify an ...

Page 58: ...he Active Directory server This account is used to automatically configure the Active Directory server to allow the storage system to become a trusted member and communicate directly with that server It is used only when setting up this relationship Note If the storage system time and Active Directory server time differ by more than five minutes an error message appears You must adjust the storage...

Page 59: ...nd the user name or password for browsing the Active Directory tree To modify the Active Directory properties 1 In the navigation bar click Users 2 In the left pane click Active Directory Properties The Update Authentication Mode page appears 3 Make the desired changes and click Apply To change this Do this The IP address of the pri mary Active Directory server In Primary server IP address enter t...

Page 60: ...rs Computers or Groups 3 Click Synchronize The page displays the progress of the synchronization Managing Shared Folders When you click Shared Folders in the navigation bar the page displays a list of shared resources including both shared folders and USB devices When you select an item in the Shared folders list the users and groups that can access that item appear in Users with access For groups...

Page 61: ...te a shared folder refer to Creating Shared Folders on page 34 Changing User Access to Shared Folders For any shared folder that appears in Shared folders or any USB disk you can change which users can access it and what level of access they have When you add a user to the list of authorized users for a shared folder or USB disk that change takes effect immediately However if you remove a user fro...

Page 62: ...the same shared folder 5 Select the desired access settings for each user and then click Apply Deleting a Shared Folder Once you have created a shared folder you can delete it at any time When you delete a shared folder any users who are currently accessing it are immediately disconnected from it Note Linux users and Mac users who are not using OS X access shared folders using NFS In this environm...

Page 63: ...e last four backups and the backup disk ID the number used to identify the backup on both the storage system and on the Status Notes You cannot delete the public folder You cannot delete the contents of a USB disk using the Shared Folders page To delete its con tents you must give yourself read write access to that disk as described in Changing User Access to Shared Folders on page 59 access the d...

Page 64: ...oting Remotely on page 119 For booting remotely you can also specify the MAC address to use if you need to remotely boot a computer using a different computer s backup and the backup to boot from In addition when a user removes protection for a disk the existing backups are not deleted The user can re use the allocated space for new backups or you can delete those backups manually using the Web Us...

Page 65: ...m the latest backup You can boot from an earlier backup but no matter which backup you boot from you can recover only the latest backup To configure remote boot 1 In the navigation bar click Backups 2 In Computer name within Remote boot select the name of the computer whose backup you need to remotely boot from 3 If you are remotely booting the computer from its own backup do not change the MAC ad...

Page 66: ...owed to back up to the storage system To both delete all backups of all disks for a particular computer and the computer name you must delete the client To delete a client 1 In the navigation bar click Backups 2 Select the computer whose backups and computer name you need to delete from the storage system in the first Select column 3 Click Delete Client Note If you delete all backups of all disks ...

Page 67: ...sks fails or if insufficient space is available for creating new files or performing a backup To take advantage of this feature you must have access to an SMTP e mail server either within your own Note If you delete a client and the user did not previously remove protection for that disk when the user subsequently accesses DiskSafe Express the Status page will indicate that the backup of the prote...

Page 68: ... and password for logging into that server in User name and Password If you clear this option no authentication will be performed 5 If your e mail server cannot use the default sender e mail address root localhost or if you need the individuals who receive e mail notifications to be able to reply to the alert enter the address that you need to appear as the return address in Sender e mail address ...

Page 69: ... the password that you use for logging in to the Web User Interface Caution When you upgrade the firmware the storage system restarts and access to the Web User Interface is temporarily interrupted In addition users will not be able to access the shared folders while the system restarts If users have shared files open data might be lost Be sure to have all users save their changes and close any op...

Page 70: ...the names usbprinter1 and usbprinter2 These names cannot be changed When you plug a USB device into the storage system the storage system automatically detects it and adds that device to the USB page You might need to click Scan to update the display However when you need to unplug a USB device from the storage system you must first use the Web User Interface to disconnect it This prevents data co...

Page 71: ...name and the current date and time You can also change the administrator name and password used for logging into the Web User Interface In local authentication mode you can change any of these settings at any time In Active Directory Note If you inadvertently disconnect a USB device that you need to retain unplug it from the storage system plug it back in and then click Scan This reactivates the U...

Page 72: ...ers as described in Disconnecting from Shared Folders on page 136 and then access the shared folders again using the new name as described in Accessing Shared Fold ers on page 37 If the DiskSafe Express users connected to the storage system using its name they must remove protection from all disks that connected to this storage system as described in Remov ing Protection on page 122 and protect th...

Page 73: ...r IP address In NTP server name or IP address enter the name or IP address of the Network Time Protocol server from which the storage system should set its time You can use a name only if it is resolvable The storage system will synchronize its time with the NTP server every hour The administrator name or password In Administrator name enter the user name to use for logging in to the Web User Inte...

Page 74: ...r Guide Managing Your Storage System 72 5 When the confirmation message appears click OK Changing the Network Settings The Network page displays the network settings that were set when you initially configured the storage system ...

Page 75: ...s who accessed the shared folders using the previous IP address will be disconnected and must access them again using the new IP address as described in Accessing Shared Folders on page 37 Users who backed up their disks to the storage system using the previous IP address must remove protection for all affected disks as described in Removing Protection on page 122 and protect their disks again as ...

Page 76: ...ting IP address and enter the last IP address in Ending IP address For example if the Starting IP address is 192 168 0 103 and the Ending IP address is 192 168 0 107 the storage system will allocate the IP addresses 192 168 0 103 192 168 0 104 192 168 0 105 192 168 0 106 and 192 168 0 107 to the first five computers that try to obtain their IP addresses from the storage system As soon as one of th...

Page 77: ...that is whether the disks use a linear or RAID configuration and the RAID level The FTP settings If you need to use the storage system as an FTP server select the Enable FTP server check box If you do not need to use the storage system as an FTP server clear this option For information about accessing the storage system using FTP refer to Accessing the Storage System through FTP and SSH on page 85...

Page 78: ...ffect the RAID For detailed information about RAIDs and how adding removing or swapping disks affects the storage system refer to Disk Configurations beginning on page 125 Expanding the shared storage The disk space on your storage system is divided into two portions One portion is for shared folders the other is for backups of your computer disks The Storage Status view on the Home page shows how...

Page 79: ...e space that is currently allocated for shared folders To allocate all available disk space select Add all available disk space To allocate a specific amount select Add this much disk space and enter the desired number of gigabytes The minimum is 1 GB and the maximum is the total amount of space currently available You can specify only whole numbers 6 Click OK 7 When the confirmation message appea...

Page 80: ... do so one at a time and click Scan after each action If you Caution Changing the disk configuration or percentage to allocate for shared folders will delete all user information and all data on all the disks Before you change these settings have all the users disconnect from all shared folders as described in Disconnecting from Shared Folders on page 136 and remove protection from all disks as de...

Page 81: ...ders and backups only 200 MB will be allocated for shared folders click Finish To allocate more space for shared folders select Allocate more space for shared folders and then specify how much space to allocate either All available disk space or Specified disk space If you select Specified disk space enter the number of gigabytes to allocate for shared folders the mini mum is 1 GB Then click Finis...

Page 82: ...he navigation bar and click System Status in the left pane you can view many of the operational parameters of your storage system including CPU usage memory usage the amount of time that the storage system has been running the current fan speed the temperatures of the CPU and disks the IP address of the gateway which you can change as described in Changing the Network Settings on page 72 the IP ad...

Page 83: ...nsure that unauthorized individuals do not make changes to the storage system To log out 1 In the navigation bar click Log Out 2 When the confirmation message appears click OK The Log Out page appears Note The fan speed changes depending on the temperature of the unit If the temperature of the motherboard reaches or exceeds 85 C 185 F or if the temperature of the drive bay reaches or exceeds 55 C ...

Page 84: ...d to do this To shut down the storage system using the Web User Interface Caution An immediate shutdown can damage either the hard drive or the hard drive s file structure Caution If you shut down the storage system users will no longer be able to access the shared folders on the storage system If users have shared files open data might be lost Be sure to have all users save their changes and clos...

Page 85: ...rd enter the password for logging in to the Web User Interface 4 Click Shut Down A message appears indicating that the system is shutting down Once the storage system shuts down if you refresh the browser window it will be blank If you subse quently try to access the Web User Interface an error message will appear since the storage system will no longer be running ...

Page 86: ...Serial ATA 4 Drive NAS User Guide Managing Your Storage System 84 ...

Page 87: ...nly the public folder 2 If prompted enter your user name and password for accessing shared folders and then click OK If you used the guest user name the password is also guest 3 Double click any of the displayed folders or files to open them You have full read write access to all the folders and files in both the public folder and your personal folder Even if you browse to other websites you remai...

Page 88: ...P address of the storage system The SSH page appears This is a hidden web page that is not accessable from the Web User Inter face 2 Click Turn On When SSH becomes active the SSH page changes to allow the administrator the option of later disabling SSH To return to the Web User Interface click the browser s Back button until the Web User Interface reappears or enter this URL in the browser s addre...

Page 89: ...e To disable SSH support 1 Enter this URL in the browser s address bar and then press Enter http storage_system ssh_controlF cgi where storage_system is the name or IP address of the storage system The SSH page appears 2 Click Turn Off When SSH becomes inactive the SSH page changes to allow the administrator the option of later enabling SSH Note You can use the storage system name only if that nam...

Page 90: ... Interface click the browser s Back button until the Web User Interface reappears or enter this URL in the browser s address bar and then press Enter http storage_system home_mainF cgi where storage_system is the name or IP address of the storage system This URL returns to the Home page of the Web User Interface ...

Page 91: ...ry subsequent backup To ensure that valuable storage space isn t used up by duplicate data when DiskSafe Express performs each subsequent backup it copies only the data that has changed since the last time a backup was performed This also minimizes the impact on your network Through unique technology on the storage system each backup is a complete point in time image You can view or recover the en...

Page 92: ...icrosoft iSCSI Initiator 2 0 To download and install this initiator 1 Open a Web browser enter the following in the address bar and press Enter http www microsoft com downloads details aspx FamilyID 12cb3c1a 15d6 4585 b385 befd1319f825 DisplayLang en 2 Scroll down to the Files in This Download section and download the item that ends with x86fre exe 3 Select the option to run the file Run Open or R...

Page 93: ...OK 8 If you agree to the terms of the license agreement select I Agree and then click Next 9 When the installation completes click Finish After your computer restarts you can install DiskSafe Express Installing DiskSafe Express You must install DiskSafe Express on each computer whose local disks you need to protect To install DiskSafe Express 1 Insert the USRobotics Installation CD into a CD ROM d...

Page 94: ...ft iSCSI Initiator 2 0 before you can install DiskSafe Express When you have finished installing the iSCSI initiator re start the installation of DiskSafe Express 4 If Microsoft NET Framework 1 1 is already installed go to step 7 If this component is not currently installed the following prompt appears Click Yes to install this component You cannot install DiskSafe Express without first installing...

Page 95: ...click OK the Intelligent Management Agent is installed automatically if it is not already installed and the welcome page for installing DiskSafe Express appears 7 On the welcome page click Next The license agreement appears 8 If you agree to the terms of the license agreement select I accept the terms of the license agree ment and then click Next Note The remaining time might be reported as 0 but ...

Page 96: ...omplete the installation and restart your computer click Finish If you do not want to restart your computer at this time select No I will restart my computer later and then click Finish You do not need to restart the computer immediately after installation but you do need to restart it before running DiskSafe Express Note You must install DiskSafe Express on the drive that you boot from that is wh...

Page 97: ...Disk wizard still starts but after 30 days you will no longer be able to perform backups or recovery until you activate the license For more information refer to Activating Your license on page 96 Starting DiskSafe Express To start DiskSafe Express Windows Vista or XP click Start All Programs USRobotics DiskSafe Express Other Windows operating systems click Start Programs USRobotics DiskSafe Expre...

Page 98: ...license is activated automatically However if your Internet connection was temporarily down or if your computer has no Internet connection your license was not activated You must activate your license within 30 days of installing DiskSafe Express otherwise you will not be able to perform backups or recovery If your Internet connection was temporarily down your license will be activated automatical...

Page 99: ... to the following address Activate Keycode falconstor com 6 When you receive an e mail response save the returned license file back to the shared folder floppy disk or USB disk 7 If you did not save the file to a shared folder take the floppy disk or USB disk back to the computer where DiskSafe Express is installed 8 From the Action menu click License Offline Activation 9 Click Import Activation C...

Page 100: ... your Internet con nection is temporarily down your license will be activated automatically the next time you run DiskSafe Express with a restored Internet connection If this computer does not have an Internet connection you must perform offline activation as described in the previous section Protecting Your Disks After you install DiskSafe Express and restart your computer the Protect a Disk wiza...

Page 101: ...d as a single entity This means that you can t later recover only one partition you must recover the entire disk If you select just a par tition you can subsequently recover just that partition In addition you can recover a data disk or partition using DiskSafe Express but you can recover a sys tem disk or partition only using the recovery CD so if you have separate partitions for your system info...

Page 102: ...ally discovered or if you need to back up your disk to a different storage system enter the name or IP address of the desired storage system in Storage system name or IP address Then click OK 4 From Backup locations select the storage system to use for backups of this disk or partition The In this case Go to this step You never previously completed the Protect a Disk wizard 3 You previously comple...

Page 103: ...t click Remove and then click Yes to confirm the removal You can remove a storage system only if it is not currently being used to protect another disk Once you have selected the desired backup location click Next and go to step 6 5 If you previously protected this disk and removed protection specify whether or not you want to re use the existing backup or create a new one If you select Re use the...

Page 104: ...lick Next Notes Only four backups of each protected disk or partition are saved on the storage system so if you back up your disk every day you ll be able to recover data from only the last four days If you back up your disk once a week you ll be able to recover data from four weeks ago but the most recent backup might be as many as six days old Although DiskSafe Express is specifically designed t...

Page 105: ...y password must be 12 16 characters long It cannot contain multi byte words This means that you can only enter ASCII characters whose code values are less than 128 The same password is used for all disks backed up to the same storage system If you subse quently protect a second disk using the same storage system you will not be prompted to pro vide this password again However if you protect a seco...

Page 106: ...rvals unless you chose Not Scheduled from the Recurrence list when you completed the schedule However you can also back up a disk manually at almost any time For example if you are about to install a new application you might want to back up your disk right before you do that so that if any problems occur you can recover your disk to the state it was in immediately before you installed the applica...

Page 107: ...urrent Activity Stopping a Backup or Recovery in Progress Once a backup or recovery starts you can stop it at any time for example if you notice that your system is not responding as quickly as you d like and you want to free up processing bandwidth for other tasks When you stop a backup in progress that backup won t appear in the list of backups on the Restore page and any changed data that was n...

Page 108: ...urrent Activity If you are stopping a backup the backup stops immediately If you are stopping a recovery a confirmation message appears Click OK to stop the recovery now or click Cancel to proceed with it Changing the Backup Schedule When you protect a disk you specify when you need backups to occur However you can change this schedule at any time To change the backup schedule ...

Page 109: ...chedule change takes effect immediately and the date and time of the next scheduled backup appears in the Next backup area Changing the Recovery Password When you protect a disk you specify what password to use for recovering the disk using the recovery CD or when you remotely boot from a backup on the storage system You can change this password at any time as long as the Status of the backup is N...

Page 110: ...lick Status The name of the storage system appears in the Backup location area Then click Restore to return to the Restore page 3 Click Recovery Password 4 In Recovery password enter the desired password This password must be 12 16 characters long It cannot contain multi byte words This means that you can only enter ASCII characters whose code values are less than 128 5 In Retype your password ent...

Page 111: ...using a different network interface card NIC you must first disable remote boot and then enable it again specifying the other NIC In addition after you recover a disk while booting remotely you must disable and re enable remote boot Caution You must determine whether or not your computer supports the recovery CD before a system failure occurs To do this perform steps 1 through 3 in Recovering a Sy...

Page 112: ... Yes to allow the temporary network interruption Your network connection will be restored imme diately after this process is complete On the Enable Remote Boot dialog box the Details area shows the progress of the enabling proc ess If any problems are encountered for example if the selected disk or partition was not your sys tem disk that portion of the process is marked as Failed You can click th...

Page 113: ...Disabling remote boot restarts your computer automatically Save and close any open files on your system before doing this To disable remote boot 1 From the Action menu click Disable Remote Boot 2 When the confirmation message appears click OK Your computer restarts automatically Recovering Data With DiskSafe Express there are several ways to recover data from your backups The best method to use de...

Page 114: ...nd then recover your system disk For more information refer to Recovering a System Disk While Booting Remotely on page 119 Caution When you do this you will lose any data that was written to the disk after the time of the selected backup as well as any backups that were performed after the backup you are recovering You might want to copy any newer files that you need to keep to another disk before...

Page 115: ... 4 Click View Backup 5 When the confirmation message appears click OK After a few moments a window opens automatically displaying all the data associated with the selected backup You can now open the folders and files in the backup view to make sure they contain the information you need and copy any of the data to your local disk Caution You can open and change the files in the backup view and eve...

Page 116: ... Manage Other Windows operating systems click Start right click My Computer and click Manage 2 In the left pane click Disk Management 3 In the right pane right click the volume click Change Drive Letter and Paths click Change select the desired drive letter from the list box and then click OK on each dialog box You can now access the backup view using the specified drive letter Windows caching can...

Page 117: ...a more recent backup than the one that you want to recover is open as indicated by Yes in the Backup View Open column select the open backup view and click Close View 4 In the Backups list select the backup that you need to recover 5 Click Restore Disk Caution When you recover a disk or partition you will lose any data that was written to the disk after the time of the selected backup as well as a...

Page 118: ...uter to boot from the CD ROM drive 2 Insert the recovery CD into the CD ROM drive When responding to the prompts use the arrow keys to highlight the desired item use the space bar to select or clear options an X appears in the brackets when the option is selected and press Enter to make your selection You can also tab between fields 3 When the hardware list appears select the network interface car...

Page 119: ...orage system where the backups reside 8 Make sure the selected authentication type is CHAP DiskSafe Express supports only CHAP authentication 9 In the Recovery Password field enter the recovery password that you specified when you protected the disk or when you last changed the password If you do not remember your password you can change it on the storage system as described in Changing the Recove...

Page 120: ... Next 16 If you selected the backup of a disk in step 10 go to step 18 If you selected the backup of a partition in step 10 select Restore to a partition to recover to an exist ing partition on the selected disk or select Clear all partitions and create new to delete all the exist ing data on the selected disk and recover only the selected partition 17 If you selected Restore to a partition in ste...

Page 121: ...u are remotely booting must be in the same subnet as the storage system Remote boot must be enabled for that computer as described in Enabling Remote Boot on page 110 To do this Do this Review information about any sectors that were not successfully recovered Select Failed Sectors review the displayed information and select Back Recover another disk or partition Select Continue If you need to reco...

Page 122: ...o boot from the NIC For example you might press F12 when the boot menu appears For more information refer to the documentation for your computer When the computer restarts allow it to boot from the NIC You might be prompted to press F1 to con tinue 3 When prompted press F8 4 Using the arrow keys select Remote Boot Windows and then press Enter 5 When prompted enter the password that you specified w...

Page 123: ...y do not try to use DiskSafe Express for any operation other than recovering the system disk Note If no backups appear in this list the backup that you booted from is not using the same recovery password as the storage system This can occur if you changed the recovery password on the storage system before booting remotely or if you changed it between backups in DiskSafe Express and booted from an ...

Page 124: ...restarts as described in Resetting the Recovery Password in the Microsoft iSCSI Initiator on page 145 18 Start DiskSafe Express and remove protection from all your disks and partitions as described in Removing Protection on page 122 This disables remote boot and restarts your computer Then pro tect your disks again as described in Protecting Your Disks on page 98 reusing the existing back ups If y...

Page 125: ... the space that was allocated for previous backups You can also delete the existing backups on the storage system to free up space for backups of other disks or partitions either for this computer or other computers For more information refer to Configuring Remote Boot on page 63 To remove protection 1 In Protected disk select the disk for which you want to remove protection 2 From the Action menu...

Page 126: ...Serial ATA 4 Drive NAS User Guide Protecting Local Disks 124 ...

Page 127: ...fers increased performance by distributing the data across multiple disks But unlike RAID 0 RAID 5 also offers data protection If your storage system has three disks of equal size two thirds of each disk are used for data and the remaining third contains the parity infor mation needed to reconstruct either of the other two In this way if any of the three disks fails it can be reconstructed when a ...

Page 128: ... is functioning properly A degraded state indicates that one or more disks have been removed or failed but because of the data protection offered by the RAID you can continue to access all the data In a normal state you cannot add a disk to a RAID 0 or RAID 1 configuration Any disk that you install will not be used unless you subsequently reconfigure the storage system as described in Reconfigurin...

Page 129: ... click Add New Disk If the information on this page is not correct click Scan to scan the storage system again and update the page You can also click Shut Down to shut down the storage system but you will be presented with this page again the next time you access the Web User Interface When you click Add New Disk the following page appears ...

Page 130: ...s Add the disk to a linear configuration or use it as a spare for a normal three disk RAID 5 configuration Click Add The Disks page indicates the current state of the disk configuration Add the disk to the storage system but not add it to the RAID at this time Click Ignore The Disks page lists the disk is part of the storage system but its status is New indicating that it is not being used If you ...

Page 131: ...ng any one of them will cause the RAID to be degraded but all the data will still be available However after you remove one disk all the other disks become RED since removing any one of them at this point will cause the entire RAID to fail If you remove a viable disk and cause only RAID degradation you can re install the same disk and resume normal operation For information about adding a disk ref...

Page 132: ...priate action Caution Reconfiguring your disks will delete all the data on your storage system To do this Do this Scan the storage system again and update the information on the page Click Scan Re install the same disk or install a new disk Click Shut Down After the storage system shuts down install the disk and then restart the system Note If you are re installing multiple disks be sure to re ins...

Page 133: ...his Do this Scan the storage system again and update the information on the page Click Scan Re install the same disk Click Shut Down After the storage system shuts down re install the same disk and then restart the system Note If you removed multiple disks be sure to re install them in the opposite order than you removed them Reconfigure the storage system using the available disks Click Reconfigu...

Page 134: ...eb User Interface for the new unit see Accessing the Web User Interface on page 25 As long as the new unit is in the same subnet as the old unit you can access the Web User Interface using the same procedure you used previously However if the new unit is in a different subnet you might need to install the Storage System Console on a computer in the same subnet as the storage system and use the Sto...

Page 135: ...Down to shut down the system If no message appears you can manage the unit as you did before Note If the firmware on your new unit is newer than that on your hard disks you can obtain the latest firmware from www USR com To apply it see Upgrading the Firmware on page 67 ...

Page 136: ...Serial ATA 4 Drive NAS User Guide Disk Configurations 134 ...

Page 137: ... button until the power LED comes on and then release the button 3 As soon as the LEDs for all of your disks have come on press and hold the power button for 2 sec onds and then release the button The default password is storage The default login user name is admin Viewing the System Log The System Log page displays a list of events that have occurred on the storage system Reviewing this list can ...

Page 138: ...red folder varied depending on the operating system used by the user Windows Users Windows users can disconnect from a shared folder using either Windows or the Storage System Console Disconnecting Using Windows To disconnect from a shared folder using Windows 1 Close any files that you currently have open in the shared folder 2 Windows Vista click Start Computer Windows 2000 on the desktop double...

Page 139: ...such as mnt my_directory use the same path wen unmounting it Mac Users The procedure for disconnecting from a shared folder on a Mac varies depending on whether the Mac is running OS X or an older operating system Mac OS X To disconnect from a shared folder on a Mac running OS X 1 On the desktop select the shared folder from which you want to disconnect 2 From the File menu click Eject Any open wi...

Page 140: ...r Mac OS X users try changing the password as described in Modifying Users on page 47 and accessing the shared folder again For Linux users make sure the computer name or IP address is correct If it s not recreate the user by removing the existing user as described in Removing Users on page 48 and adding it again as described in Adding Users on page 31 If the storage system uses Active Directory a...

Page 141: ... check the network connection in a Windows environment click Start Run and type cmd At the command prompt type the following text and press Enter ping IP_address where IP_address is the IP address of the storage system If you do not see Reply from the problem is with your network If you are using Active Directory authentication mode make sure that User must change password at next logon is cleared...

Page 142: ...o the Active Directory tree Not all of my Active Directory users or groups were added to the storage system The storage system can accommodate a maximum of 128 users and 128 groups If the selected organizational unit on the Active Directory server has more than that the excess users or groups will not be added to the storage system To better control which users or groups are added to the storage s...

Page 143: ...re the system time settings with the Active Directory server s time If they are not within five minutes of each other change the time for the storage system as described in Changing the System Settings on page 69 so that their times match Return to the Users Users Computers page and click Synchronize Now The storage system is not distributing IP addresses Make sure that Enable DHCP server is selec...

Page 144: ... not corrupted Restart the storage system and try again This ensures that any temporary files on the storage system are deleted before the firmware is upgraded Troubleshooting DiskSafe Express This section provides general information about common problems that you might have with DiskSafe Express and steps you can take to resolve them The disk that I want to protect isn t listed DiskSafe Express ...

Page 145: ...torage system will not recognize it any longer Remove protection for all your disks or partitions as described in Removing Protection on page 122 delete the old computer name from the storage system as described in Deleting a Client on page 64 and then protect your disks again as described in Protecting Your Disks on page 98 A backup did not occur at its regularly scheduled time Check the schedule...

Page 146: ... Up Now I forgot my recovery password Reset the password using the storage system as described in Managing Backups on page 61 Once you reset it on the storage system you can use the new password with the recovery CD or for booting remotely from the storage system Creating a Diagnostic File In some cases you might need assistance from Technical Support to solve problems that you might have with Dis...

Page 147: ...covery CD menu press Alt F1 For information about using the recovery CD to restore data refer to Recovering a System Disk or Partition on page 116 Resetting the Recovery Password in the Microsoft iSCSI Initiator The recovery password used by the recovery CD and for booting remotely is actually the Microsoft iSCSI Initiator CHAP secret When you protect a disk or change the recovery password using D...

Page 148: ...initiator 1 Windows Vista or XP click Start All Programs Microsoft iSCSI Initiator Microsoft iSCSI Initi ator Other Windows operating Systems click Start Programs Microsoft iSCSI Initiator Microsoft iSCSI Initiator 2 Click the Targets tab 3 If more than one target appears in Targets select the one that contains the name of the storage sys tem The Status should be Disconnected 4 Click Log On 5 Clic...

Page 149: ... 116 Belgium België www usr com emailsupport nl 070 23 35 45 Belgium Belgique www usr com emailsupport be 070 23 35 46 Czech Republic Česká republika www usr com emailsupport cz Denmark www usr com emailsupport ea 38323011 Finland www usr com emailsupport ea 08 0091 3100 France www usr com emailsupport fr 0825 070 693 Germany Deutschland www usr com emailsupport de 0180 567 1548 Greece Ελλάδα www ...

Page 150: ...r current support contact information go to www usr com support Turkey Türkiye www usr com emailsupport tk 0212 444 4 877 United Arab Emirates www usr com emailsupport me 0800 877 63 United Kingdom www usr com emailsupport uk 0870 844 4546 Country Webmail Voice ...

Page 151: ...comply with the limits for a Class B digital device pursuant to Part 15 of the FCC Rules These limits are designed to provide reasonable protection against harmful interference in a residential installation This equipment generates uses and can radiate radio frequency energy If this equipment is not installed and used in accordance with the manufacturer s instructions it may cause harmful interfer...

Page 152: ...f present are connected together This precaution may be particularly important in rural areas Caution Users should not attempt to make electrical ground connections by themselves but should contact the appropriate inspection authority or an electrician as appropriate CE Compliance Declaration of Conformity We U S Robotics Corporation of 935 National Parkway Schaumburg Illinois 60173 5157 USA decla...

Page 153: ...ve product or part with new or reconditioned parts or to exchange the defective product or part with a new or reconditioned product or part that is the same or similar or if neither of the two foregoing options is reasonably available U S ROBOTICS may at its sole discretion provide a refund to the CUS TOMER not to exceed the latest published U S ROBOTICS recommended retail purchase price of the pr...

Page 154: ...tain warranty serv ice authorisation 3 3 For information on how to contact U S ROBOTICS Technical Support or an authorised U S ROBOT ICS Service Centre please see the U S ROBOTICS corporate Web site at www usr com 3 4 CUSTOMER should have the following information items readily available when contacting U S ROBOTICS Technical Support Product Model Number Product Serial Number Dated Proof of Purcha...

Page 155: ...red or replaced product or part 5 0 LIMITATIONS 5 1 THIRD PARTY SOFTWARE This U S ROBOTICS product may include or be bundled with third party software the use of which is governed by separate end user license agreements provided by third party software vendors This U S ROBOTICS Limited Warranty does not apply to such third party software For the applicable warranty refer to the end user license ag...

Page 156: ...ALLATION MAINTENANCE USE PERFORMANCE FAILURE OR INTERRUPTION OF ITS PRODUCTS EVEN IF U S ROBOTICS OR ITS AUTHORISED RESELLER HAS BEEN ADVISED OF THE POSSIBILITY OF SUCH DAMAGES AND LIMITS ITS LIABILITY TO REPAIR REPLACEMENT OR REFUND OF THE PURCHASE PRICE PAID AT U S ROBOTICS OPTION THIS DISCLAIMER OF LIABILITY FOR DAMAGES WILL NOT BE AFFECTED IF ANY REM EDY PROVIDED HEREIN SHALL FAIL OF ITS ESSEN...

Reviews: