34
10. Thoroughly dust off the mirror using an oil free compressed air source or the Freon duster
described earlier. If mirror is extremely dirty use a stream of lens cleaning solution #1 from
the small plastic wash bottle to flush the surface instead.
11. Fold a lens tissue in half and place next to the mirror surface. Soak mirror with lens
cleaning solution #1 through the cloth and leave cloth against mirror for one minute.
Finally, drag the lens tissue across the mirror surface cleaning and drying the lens with the
dry portion of the lens tissue in one movement.
12. Inspect mirror and repeat procedure if necessary until mirror is clean.
OTE:
Never use the same tissue twice. Dust build-up on the tissue may scratch the surface
of the mirror.
13. Reinstall mirror holder into shutter support with mirror surface towards front of machine
and tighten set screws until mirror holder rotates with some friction.
14. Realign optics as follows.
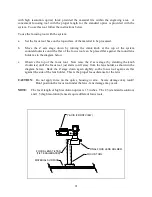
16. The interlock defeat tool must be inserted into the receptacle in the center at the front of the
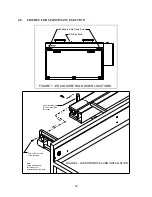
machine (reference Figure 3).
Special laser safety goggles must be worn during alignment
to avoid exposure to invisible laser radiation when system is
open and interlock defeated.
Avoid eye or skin exposure to direct
or scattered radiation. Severe eye damage can result from exposure to
laser radiation.
17. Be sure shutter switch is in the closed position then reconnect power cord and turn system
on.
18. Set laser power at system control panel.
a.
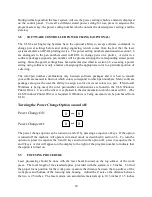
Depress and release keypad "Program Select".
b.
Depress and release keypad "Pulse Width".
OTE:
Upper display should be flashing.
c.
Using keypad, enter 50.
d.
Depress and release keypad "Pulse Width".
e.
Depress and release keypad "Pulse Rate".
Caution

