


9
USSC
When you start a fire in the furnace and it reaches op
-
erating temperature, the blower(s) will come on auto
-
matically. The snap-disc is adjustable from 100°F(A) to
140°F(E), Each click on the switch is approximately 5°F. It
comes from the factory, set at 120°F, setting C. The rocker
switch on the top of the junction box gives you the option
to run one blower or two. If the switch is ON, both blow
-
ers will come on when the snap-disc reaches the set tem
-
perature. If the swithc is OFF, only one blower will operate.
When the furnace temperature drops approximately 20°F
below the snap-disc setting, the blower(s) will shut off.
GENERAL FURNACE OPERATION
TESTING AND OPERATING PROCEDURES
CAUTION:
Never use gasoline, gasoline-type lantern fuel,
kerosene, charcoal lighter fluid, or similar liquids to start or
“freshen up” a fire in the furnace. Keep all such liquids well
away from the furnace while it is in use.
CAUTION:
To prevent flame and smoke spillage, the slide
baffle must be pulled out and the fuel door must be cracked
for ten seconds before being fully opened.
Do not over fire your furnace! After you have become
familiar with its operating, you should know how much
wood to use.
1. Open spin draft cap on ash door.
2. Pull the slide baffle rod to the front position.
3. Open the fuel load door and light fire using kindling and
several sheets of newspaper, then close the furnace door.
The furnace door should remain closed for 5 to 10 minutes
in order to establish the fire. If the fire has established, you
are ready to load the furnace.
4. Load the furnace, close the load door and push the slide
Baffle rod to rear.
5. Close the spin draft cap on ash door, leaving it cracked
about the diameter of a dime.
6. Adjust the spin draft cap on the intake just below the feed
door to allow sufficient combustion air into the firebox.
This setting may increase or decrease depending on the
fuel being used and it’s moisture content.
7. The blower(s) will being to distribute warm air when the
snap-disc reached set-point.
STARTING A WOOD FIRE
Using Forced Air Draft (optional)
Shut off FAD when fuel door is open
STARTING A COAL FIRE
If you burn coal, a forced air draft is required
Shut off FAD when fuel door is open
Open smoke pipe damper all the way. Open all draft
controls on your furnace. Pull the slide baffle forward.
Place about 10-15 lb. of coal in on the shaker grates. It
should come up to about half of the first firebrick level.
Place crumpled paper over the coal and crisscross a
couple handfuls of dry kindling wood 3/4” in thickness
on top of paper.
Ignite the paper and close loading door. Wait about 30
minutes until coal fire is established before adding more
coal. NOTE: NEVER load coal over the level of firebrick.
Close by-pass damper and set all draft controls to your
own needs. It may take 3 to 4 coal fires to determine
how your local coal and the Clayton Furnace reacts
together. Adjusts drafts accordingly.
Loading with a good bed of coals in the morning - Open
by-pass damper.
1. In normal shaking, only rock the grates a small amount
to sift ash through. Do not agitate the fire bed too
often. This practice will waste coal. If glowing coal is
visible in the ash pan, you have shaken to much.
2. Remove all ashes every day from ash pit.
CAUTION:
Ashes should be placed in a metal container with
a tight fitting lid. The closed container of ashes should be
placed on a non-combustible floor or on the ground well
away from all combustible materials pending final disposal.
If the ashes are disposed of by burial in soil or otherwise
locally dispersed, they should be retained in the closed
container until all coals have thoroughly cooled.
3. With your poker, push hot burning embers to the rear
of the unit and add green coal in front. NEVER load
over height of firebrick. This can result in damage to
your furnace and home.
4. Close by-pass damper.
Too much draft air will cause clinkering of coal and will
waste heat up the chimney. Shut draft down to as low
a point as you can and still heat your home.
1. NOTE: Never stand in front of loading door when
opening it. Stand to the side.
2. NEVER completely cover the live fire with fresh coal.
Always leave a generous area of glowing coal at the
top of the fire and at the rear.
3. Always keep the ash pit clean.
FACTORY SETTING
120°F
125°F
130°F
135°F
140°F
100°F
105°F
110°F
115°F
STARTING A WOOD FIRE
1. Start a fire inside the firebox as described above.
2. The forced air draft cycles on demand from the wall
thermostat. Setting the U.S. Stove thermostat four degrees
higher than your existing thermostat is recommended. In
operation, the power draft blower will run until the U.S.
Stove thermostat temperature setting is reached. The
draft regulator on the forced air draft is preset at the
factory and should require no adjustment.
CAUTION:
To avoid excessive temperatures, do not
operate with fuel door or ash pan open.
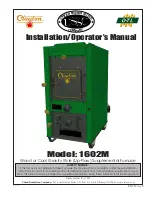
Summary of Contents for Clayton 1602M
Page 18: ...18 USSC NOTES...
Page 19: ...19 USSC NOTES...