background image

REMOTE OPERATION 

~

44


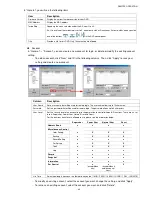
Camera 

In “Dvr” 

 “Camera”, you can specify a channel to enable the recording function by selecting the check box 

“Record”, choose to activate the “Covert Recording” function by selecting the check box “Cover”, and rename 

the channel title which will be displayed in the live view screen by double-clicking the channel title. 


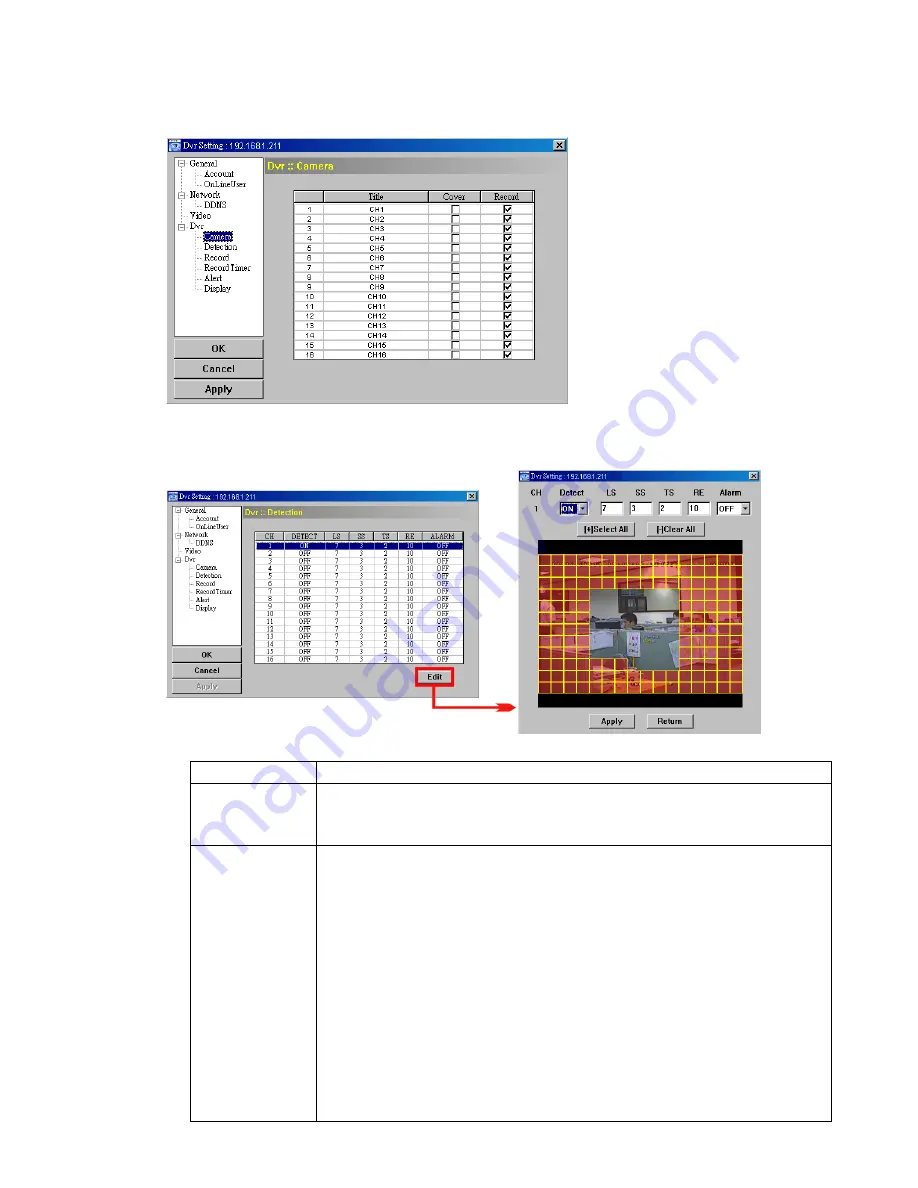
Detection 

Select the desired channel, and click “Edit” to enter the motion detection sensitivity and area-setting page. 


Please see the description below for each function: 

Function 

Description 

DETECT 

Enable (ON) or disable (OFF) the function of “Motion Detection”. 

If this function is enabled, you might need to set the motion detection sensitivity or simply keep the 

default values. For details, please see the description below. 

Motion Detection 
Sensitivity 
(LS / SS / TS / RE) 

Set the detection sensitivity in 4 different adjustable factors (LS / SS / TS / RE). 

LS 

“Level of Sensitivity”, is to set the sensitivity of comparing two different images. The smaller the 
value is, the higher sensitivity for motion detection. 

The highest sensitivity setting is 0, and the lowest sensitivity setting is 15. The default value is 7. 

SS 

“Spatial Sensitivity”, is to set the sensitivity for detecting the size of one object (the number of the 
grids) on the screen. The smaller the value is, the higher sensitivity for motion detection. 

The highest sensitivity setting is 0, and the lowest sensitivity setting is 15. The default setting is 3. 

TS 

“Time of Sensitivity”, is to set the sensitivity regarding how long one object stays in the detection area 
and triggers the recording. The smaller the value is, the higher sensitivity for motion detection. 

The highest sensitivity setting is 0, and the lowest sensitivity setting is 15. The default setting is 2. 


RE 

“Reference”, is to set a reference for detection. The default value is 10, which means the DVR will 

Summary of Contents for MDR604

Page 1: ...256Z MDR616 608 604 manual_V0 94 MANUAL Please read instructions thoroughly before operation and retain it for future reference The image shown above may differ from the actual product appearance...

Page 2: ...ference requirements Disclaimer We reserve the right to revise or remove any content in this manual at any time We do not warrant or assume any legal liability or responsibility for the accuracy compl...

Page 3: ...OPERATION Take 16CH DVR as an example 10 4 1 Live Page 10 4 2 Recording 10 4 3 Playback 11 4 4 Key Lock and Unlock 11 4 5 Upgrade 12 4 6 Search 12 5 MAIN MENU 13 5 1 Menu Configuration 13 5 2 Menu Ope...

Page 4: ...ration 32 Record 32 Playback 32 Network Backup 33 8 1 3 AP Control Panel 34 8 1 4 AP Functions 35 Image Display 35 Address Book 35 Miscellaneous Control 37 Information 53 DVR Control 54 8 2 IE Web Bro...

Page 5: ...ce The CIF image quality is highly improved for more clear and detailed image Multiplex Operation Allows live display record playback backup and network operations at the same time Backup Function Sup...

Page 6: ...kup and network Audio I O 4 audio inputs 1 audio output Mono 4 audio inputs 1 audio output Mono 1 audio input 1 audio output Mono Motion Detection Area 16 12 grids per camera for all channels Motion D...

Page 7: ...buttons to setup the password 5 Channel Display Selection Use the number buttons select the channel Or press SHIFT CH and SHIFT CH buttons to select the channel 6 SNAP When the DVR is not under the m...

Page 8: ...nel Icon means The audio channel is not selected Note If you want to make a video backup with audio please connect audio cameras to the channels which support the audio function For 16CH 8CH DVR the a...

Page 9: ...t the video system of the camera please make sure that the cameras are properly connected to the DVR and power supplied before the DVR is turned on Note If you want to make a video backup with audio p...

Page 10: ...ras to the channels which support the audio function For 16CH 8CH DVR the audio channels are CH1 CH2 CH3 and CH4 For 4CH DVR the audio channel is CH1 6 Audio OUT Connect to a monitor or speaker with 1...

Page 11: ...7 Close the upper cover of the DVR and fasten all the screws you loosened in Step 1 3 2 Camera Connection The cameras must be connected and power supplied before the DVR is turned on Connect the came...

Page 12: ...ENU button and enter the password to go to the quick start menu list The default admin password is 0000 Move the cursor to the icon and you can set the date time daylight saving in this menu list QUIC...

Page 13: ...M INFO SERIAL TYPE RS485 BAUD RATE 2400 HOST ID 0 PASSWORD XXXX RESET DEFAULT RESET CLEAR HDD HDD MASTER 1 UPGRADE START AUTO KEYLOCK SEC 30 LANGUAGE ENGLISH VIDEO FORMAT NTSC VERSION 1049 1007 1011 1...

Page 14: ...ntinuous recording without notice 1 Continuous Recording Icon When the DVR is properly connected with camera you can see the icon recording on the screen 2 Event Recording Icon When the motion alarm d...

Page 15: ...itoring mode 4 Slow Playback Press SLOW button to get 1 4X speed playback and press twice to get 1 8X speed playback 5 Audio Playback Press SLOW ZOOM buttons or SHIFT AUDIO buttons to select the live...

Page 16: ...emote upgrade details please see Tools at page 47 4 6 Search 1 Search by List Press LIST button on the DVR control panel to show the list for all types of the recorded files Choose the list you want t...

Page 17: ...w change the settings of the quick start menu items MENU Enter exit the quick start menu Make the selection Change the setting Go to the upper layer or sub layer Make the selection ENTER Confirm the p...

Page 18: ...change some display settings Move the cursor to icon and you will see the following screen QUICK START CHANNEL TITLE ON EVENT STATUS ON IMAGE SIZE CIF QUALITY BEST IMAGE PER SECOND 120 RECORD TIMER OF...

Page 19: ...ING OFF ADVANCE SELECT BACK NEXT ENTER The submenu items are described below 1 IMAGE SIZE Select one of the image sizes FRAME Field or CIF 2 QUALITY Select one of the 4 quality options BEST HIGH NORMA...

Page 20: ...CORD TIMER 0 2 4 6 8 10 12 14 16 18 20 22 24 SUN MON TUE WED THU FRI SAT PLEASE CONSULT YOUR INSTALLER FOR ADVANCE SETTINGS MOVE SELECT X axis 0 24 hours Each time interval within a square is two hour...

Page 21: ...ain to create an ending time point marked in yellow color and press MENU button to exit Note This function here is only for detection timer setup and activation For motion detection function setup and...

Page 22: ...24 00 00 ADJUST 01 00 PLEASE CONSULT YOUR INSTALLER FOR ADVANCE SETTINGS SELECT BACK NEXT ENTER Set the start time and end time and adjust the daylight saving time in hour The above example means dur...

Page 23: ...ORD PLEASE CONSULT YOUR INSTALLER FOR ADVANCE SETTINGS SELECT BACK NEXT ENTER 7 1 1 Camera In this submenu you can make advanced camera settings such as changing the camera title or adjust the brightn...

Page 24: ...n In this submenu you can set up detection related functions Move the cursor to DETECTION and press ENTER button You will see the following screen DETECTION TITLE DET AREA LS SS TS RE ALARM CH1 OFF SE...

Page 25: ...15 The default setting is 03 Note The default setting of SS is 03 which means once an object is detected more than 3 grids the system will get triggered So the value of SS must be less than the numbe...

Page 26: ...Select to enable or disable the sound when pressing the buttons on the front panel ON OFF 4 VLOSS BUZZER Select to enable or disable the sound when video loss happened ON OFF 5 MOTION BUZZER Select to...

Page 27: ...55 252 000 PRIMARY DNS 168 095 001 001 SECONDARY DNS 139 175 055 244 PORT 0080 PLEASE CONSULT YOUR INSTALLER FOR ADVANCE SETTINGS SELECT BACK NEXT ENTER PPPOE 1 NETWORK TYPE Select the network type as...

Page 28: ...S 139 175 055 244 PORT 0080 PLEASE CONSULT YOUR INSTALLER FOR ADVANCE SETTINGS SELECT BACK NEXT ENTER Note This DHCP function needs to be supported by a router or a cable modem network with DHCP servi...

Page 29: ...ff 2 EVENT RECORD ENABLE Set the event recording function on off 3 TIMER RECORD ENABLE Set the timer recording function on off 4 EVENT RECORD IPS Select the images per second for EVENT RECORD Recordin...

Page 30: ...can set the 4 digit password 5 RESET DEFAULT Press ENTER button to reset all settings as default and select YES to confirm or NO to cancel 6 CLEAR HDD Select the HDD you want to clear Press ENTER butt...

Page 31: ...In this menu list you can search any specific events by time and directly play the file you find Move the cursor to QUICK SEARCH and press ENTER button You will see a similar screen as the following...

Page 32: ...00 11 09 VLOSS 2007 MAY 30 16 00 08 14 VLOSS 2007 MAY 30 15 09 32 13 VLOSS 2007 MAY 30 11 00 08 12 VLOSS 2007 MAY 30 10 27 33 11 VLOSS 2007 MAY 30 08 05 55 10 DEFAULT 2007 MAY 30 08 05 26 09 POWER ON...

Page 33: ...not please format it as FAT32 in your PC c There is no data in the USB flash drive If yes it s recommended to clear all data in the USB flash drive before starting the backup Move the cursor to USB BA...

Page 34: ...ACKUP START TIME 2007 DEC 25 19 00 05 END TIME 2007 DEC 25 21 00 05 AVAILABLE SIZE 3 79 GB CHANNEL 01 02 03 04 05 06 07 08 09 10 11 12 13 14 15 16 HDD NUM ALL HDD START PLEASE CONSULT YOUR INSTALLER F...

Page 35: ...domain h Double click icon on your PC desktop to enter the AP control panel By defaults the Address Book panel will be displayed on the right side of the AP control panel i Click Address Book Add butt...

Page 36: ...o go to the Record Setting page Check the record type s you want and assign the location to save the recordings by double clicking the Video Path cell If Manual is checked click Record on the main con...

Page 37: ...ill be shown at the bottom of the main control panel similar to the following For the playback control panel details please see Playback Screen at page 53 Network Backup Click Miscellaneous Control Ba...

Page 38: ...button Address Book and Search For details please see Address Book at page 35 3 3 3 3 Miscellaneous Control Click to show the main operation functions audio volume control color setting backup DVR set...

Page 39: ...is tab with the palyback view is displayed Download When the downloaded video clip is selected in Logs and played this tab with the downloaded video clip is displayed 2 2 2 2 Full Screen Click to view...

Page 40: ...ctly add one IP address for login Key in the DVR access information needed and click Apply and Close 2 Edit Select one current IP address from the address list and click this button to modify the DVR...

Page 41: ...click this button and you will go to the download setting page For details please see Network Backup at page 33 4 4 4 4 Record Setting Click to go to the detailed record setting Please refer to Recor...

Page 42: ...umns 4 4 4 4 Download by Event Select an event log from the event list This list shows all logs in the specified DVR from the latest to the earliest To quickly find the events you need check or unchec...

Page 43: ...e cell of Video Path or Picture Path twice and select a new path for saving the video clips or snapshots D Dv vr r S Se et tt ti in ng g Click to view set or modify the DVR setting All the changes you...

Page 44: ...e that will be used for remote login The user name allows up to 10 characters Password Set the password that will be used for remote login The password allows up to 8 characters User Level Set the sec...

Page 45: ...amic IP address Please refer to DDNS at page 42 for details Function Description Web Port Typically the default TCP port used by HTTP is 80 However in some cases it is better to change this port numbe...

Page 46: ...ing to a specific host name Go to a website which provide free DDNS services and apply a host name DDNS Apply a Go to a website which provide the free DDNS service for example http www dyndns org b Cr...

Page 47: ...ay etc In Dvr you can see the following items Function Description Host ID Set the host ID from 0 to 254 The default value is 0 System Type Display the current system type NTSC PAL It s automatically...

Page 48: ...itivity in 4 different adjustable factors LS SS TS RE LS Level of Sensitivity is to set the sensitivity of comparing two different images The smaller the value is the higher sensitivity for motion det...

Page 49: ...Select All to set the whole area under detection Apply Return To save the setting click Apply and return to Dvr Setting window To discard the setting click Return to directly return to Dvr Setting win...

Page 50: ...the buzzer option you want and set how long the beep sound will be lasted Function Description Ext Alert Check this option to enable the external alert Buzzer Enable This option must be checked for Mo...

Page 51: ...ming any update finish the following settings first 1 Choose the IP address of the DVR whose firmware needs to be updated from the drop down list or click Search to find 2 Key in the user name passwor...

Page 52: ...d click Update Language to start the upgrade process Logo To replace the logo shown in the DVR boot display click Logo tab and follow the steps below a Prepare a graphic file in the BMP format for rep...

Page 53: ...to Playback at page 53 Event Select All to show all event logs or Condition to search for the specific log s by date All Button Description Query This button is effective when Condition is selected De...

Page 54: ...ed in the log list arranged by time from the earliest to the latest Delete Delete All Click Delete to remove the selected log s or click Delete All to clear the current log list Tip To select more log...

Page 55: ...ecord logs you might want Record Type This section is enabled only when the Record tab is selected Select the record type you want to search User Alarm Motion Query When all the search criteria are se...

Page 56: ...elected Delete Delete All Click Delete to remove the selected log s or click Delete All to clear the current log list Tip To select more logs all at once press and hold the Ctrl key on your keyboard a...

Page 57: ...window Playback Screen When you select and play the recorded data for a specific log in Log Record or Backup you will immediately go into the playback mode and the following playback panel appears For...

Page 58: ...ice View CH1 CH2 CH5 and CH6 View CH3 CH4 CH7 and CH8 View CH9 CH10 CH13 and CH14 View CH11 CH12 CH15 and CH16 View the 1 st channel of the selected 4 cut view mode View the 2 nd channel of the select...

Page 59: ...hem to payback 7 Playback Stop Pause Rewind Play Slow Playback Forward Rewind Forward Click once to get 4X fast rewind forward twice to get 8X three times to get 16X and four times to get 32X the high...

Page 60: ...ttp 60 121 46 236 888 into the URL address box and press Enter Step 2 Enter the user name and password the same as the ones used at AP login and press OK You will see a similar screen as the following...

Page 61: ...modes one by one The 1 st view is CH1 CH2 CH5 CH6 the 2 nd view is CH3 CH4 CH7 CH8 the 3 rd view is CH9 CH10 CH13 CH14 and the 4 th view is CH11 CH12 CH15 CH16 When the 4 th view is displayed it will...

Page 62: ...nl lo oa ad d N No ow w to download the latest QuickTime player c When the download is completed execute the Q Qu ui ic ck kT Ti im me eI In ns st ta al ll le er r e ex xe e file and follow the on sc...

Page 63: ...of the DVR will start alarm triggered recording 10 PIN OFF NA 11 PIN OFF NA 12 PIN OFF NA 13 EXTERNAL ALARM NO Under the normal operation COM disconnects with NO But when any alarm is triggered COM c...

Page 64: ...e CH2 of the DVR will start alarm triggered recording 6 12 PIN OFF NA 13 EXTERNAL ALARM NO Under the normal operation COM disconnects with NO But when any alarm is triggered COM connects with NO Atten...

Page 65: ...use your PC to format the USB flash drive as FAT32 MANUFACTURER MODEL CAPACITY 256MB JetFlash 110 512MB JetFlash V30 1GB JetFlash 150 1GB JetFlash V20 1GB Transcend JFV10 4GB 256MB 512MB Kingston Dat...

Page 66: ...Max 10 6L200R0 200GB 7200 rpm DiamondMax 10 6L200PO 200GB 7200 rpm MaxLine Plus Model 7Y250P0 250GB 7200 rpm DiamondMax 10 6L250R0 3 250GB 7200 rpm Maxtor DiamondMax 10 HDMA6L300RO 3 300GB 7200 rpm Ba...

Page 67: ...of recorded data for playback to work properly If not your DVR will stop the playback For example if the IPS is set to 30 the recording time should be at least 273 seconds 8192 images 30 IPS for the p...

Page 68: ...Covert Screen OFF Camera REC ON Detection OFF Detection LS 07 Detection SS 03 Detection TS 02 Detection RE 10 Detection Alarm OFF Alert Buzzer ON Alert Buzzer Duration 5 seconds Network IP Address 192...

Reviews: