


54
5.
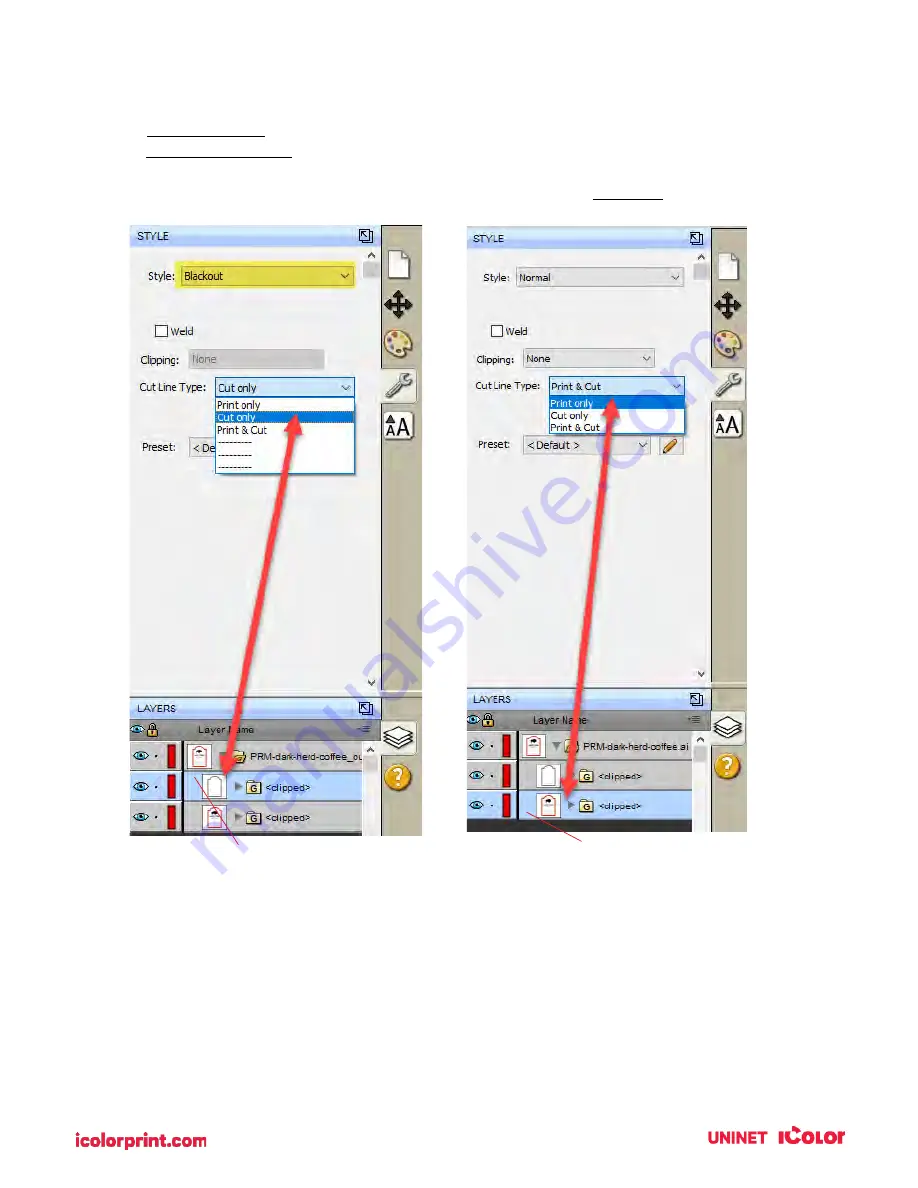
Once you find the cut line, select that layer, and click the style tab above.
A. Choose Cut Only.
B. Set Style to Blackout.
6.
Now select the Print layer, click on the stye tab above, and choose Print Only.
7.
To print go to the File menu and choose Print or click the Print Icon on the shortcut bar.
The print dialog will appear. Make sure Print+Cut is selected. Click the Properties button to
access the printer settings such as Print Quality, Saturation, and Color Matching.
For a full explanation of printer driver settings see section 5D.
Layer to be Printed
Layer to be Cut
Summary of Contents for IColor 250
Page 1: ......
Page 52: ...51 2 Browse to the file you would like to use and choose Open ...
Page 59: ...58 8 Center the image horizontally and vertically to the page ...
Page 73: ...72 2 Select Blank Template Click Next 3 Select IColor 250 Label Click Next ...
Page 104: ...103 Printing from Preview Click on the Preview dropdown menu and choose Printer Features ...
Page 114: ...113 4 Prepare items needed for the procedure 5 Soak the paper towels in water for 5 seconds ...


