PC Client Introduction
74
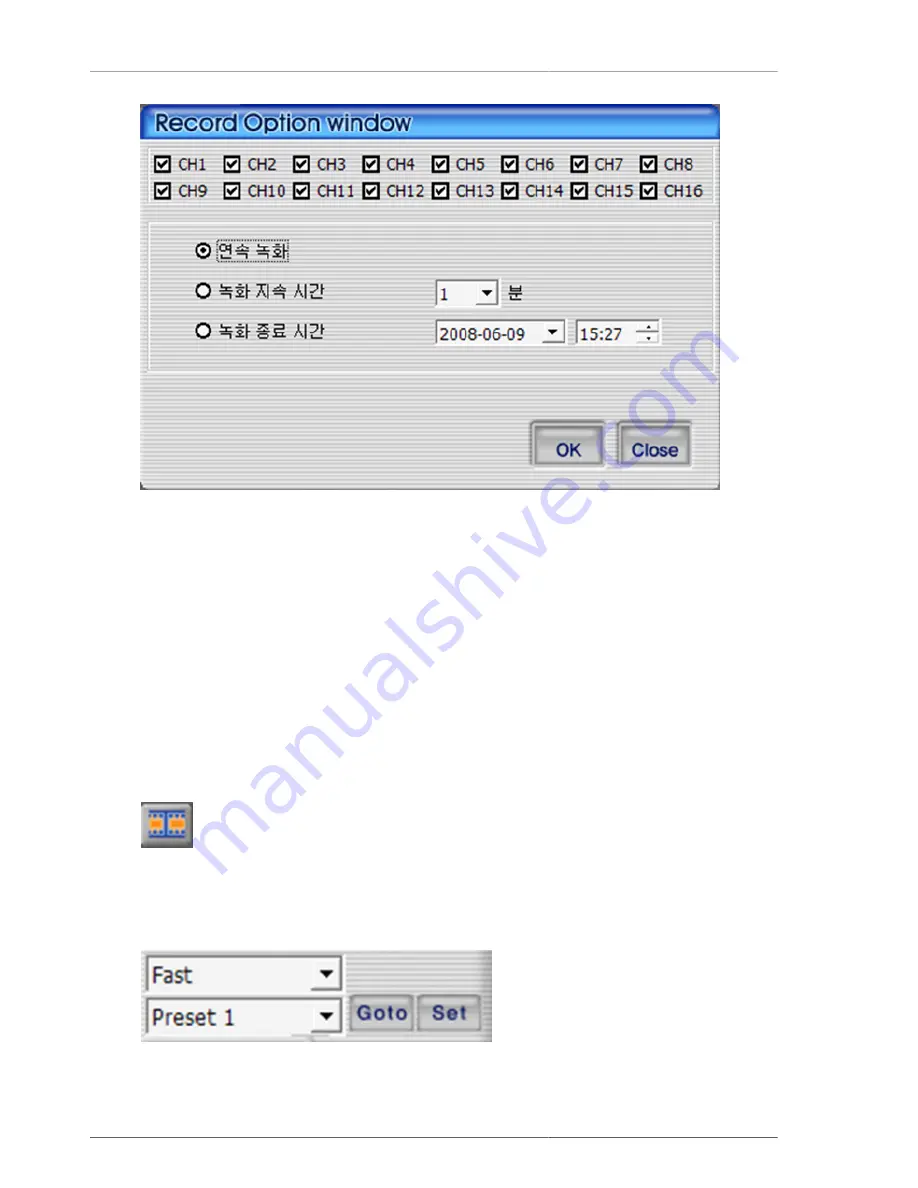
Figure 4.20. Recording option dialog
1. This is to select the channel for recording.
2. Continuous recording : This is to record continuously until the user terminates the recording.
3. Recording continuation time : This is to continue the recording within the selected time frame. During recording
continutation time frame, if the user cancels the recording, then the recording is to be terminated.
4. Recording termination time : The recording continues to the set date and time. During recording termination
time frame, if the user discontinues the recording, then the recording is to be terminated.
5. OK : This is to start the recording after closing recording time setup screen.
6. Close : This is close the screen
When the recording starts, the button color changes to orange
. Recording termination and file saving can be made by pressing the recording button one more time. The recording
file will be saved on to Record folder under the directory that the current program is installed.
4.4.14. PAN/TILT, ZOOM/FOCUS, Speed, Preset
Figure 4.21. PTZ Preset
Summary of Contents for H.264 Real Time DVR
Page 1: ...FULL MANUAL H 264 Real Time DVR Version 1 0 0 Unimo Technology ...
Page 70: ...PC Client Introduction 60 Figure 4 7 When DVR is not on recording ...
Page 72: ...PC Client Introduction 62 Figure 4 9 This screen shows the searched recoreded data on DVR ...
Page 73: ...PC Client Introduction 63 Figure 4 10 Backup Guide Screen ...
Page 75: ...PC Client Introduction 65 Figure 4 12 This screen shows the searched recoreded data on DVR ...
Page 81: ...PC Client Introduction 71 Figure 4 17 D Zoom Example ...
Page 111: ...PC Client Introduction 101 Figure 4 59 Calendar Search Screen ...
Page 115: ...PC Client Introduction 105 Figure 4 62 Still Image Screen Figure 4 63 Watermark Except Screen ...


