Ultimaker PVA Removal Station user manual
14
4.1 Filling the container
To dissolve PVA of 3D printed parts, the container must be filled with cold tap water. Take the following steps
to fill the container:
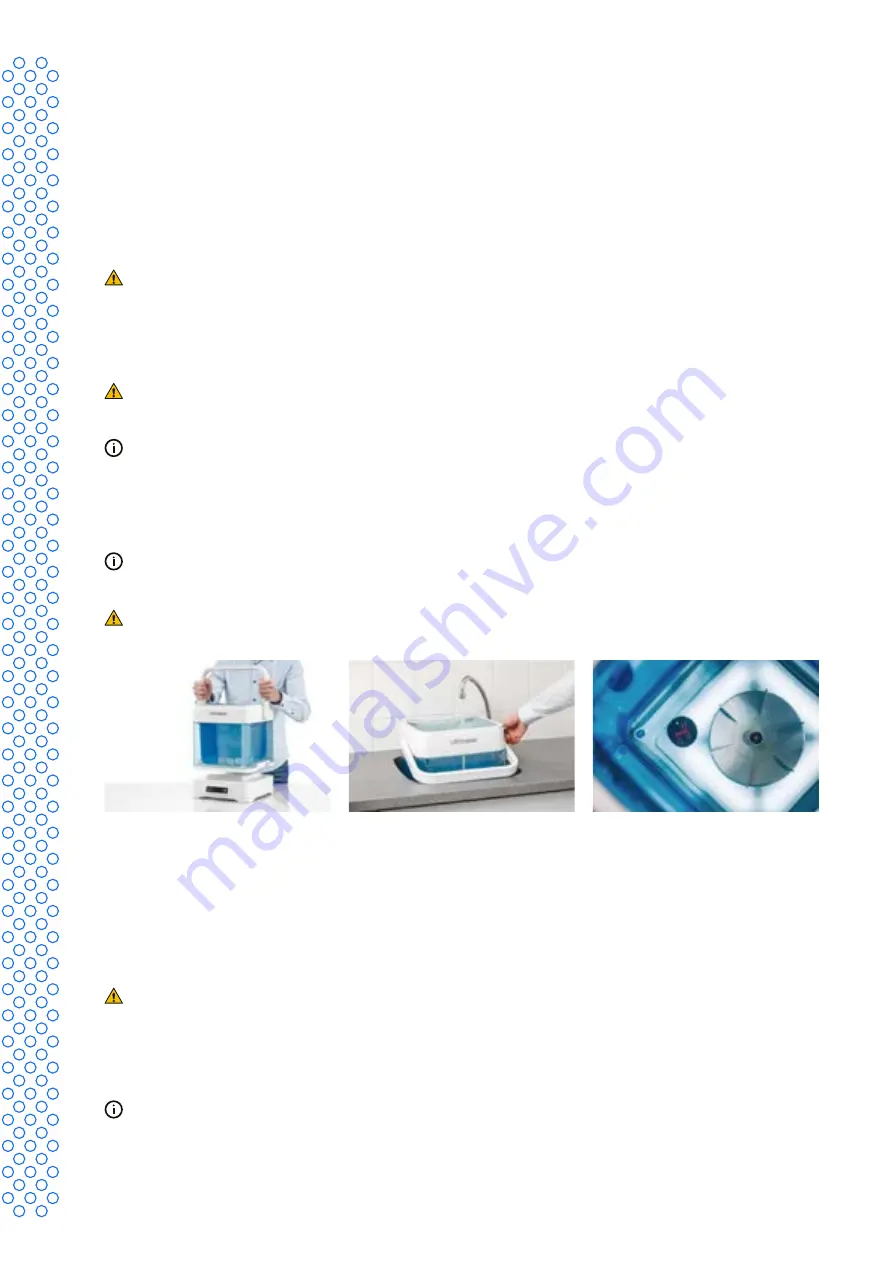
1. Remove the top cover and rinsing basket from the container.
2. Lift the container from the docking station. Use either the handle at the top, or use the grips on either side at
the bottom of the container.
Dried-up PVA residue has highly adhesive properties. If any PVA residue came into contact with the docking
station, this could result in the container remaining attached to the docking station when the container is lifted.
Make sure the two parts are detached before walking away with the container.
3. Fill the container with cold tap water. Do not fill the container beyond the water level indicator.
Only use cold water to fill the container. Too high water temperatures will damage or deform most printed
parts or even the container. Do not fill the device with other liquids.
Note:
The container has a temperature warning label on the bottom. Pay attention to this label when filling the
container. The label will turn red if the water is too hot. Wait until the water has cooled before placing printed
parts into the water.
4. Return to the docking station and gently place the container on top. Ensure the two parts are properly aligned.
Note:
Always first make sure the docking station is clean and dry. Remove all saturated PVA with a moist towel
and dry the docking station before placing the container on top.
Immediately unplug the PVA Removal Station if water has splashed over the docking station. Allow the docking
station to air dry completely before next use.
4.2 Place parts in the rinsing basket
To speed up the dissolving of the PVA support material, first manually remove as much PVA material as possible,
prior to placing the print in the basket. Be careful not to damage the printed part in the process. Use pliers to
remove larger chunks of PVA.
Protective gloves are advised as broken pieces of PVA can be sharp.
1. Unlock the rinsing basket and open the lids.
2. Place the printed object in the rinsing basket.
3. Adjust the basket’s divider to restrict movement of the object.
Make sure that no parts of the printed object are protruding through the sides of the basket.
Summary of Contents for PVA Removal Station
Page 4: ...1 Safety and compliance...
Page 8: ...2 Introduction...
Page 11: ...3 Installation...
Page 14: ...4 Operation...
Page 19: ...5 Maintenance...
Page 23: ...6 Troubleshooting...
Page 26: ...7 Warranty...


