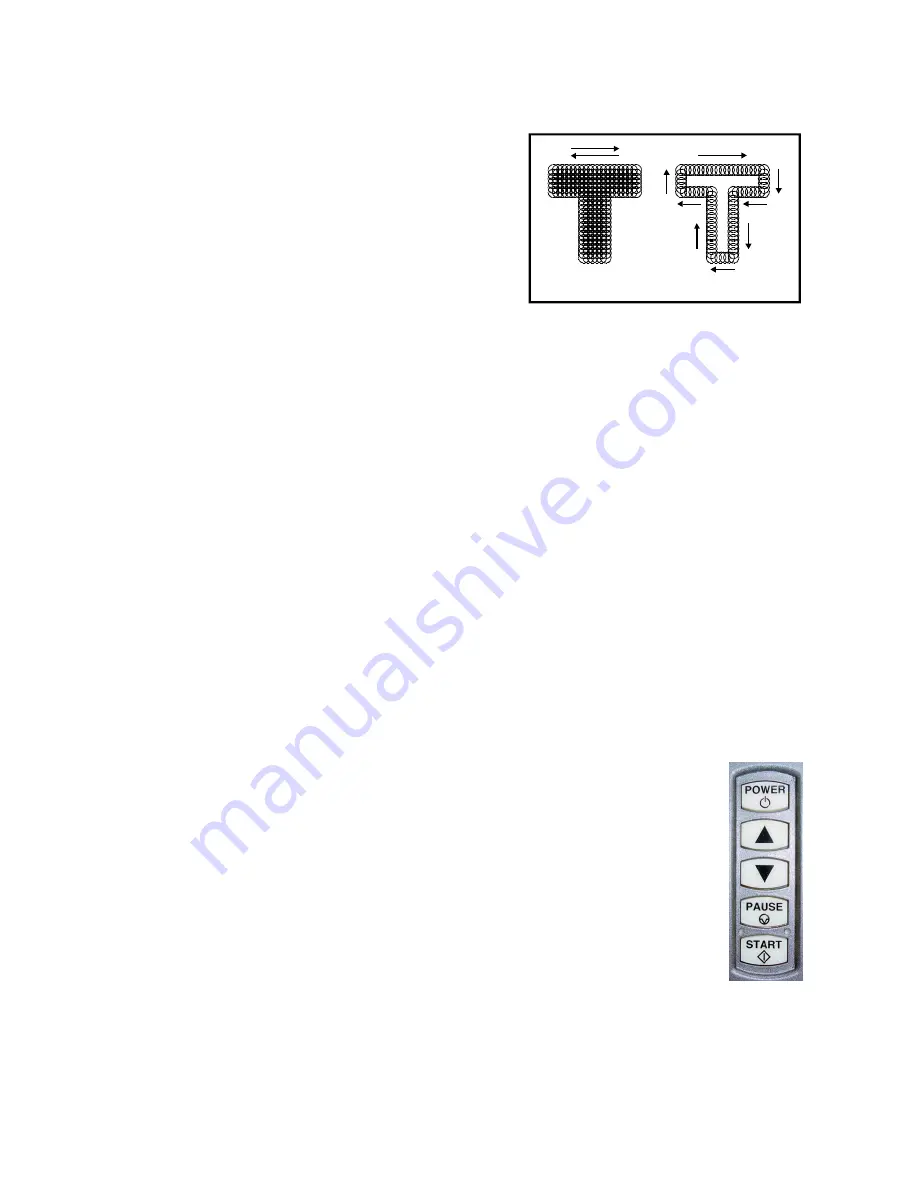
Cutting or Scribing
Etching
How
it
Works
The
VersaLASER
uses
the
intense
energy
of
the
laser
beam
to
vaporize
material
(wood,
plastic,
etc.),
placed
on
the
VersaLASER
work
surface,
by
using
the
technique
of
etching,
cutting,
or
scribing
the
material.
Etching
is
the
technique
where
the
laser
beam
traverses
left
and
right,
etching
horizontal
lines
of
material
as
it
steps
down
the
material
vertically,
similar
to
a
laser
or
inkjet
printer.
Cutting
or
scribing
is
the
technique
in
which
the
laser
beam
follows
a
path
to
cut
or
mark
a
desired
outline,
which
is
similar
to
a
pen
plotter.
The
difference
between
cutting
(completely
passing
through
the
material)
and
scribing
the
material
(lightly
marking
the
surface),
is
laser
power
applied.
You
determine
whether
you
want
your
artwork
etched,
scribed,
or
cut
into
the
material
by
the
colors
you
assign
to
the
elements
of
the
objects
in
your
graphic
images.
Black
colored
(filled)
and
shades
of
black
(grays
or
grayscale)
objects
will
etch
the
material.
Red
colored
outlined
objects,
set
to
a
hairline
thickness,
will
cut
the
material.
Blue
outlined
objects,
also
set
to
a
hairline
thickness,
will
scribe
the
material.
Using
the
VersaLASER
is
as
simple
as
creating
your
artwork,
according
to
the
rules
outlined
above,
and
simply
printing
to
the
VersaLASER
as
you
would
to
any
other
type
of
printer.
The
VersaLASER
printer
driver
will
then
pop
up
and
prompt
you
for
the
type
of
material
you
are
processing
and
its
measured
thickness.
After
choosing
a
material
from
the
list
and
entering
the
material
thickness,
your
artwork
will
be
turned
into
a
job
and
stored
in
the
VersaLASER
cache
on
your
hard
drive.
You
can
then
use
the
VersaLASER
On
‐
Screen
Control
Panel
to
select
and
preview
the
saved
job
you
wish
to
run,
position
your
material
in
the
VersaLASER,
and
press
the
START
button.
The
VersaLASER
Keypad
POWER:
Turns
the
VersaLASER
on
ONLY
if
the
computer
is
powered
on,
booted
into
Windows,
the
VersaLASER
On
‐
Screen
Control
Panel
is
running,
and
the
USB
cable
is
connected
from
the
computer
to
the
VersaLASER.
Also,
holding
the
key
down
for
5
seconds
will
power
off
the
VersaLASER.
UP
and
DOWN
ARROWS:
Raises
and
lowers
the
Z
‐
axis
table
(work
surface).
Press
momentarily
for
slow
movement
and
hold
down
for
faster
movement.
PAUSE:
If,
during
processing,
you
wish
to
stop
or
pause
the
VersaLASER,
press
PAUSE
once.
Press
PAUSE
again
and
the
VersaLASER
will
resume
processing
from
the
point
at
which
it
was
“paused”.
If
you
press
START
while
the
VersaLASER
is
“paused”
the
VersaLASER
will
start
over
from
the
beginning
of
the
job.
START:
Begins
processing
from
the
beginning
of
a
job.
RED
and
GREEN
LED’s:
The
RED
LED
and
GREEN
LED
located
between
the
PAUSE
and
START
buttons
provide
information
on
the
status
of
the
machine.
Summary of Contents for VersaLaser VL-200
Page 1: ...Models VL 200 VL 300 Safety Installation Operation...
Page 17: ......


