background image

24

WE WOULD LIKE TO THANKS YOU FOR CHOOSING UFESA, WE WISH THE PRODUCT 

PERFORMS TO YOUR SATISFACTION AND PLEASURE.

WARNING

PLEASE USE THE INSTRUCTIONS FOR USE CAREFULLY PRIOR TO USING THE PRODUCT. STORE 
THESE IN A SAFE PLACE FOR FUTURE REFERENCE

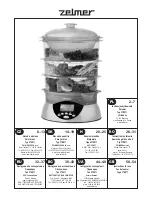
DESCRIPTION

1. Lid
2. Rice bowl
3. Steam basket 1
4. Steam basket 2
5. Steam basket 3
6. Base with clip and build –in egg holder
7. Juice collector
8. Steam tube
9. Water level indicator
10. Water tank
11. Heating element
12. Timer
13. Indicator light
14. Power cord

SAFETY INSTRUCTIONS
If the supply cord is damaged it must be replaced by the 

manufacturer, its service agent or similarly qualified persons in 

order to avoid a hazard.
This appliance can be used by children aged from 8 years and 

above and persons with reduced physical, sensory or mental 

capabilities or lack of experience and knowledge if they have 

been given supervision or instruction concerning use of the 

appliance in a safe way and understand the hazards involved.
Children shall not play with the appliance. Cleaning and user 

maintenance shall not be made by children unless they are 

older than 8 and supervised.
Keep the appliance and its cord out of reach of children less 

than 8 years.
 

Surfaces are liable to get hot during use.

This appliance is intended to be used in household. It is not 

intended to be use in applications such as:
-staff  kitchen  areas  in  shops,  offices  and  other  working 

environments;
-farm houses;
-by  clients  in  hotels,  motels  and  other  residential  type 

environments;
-bed and breakfast type environments.
Proceed according to maintenance and cleaning section of this 

manual for cleaning.
Warning: potential injury from misuse!
Heating element surface is subject to residual heat after use
Disconnect the appliance when it is not in use and before 

cleaning it. Let it cool before putting on, taking off parts and 

cleaning it
Do not submerge the appliance in water or any other liquid.
This appliance is intended for use at a maximum altitude of 

2000m above sea level.

IMPORTANT WARNINGS

This appliance is designed exclusively for domestic use, in no case should be a commercial or industrial 

use. 
Any incorrect use or improper handling of the product shall render the warranty null and void.
Prior to plugging in the product, check that your mains voltage is the same as the one indicated on the 

product label. 
Place the appliance on a flat even surface
The mains connection cable must not be tangled or wrapped around the product during use.  
Do not use the device, or connect and disconnect to the supply mains with the hands and/or feet wet. Do 

not pull on the connection cord in order to unplug it or use it as a handle.
Do not place the appliance near the hot source or in a hot oven, as serious damage could result.
Burns can occur by touching hot surface of the appliance, the hot water, the steam or the food.
Never immersed the appliance in water.
Do not move the appliance when it is full of liquid or hot foods.
Do not touch the appliance when it is steaming and use gloves to remove the lid, rice bowl and steamer 

baskets.
Always  unplug  the  appliance  immediately  after  use,  when  moving  it  or  prior  to  any  cleaning  or 

maintenance.

Do not use any accessories other than manufacturer recommended accessories in this appliance.
Unplug the product immediately from the mains in the event of any breakdown or damage and contact 

an official technical support service. In order to prevent any risk of danger, do not open the device. Only 

qualified technical personnel from the brand´s Official technical support service may carry out repairs or 

procedures on the device. 

B&B TRENDS SL. disclaims all liability for damages that may occur to people, animals or objects, for the 

non-observance of these warnings.

BEFORE ITS FIRST USE

Remove all packing materials and stickers from the inside and outside of the appliance. Clean the 

appliance as per as cleaning section.

WARNING: Never immerse the appliance or its plug in water or any other liquids.

HOW TO USE

Pour fresh water directly into the water tank up to the maximum level.
Do not add anything to the water. Only add seasoning to the food not the steaming water.
Fit the steam tube round the element, so it will be in its center.
Place the tray on the unit base. The tray fits only one way round, to allow for the control panel.
The basket handles are marked 1,2 and 3. You may use 1,2  or 3 baskets at a time.
a) Fit basket 1 on top of the tray. Put food in the basket.

LA RINGRAZIAMO PER AVER SCELTO UFESA E CI AUGURIAMO CHE IL 

FUNZIONAMENTO DEL PRODOTTO SODDISFI LE SUE ASPETTATIVE.

AVVERTENZA

SI PREGA DI UTILIZZARE LE ISTRUZIONI PER L’USO PRIMA DI UTILIZZARE IL PRODOTTO. 
CONSERVARLE IN UN LUOGO SICURO PER FUTURA CONSULTAZIONE

DESCRIZIONE

1. Coperchio
2. Ciotola per il riso
3. Cestino per vapore 1
4. Cestino per vapore 2
5. Cestino per vapore 3
6. Base con clip e portauovo integrato
7. Raccoglitore di succo
8. Tubo del vapore
9. Indicatore del livello dell’acqua
10. Serbatoio dell’acqua
11. Elemento di riscaldamento
12. Timer
13. Spia indicatrice
14. Cavo di alimentazione

ISTRUZIONI PER LA SICUREZZA
Se  il  cavo  di  alimentazione  è  danneggiato,  deve  essere 

sostituito  dal  produttore,  dal  servizio  di  assistenza  o  da 

persone altrettanto qualificate al fine di evitare pericoli.
L’apparecchio può essere utilizzato da bambini di età 

superiore a 8 anni e da persone con capacità fisiche, sensoriali 

o mentali ridotte o con scarse esperienza e conoscenza a 

condizione che vengano fornite loro adeguate supervisione e 

istruzione riguardo all’utilizzo dell’apparecchio in un modo 

sicuro e che abbiano compreso i pericoli correlati.
È vietato l’utilizzo ludico dell’apparecchio da parte dei bambini. 

La pulizia e la manutenzione da parte dell’utente non devono 

essere effettuate da bambini a meno che non abbiano più di 8 

anni e siano supervisionati.
Mantenere l’apparecchio e il suo cavo fuori dalla portata dei 

bambini di età inferiore a 8 anni.
 

Le superfici possono scaldarsi durante l’utilizzo.

Questo apparecchio è concepito per l’uso domestico. Non è 

concepito per l’uso in situazioni quali:
-cucine  per  il  personale  in  negozi,  uffici  e  altri  ambienti  di 

lavoro;
-agriturismi;
-uso da parte di clienti in hotel, motel e altri ambienti di tipo 

residenziale;
-ambienti del tipo di bed and breakfast.
Per la pulizia, procedere secondo quanto indicato nella sezione 

di manutenzione e pulizia del presente manuale.
Avvertenza: l’uso scorretto può causare infortuni.
La  superficie  dell’elemento  di  riscaldamento  è  soggetta  a 

calore residuo dopo l’utilizzo
Scollegare l’apparecchio quando non è in uso e prima di pulirlo. 

Lasciare che l’apparecchio si raffreddi prima di attaccare o 

rimuovere parti o prima di pulirlo.
Non immergere l’apparecchio in acqua o qualsiasi altro liquido.
L’apparecchio è destinato all’uso a un’altitudine massima di 

2000 m sopra il livello del mare.

AVVERTENZE IMPORTANTI

Questo apparecchio è indicato esclusivamente per uso domestico, non deve essere utilizzato in nessun 

caso per scopi commerciali o industriali.
Qualsiasi utilizzo incorretto o maneggiamento improprio del prodotto renderà nulla la garanzia.
Prima di collegare il prodotto, assicurarsi che la tensione di rete sia uguale a quella indicata sull’etichetta 

del prodotto. 
Posizionare l’apparecchio su una superficie piatta e uniforme.
Il cavo di collegamento alla rete elettrica non deve essere attorcigliato o avvolto intorno al prodotto 

durante l’utilizzo.  
Non utilizzare il dispositivo, o collegarlo e scollegarlo a/dall’alimentazione elettrica con mani e/o piedi 

bagnati. Non tirare il cavo di collegamento per scollegarlo o usarlo come maniglia.
Non posizionare l’apparecchio vicino a fonti di calore o in un forno caldo, in quanto potrebbe provocare 

seri danni.
Possono verificarsi bruciature toccando la superficie calda dell’apparecchio, l’acqua calda, il vapore o 

gli alimenti.
Non immergere mai l’apparecchio in acqua.
Non spostare l’apparecchio quando è pieno di liquido o alimenti caldi.
Non toccare l’apparecchio mentre sta emettendo vapore e utilizzare guanti per rimuovere il coperchio, la 

ciotola per il riso e i cestini per vapore.
Scollegare  sempre  l’apparecchio  immediatamente  dopo  l’utilizzo,  quando  lo  si  sposta  o  prima  di 

qualsiasi operazione di pulizia o manutenzione.

Non utilizzare accessori diversi da quelli raccomandati dal produttore in questo apparecchio.
In caso di cortocircuito o danno, scollegare immediatamente il prodotto dalla rete elettrica e contattare 

un servizio di assistenza tecnica ufficiale. Per evitare qualsiasi pericolo, non smontare il dispositivo. Le 

riparazioni o gli interventi sul dispositivo possono essere effettuati soltanto da personale tecnico 

qualificato del servizio di assistenza tecnica ufficiale del marchio. 

B&B TRENDS SL. declina ogni responsabilità per danni che possono verificarsi a persone, animali o 

cose, per la mancata osservanza di queste avvertenze.

PRIMA DEL PRIMO UTILIZZO

Rimuovere tutti i materiali di imballaggio e gli adesivi dalla parte interna ed esterna dell’apparecchio. 

Pulire l’apparecchio come indicato nella sezione sulla pulizia.

AVVERTENZA: Non immergere mai l’apparecchio o la sua spina in acqua o qualsiasi altro liquido.

ISTRUZIONI PER L’USO

Versare acqua fresca direttamente nel serbatoio dell’acqua fino al livello massimo.
Non aggiungere altro all’acqua. Aggiungere condimenti soltanto agli alimenti e non all’acqua di 

evaporazione.
Posizionare il tubo del vapore attorno all’elemento, in modo che siano concentrici.

Posizionare il vassoio sulla base dell’unità. Il vassoio si inserisce in un solo senso, per lasciare libero il 

pannello di controllo.
Le maniglie del cestino sono indicate con 1, 2 e 3. È possibile utilizzare 1, 2 o 3 maniglie alla volta.
a) Posizionare il cestino 1 sopra il vassoio. Riporre gli alimenti nel cestino.
b) Posizionare il cestino 2 sopra il cestino 1.
c) Posizionare il cestino 3 sopra il cestino 2.
d) Riporre il coperchio sopra il cestino 3.

Collegare la spina e impostare il timer per i tempi di cottura consigliati (vedere tabella di tempi di 

cottura), la spia indicatrice si accende e ha inizio la cottura a vapore.
Controllare il livello dell’acqua osservando l’indicatore del livello dell’acqua e se necessario, aggiungere 

acqua dall’ingresso laterale durante la cottura.
Quando il timer torna a 0, l’apparecchio smette di funzionare e la spia si spegne.
Se si vuole interrompere l’apparecchio in anticipo, scollegarlo.

Cuocere il riso
Aggiungere riso secco e acqua alla ciotola per il riso come da informazioni sulla confezione.
Posizionare la ciotola per il riso nel cestino per vapore inferiore.
Posizionare il coperchio sopra il cestino per vapore.
Il riso impiega circa 20 minuti per cuocersi. Dipende dal tipo di riso, dalla quantità e dal gusto 

personale.

Una volta terminato l’utilizzo dell’apparecchio, scollegarlo.
Rimuovere il coperchio, posizionare il cestino sulla piastra.
Lasciare che l’apparecchio si raffreddi completamente prima di pulirlo.
Avvertenza: Usare la massima cautela nel rimuovere i cestini. Non rimuovere mai tutti i cestini insieme. 

Utilizzare guanti da forno o simili per proteggersi da bruciature causate dal vapore caldo.

Tempo di cottura con vapore
Notare che il tempo è approssimativo e può essere regolato a seconda dei gusti personali.

b) Fit basket 2 on top of the basket 1.
c) Fit basket 3 on top of the basket 2
d) Put the lid on top of basket 3

Plug in and set the timer for the recommended cooking times (see table of cooking times)., the 

indicator light on and the steam cooking has begun.
Check the water level by looking the water level indicator and if necessary, add water from the side 

inlet during the cooking.
When the timer returns to 0, the appliance will stop working and the light will switch off.
If you want to stop the appliance early, unplug it.

Cooking rice
Add the dry rice and water to the rice bowl as per as the package information.
Place the rice bowl into the bottom steaming basket.
Fit the lid on the steaming basket.
Rice should take around 20 minutes to be ready. It may depend on the type of rice, quantity and 

personal taste.

Once you have finished using the appliance, unplug it.
Remove the lid, place the basket on the plate.
Let the appliance cool completely before cleaning.

Warning: Use extreme caution when removing the baskets. Never remove all the baskets together. Use 

oven mitts or similar to help protect against burns from hot steam.

Cooking time steaming
Note that the time is approximated and can be adjust according to your personal tastes.

CLEANING AND MAINTENANCE

•    Ensure the appliance is unplugged and cool before cleaning.
Empty the water tank and clean it with a damp cloth.
Baskets, lid and rice recipient are dishwasher safe.
•    Never immerse the base or its plug in water or any other liquid. 
•    Warning: Do not use abrasive cleaning agents or scouring pads. 
•    Gently wipe down exterior with a damp cloth or paper towel. 
•    Dry all parts thoroughly before storage.
•    Store the appliance in a cool, dry place. 

DESCALING

We recommend you to descale the appliance every 3 months.

Method 1:
Put the steam tube upside down around the heating element (the largest side on the upper).
Fill the water tank with cold water up to max level, fill the inside with steam tube with white vinegar to 

the same level.
Do not heat up (to avoid the descaling odor).
Leave overnight to descale.
Rinse out the inside of water tank with warm water several times.

Method 2:
Pour about your descaling solution into the water reservoir respecting the max level.
Fit the steam guide, drip tray, one steaming basket and the lid.
Steam for 25 minutes.
Unplug the unit and allow it to cool down completely.
Remove the descaling solution from the water tank.
Repeat the steps a) to d) with water only. You have to repeat it until all traces of descaled have been 

removed.
Wash all removable parts in warm soapy water or on the dishwasher.

PRODUCT DISPOSAL

PULIZIA E MANUTENZIONE

• Controllare che l’apparecchio sia scollegato e freddo prima di pulirlo.
• Svuotare il serbatoio dell’acqua e pulirlo con un panno umido.
• I cestini, il coperchio e il recipiente per il riso possono essere lavati in lavastoviglie.
• Non immergere mai la base o la sua spina in acqua o qualsiasi altro liquido. 
• Avvertenza: Non usare agenti detergenti o spugne abrasivi. 
• Strofinare delicatamente la parte esterna con un panno umido o un asciugamano di carta.
• Asciugare accuratamente tutte le parti prima di riporle.
• Riporre l’apparecchio in un luogo fresco e asciutto. 

DECALCIFICAZIONE

Si raccomanda di effettuare la decalcificazione dell’apparecchio ogni 3 mesi.

Metodo 1:
Capovolgere il tubo del vapore attorno all’elemento di riscaldamento (il lato maggiore in alto).
Riempire il serbatoio dell’acqua con acqua fredda fino al livello massimo, riempire l’interno del tubo del 

vapore con aceto fino allo stesso livello.
Non riscaldare (per evitare l’odore provocato dalla decalcificazione).
Lasciare decalcificare per tutta la notte.
Sciacquare più volte l’interno del serbatoio dell’acqua con acqua tiepida.

Metodo 2:
Versare la soluzione decalcificante nel serbatoio dell’acqua fino al livello massimo.
Posizionare la guida del vapore, far sgocciolare il vassoio, un cestino per vapore e il coperchio.
Far circolare vapore per 25 minuti.
Scollegare l’unità e lasciare che si raffreddi completamente.
Rimuovere la soluzione decalcificante dal serbatoio dell’acqua.
Ripetere i passaggi da a) a d) con acqua soltanto. È necessario ripetere la procedura finché non 

vengono rimosse tutte le incrostazioni.
Lavare tutte le parti amovibili in acqua tiepida con sapone o in lavastoviglie.

SMALTIMENTO DEL PRODOTTO 

Summary of Contents for CV4000 vaporino

Page 1: ...vaporera CV4000 vaporino Ръководство за инструкции manual de instrucciones manual de instruções instructions manual mode d emploi ES EN FR PT BG AR Bedienungsanleitung DE manuale di istruzioni IT ...

Page 2: ...1 2 5 4 6 3 7 8 10 11 9 12 13 14 ...

Page 3: ...do 7 Colector de zumo 8 Tubo de vapor 9 Indicador de nivel de agua 10 Depósito de agua 11 Elemento calefactor 12 Temporizador 13 Luces indicadoras 14 Cable de alimentación INSTRUCCIONES DE SEGURIDAD Si el cable de alimentación está dañado este deberá ser reemplazado por el fabricante un agente de servicio o personal cualificado equivalente a fin de evitar cualquier riesgo Los niños a partir de 8 año...

Page 4: ...aplicaciones como zonas de cocina del personal en tiendas oficinas y otros entornos de trabajo casas de campo clientes en hoteles moteles y otros entornos de tipo residencial entornos de tipo bed and breakfast alojamiento y desayuno Proceda conforme a la sección de mantenimiento y limpieza del presente manual para la limpieza Advertencia posibles lesiones por mal uso La superficie del elemento calef...

Page 5: ...enchufe siempre el aparato inmediatamente después de su uso cuando lo traslade o antes de cualquier limpieza o mantenimiento No utilice en este aparato otros accesorios que no sean los recomendados por el fabricante Desenchufe inmediatamente el aparato de la red eléctrica en caso de que se produzca cualquier avería o daño y póngase en contacto con un servicio de asistencia técnica oficial Para evit...

Page 6: ...aciones del paquete Coloque el recipiente para arroz en la cesta inferior de cocción al vapor Ponga la tapa sobre la cesta de cocción al vapor El arroz debería estar listo en unos 20 minutos Esto puede depender del tipo de arroz la cantidad y el gusto personal Una vez que haya terminado de usar el aparato desenchúfelo Retire la tapa y coloque la cesta en el plato Deje que el aparato se enfríe comp...

Page 7: ...ción Déjelo toda la noche para su descalcificación Aclare el interior del depósito de agua con agua caliente varias veces Método 2 Vierta la solución descalcificadora en el depósito de agua respetando el nivel máximo Coloque la guía de vapor la bandeja de goteo una cesta de cocción al vapor y la tapa Cocer al vapor durante 25 minutos Desenchufe el aparato y deje que se enfríe completamente Retire la...

Page 8: ...uporte integrado para ovos 7 Coletor de sumo 8 Tubo de vapor 9 Indicador do nível da água 10 Depósito de água 11 Elemento de aquecimento 12 Temporizador 13 Luz indicadora 14 Cabo de alimentação INSTRUÇÕES DE SEGURANÇA Se o cabo de alimentação estiver danificado tem de ser substituído pelo fabricante pelo respetivo técnico ou por pessoal igualmente qualificado de modo a evitar riscos O aparelho pode ...
Page 9: ...os em lojas escritórios e outros ambientes de trabalho casas rurais por clientes em hotéis motéis e outros ambientes residenciais ambientes de alojamento e pequeno almoço Para limpar proceda de acordo com a secção de manutenção e limpeza deste manual Aviso a utilização incorreta pode causar ferimentos A superfície do elemento de aquecimento está sujeita a um aquecimento residual após a sua utiliza...

Page 10: ...aparelho da corrente imediatamente após a sua utilização quando o mover ou antes de efetuar quaisquer trabalhos de limpeza ou manutenção Não utilize qualquer acessório para além daqueles recomendados pelo fabricante neste aparelho Em caso de avaria ou danos desligue imediatamente o produto da corrente elétrica e contacte um serviço de assistência técnica oficial Para evitar possíveis situações de r...

Page 11: ...mbalagem Coloque o recipiente de arroz no cesto de cozedura a vapor inferior Coloque a tampa no cesto de cozedura a vapor O arroz deverá demorar aproximadamente 20 minutos a ficar pronto O tempo poderá variar conforme o tipo de arroz quantidade e gosto pessoal Após utilizar o aparelho desligue o da corrente Retire a tampa e coloque o cesto na placa Deixe o aparelho arrefecer completamente antes de ...

Page 12: ...o aparelho num local fresco e seco DESCALCIFICAÇÃO Recomendamos que descalcifique o aparelho a cada 3 meses Método 1 Vire o tubo de vapor ao contrário à volta do elemento de aquecimento o lado maior na parte superior Encha o depósito de água com água fria até ao nível máximo e encha o interior com vinagre branco até ao mesmo nível utilizando o tubo de vapor Não aqueça para evitar o odor da descalci...

Page 13: ...build in egg holder 7 Juice collector 8 Steam tube 9 Water level indicator 10 Water tank 11 Heating element 12 Timer 13 Indicator light 14 Power cord SAFETY INSTRUCTIONS If the supply cord is damaged it must be replaced by the manufacturer its service agent or similarly qualified persons in order to avoid a hazard This appliance can be used by children aged from 8 years and above and persons with r...

Page 14: ...aff kitchen areas in shops offices and other working environments farm houses by clients in hotels motels and other residential type environments bed and breakfast type environments Proceed according to maintenance and cleaning section of this manual for cleaning Warning potential injury from misuse Heating element surface is subject to residual heat after use Disconnect the appliance when it is not...

Page 15: ... moving it or prior to any cleaning or maintenance Do not use any accessories other than manufacturer recommended accessories in this appliance Unplug the product immediately from the mains in the event of any breakdown or damage and contact an official technical support service In order to prevent any risk of danger do not open the device Only qualified technical personnel from the brand s Official te...

Page 16: ...om steaming basket Fit the lid on the steaming basket Rice should take around 20 minutes to be ready It may depend on the type of rice quantity and personal taste Once you have finished using the appliance unplug it Remove the lid place the basket on the plate Let the appliance cool completely before cleaning Warning Use extreme caution when removing the baskets Never remove all the baskets togethe...

Page 17: ...aper towel Dry all parts thoroughly before storage Store the appliance in a cool dry place DESCALING We recommend you to descale the appliance every 3 months Method 1 Put the steam tube upside down around the heating element the largest side on the upper Fill the water tank with cold water up to max level fill the inside with steam tube with white vinegar to the same level Do not heat up to avoid t...

Page 18: ...ur 3 6 Base avec clip et porte œuf intégré 7 Collecteur de jus 8 Tube de vapeur 9 Indicateur de niveau d eau 10 Réservoir d eau 11 Élément chauffant 12 Minuterie 13 Indicateurs lumineux 14 Cordon d alimentation CONSIGNES DE SÉCURITÉ Si le cordon d alimentation est endommagé il doit être remplacé par le fabricant son agent de service ou des personnes ayant des qualifications similaires afin d éviter ...

Page 19: ... n est pas destiné à être utilisé dans les situations suivantes les cuisines du personnel dans les magasins les bureaux et autres lieux de travail fermes exploitations agricoles par les clients dans les hôtels les motels et tout autre lieu similaire les chambres d hôtes Respecter les instructions indiquées dans la section Entretien et nettoyage de ce manuel lors du nettoyage Attention risque de bl...

Page 20: ...gez jamais l appareil dans de l eau Ne déplacez pas l appareil lorsqu il est rempli d aliments ou de liquides chauds Ne touchez pas l appareil lorsqu il cuit à la vapeur et utilisez des gants pour retirer le couvercle le bol de riz et les paniers de cuisson à vapeur Débranchez toujours l appareil immédiatement après utilisation lors de son déplacement ou avant de le nettoyer ou de l entretenir N u...

Page 21: ...l eau dans le bol de riz conformément aux instructions indiquées sur l emballage Placez le bol de riz dans le panier inférieur pour la cuisson à la vapeur Placez le couvercle sur le panier pour la cuisson à la vapeur Le riz doit cuire en environ 20 minutes Le temps de cuisson dépend du type de riz de la quantité de riz et du type de cuisson que vous souhaitez Débranchez l appareil lorsque vous ave...

Page 22: ...ier Séchez soigneusement toutes les pièces avant de les ranger Stockez l appareil dans un endroit frais et sec DÉTARTRAGE Nous vous recommandons de détartrer l appareil tous les 3 mois Méthode 1 Placez le tube de vapeur à l envers autour de l élément chauffant le plus grand côté sur le dessus Remplissez le réservoir d eau avec de l eau froide jusqu au niveau maximum et remplissez l intérieur avec ...

Page 23: ...rato 7 Raccoglitore di succo 8 Tubo del vapore 9 Indicatore del livello dell acqua 10 Serbatoio dell acqua 11 Elemento di riscaldamento 12 Timer 13 Spia indicatrice 14 Cavo di alimentazione ISTRUZIONI PER LA SICUREZZA Se il cavo di alimentazione è danneggiato deve essere sostituito dal produttore dal servizio di assistenza o da persone altrettanto qualificate al fine di evitare pericoli L apparecchi...

Page 24: ...ni quali cucine per il personale in negozi uffici e altri ambienti di lavoro agriturismi uso da parte di clienti in hotel motel e altri ambienti di tipo residenziale ambienti del tipo di bed and breakfast Per la pulizia procedere secondo quanto indicato nella sezione di manutenzione e pulizia del presente manuale Avvertenza l uso scorretto può causare infortuni La superficie dell elemento di riscalda...

Page 25: ...coperchio la ciotola per il riso e i cestini per vapore Scollegare sempre l apparecchio immediatamente dopo l utilizzo quando lo si sposta o prima di qualsiasi operazione di pulizia o manutenzione Non utilizzare accessori diversi da quelli raccomandati dal produttore in questo apparecchio In caso di cortocircuito o danno scollegare immediatamente il prodotto dalla rete elettrica e contattare un se...

Page 26: ...arlo Cuocere il riso Aggiungere riso secco e acqua alla ciotola per il riso come da informazioni sulla confezione Posizionare la ciotola per il riso nel cestino per vapore inferiore Posizionare il coperchio sopra il cestino per vapore Il riso impiega circa 20 minuti per cuocersi Dipende dal tipo di riso dalla quantità e dal gusto personale Una volta terminato l utilizzo dell apparecchio scollegarl...

Page 27: ...porle Riporre l apparecchio in un luogo fresco e asciutto DECALCIFICAZIONE Si raccomanda di effettuare la decalcificazione dell apparecchio ogni 3 mesi Metodo 1 Capovolgere il tubo del vapore attorno all elemento di riscaldamento il lato maggiore in alto Riempire il serbatoio dell acqua con acqua fredda fino al livello massimo riempire l interno del tubo del vapore con aceto fino allo stesso livello ...

Page 28: ... mit Clip und integriertem Eierhalter 7 Saftsammler 8 Dampfrohr 9 Wasserstandsanzeiger 10 Wassertank 11 Heizelement 12 Timer 13 Anzeigeleuchte 14 Stromkabel SICHERHEITSHINWEISE Wenn das Netzkabel beschädigt ist muss es durch den Hersteller seinen Kundendienst oder ähnlich qualifizierte Personen ersetzt werden um eine Gefährdung zu vermeiden Dieses Gerät kann von Kindern ab 8 Jahren und darüber sowi...

Page 29: ...nd anderen Arbeitsumgebungen Bauernhäusern Von Kunden in Hotels Motels und anderen wohnungsähnlichen Umgebungen Pensionsähnlichen Umgebungen Gehen Sie bei der Reinigung entsprechend dem Wartungs und Reinigungsabschnitt dieses Handbuchs vor Warnung Mögliche Verletzung durch Missbrauch Die Heizelementoberfläche ist nach dem Gebrauch durch Restwärme heiß Trennen Sie das Gerät von der Stromversorgung w...

Page 30: ...ssel und die Dampfkörbe zu entfernen Ziehen Sie immer umgehend nach der Verwendung den Stecker des Geräts aus der Steckdose wenn Sie es bewegen oder vor der Reinigung oder Wartungsmaßnahmen Verwenden Sie mit diesem Gerät nur das vom Hersteller empfohlene Zubehör Ziehen Sie im Falle einer Störung oder Beschädigung sofort den Netzstecker und wenden Sie sich an einen offiziellen technischen Kundendiens...

Page 31: ...rmationen Setzen Sie die Reisschüssel in den unteren Dampfkorb ein Legen Sie den Deckel auf den Dampfkorb Reis sollte nach 20 Minuten fertig sein Dies hängt von der Art des Reises der Menge und dem persönlichen Geschmack ab Nach der Benutzung des Gerätes ziehen Sie den Stecker aus der Steckdose Entfernen Sie den Deckel und stellen Sie den Korb auf die Platte Lassen Sie das Gerät vor der Reinigung ...

Page 32: ...e alle Teile gründlich ab bevor Sie sie wegstellen Lagern Sie das Gerät an einem kühlen trockenen Ort ENTKALKEN Wir empfehlen Ihnen das Gerät alle 3 Monate zu entkalken Zubereitung 1 Drehen Sie das Dampfrohr um das Heizelement herum um die größte Seite nach oben Füllen Sie den Wassertank mit kaltem Wasser bis zum Maximalstand füllen Sie das Innere mit Dampfrohr mit weißem Essig bis zum selben Stan...

Page 33: ... Кошница за пара 1 4 Кошница за пара 2 5 Кошница за пара 3 6 Основа с щипка и вградена стойка за яйца 7 Кана за сок 8 Тръба за пара 9 Индикатор за ниво на водата 10 Резервоар за вода 11 Нагревател 12 Таймер 13 Светлинен индикатор 14 Захранващ кабел ИНСТРУКЦИИ ЗА БЕЗОПАСНОСТ Ако захранващият кабел е повреден той трябва да бъде заменен от производителя неговия сервизен представител или лица с подобн...

Page 34: ...авършили 8 години Повърхностите се нагряват по време на употреба Този уред е предназначен за употреба в домакинството Не е предвидена употребата му в кухненски пространства за персонала в магазини офиси и други работни среди ферми от клиенти в хотели мотели и друг тип жилищна среда среда от типа нощувка и закуска Процедирайте според раздела за поддръжка и почистване на това ръководство при почиств...

Page 35: ...уреда близо до източници на топлина или в гореща фурна тъй като това може да доведе до сериозна повреда Може да възникнат изгаряния при докосване на гореща повърхност на уреда горещата вода парата или храната Никога не потапяйте уреда във вода Не местете уреда когато е пълен с течност или гореща храна Не докосвайте уреда когато от него излиза пара Използвайте ръкавици за да свалите капака купата з...

Page 36: ...ера на препоръчаното време за готвене вижте таблицата с време за готвене светлинният индикатор светва и процесът на готвене с пара започва Проверявайте нивото на водата като поглеждате индикатора за ниво на водата и добавяйте вода от страничния улей по време на готвене ако е необходимо Когато таймерът се върне на 0 уредът ще спре да работи и светлинният индикатор ще се изключи Ако искате да спрете...

Page 37: ...премахвате котления камък от уред на всеки 3 месеца Метод 1 Поставете тръбата за пара обърната около нагревателния елемент най голямата страна отгоре Напълнете резервоара за вода със студена вода до максималното ниво напълнете вътрешността на тръбата за пара с бял оцет до същото ниво Не нагрявайте за да избегнете миризма от котления камък Оставете да престои през нощта Изплакнете вътрешността на р...

Page 38: ...ни и електрически устройства Не изхвърляйте този продукт с битовата смет вместо това го отнесете до най близкия център за събиране на електрически и електронни отпадъци ИЗХВЪРЛЯНЕ НА ПРОДУКТА Изключете уреда от контакта и го оставете да се охлади напълно Излейте разтвора за отстраняване на котлен камък от резервоара за вода Повторете стъпки a до d само с вода Трябва да го повторите докато бъдат от...

Page 39: ...ﺧﺰان اﺷﻄﻒ اﻟﺜﺎﻧﻴﺔ اﻟﻄﺮﻳﻘﺔ ﻣﺴﺘﻮى أﻗﴡ ﻣﺮاﻋﺎة ﻣﻊ اﳌﻴﺎه ﺧﺰان ﰲ اﻟﱰﺳﺒﺎت إزاﻟﺔ ﻣﺤﻠﻮل اﺳﻜﺐ واﻟﻐﻄﺎء واﺣﺪة ﺑﺨﺎر وﺳﻠﺔ اﻟﺘﻘﻄري وﺻﻴﻨﻴﺔ اﻟﺒﺨﺎر ﻣﺆﴍ ﱢﺐ ﻛ ر دﻗﻴﻘﺔ 25 ﳌﺪة اﻟﺒﺨﺎر ﻋﲆ اﻟﻄﻬﻲ ﺎ ً ﻣ متﺎ ﺗﱪد واﺗﺮﻛﻬﺎ اﻟﻮﺣﺪة اﻓﺼﻞ اﳌﻴﺎه ﺧﺰان ﻣﻦ اﻟﱰﺳﺒﺎت إزاﻟﺔ ﻣﺤﻠﻮل ْ ِل ز أ ﺟﻤﻴﻊ إزاﻟﺔ ﺗﺘﻢ ﺣﺘﻰ اﻟﻌﻤﻠﻴﺔ ﺗﻠﻚ ﺗﻜﺮار ﻋﻠﻴﻚ ﻳﺠﺐ ﻓﻘﻂ اﳌﺎء ﺑﺎﺳﺘﺨﺪام د إﱃ أ ﻣﻦ اﻟﺨﻄﻮات ﻛﺮر اﻟﺘﻜﻠﺲ آﺛﺎر اﻷﻃﺒﺎق ﻏﺴﺎﻟﺔ ﰲ أو واﻟﺼﺎﺑﻮن اﻟﺪاﻓﺊ ﺑﺎﳌﺎء ّﻬﺎ ﻜ ﻓ ميﻜﻦ اﻟ...

Page 40: ...ﻔﻪ ﻈ وﻧ اﳌﻴﺎه ﺧﺰان أﻓﺮغ اﻷﻃﺒﺎق ﻏﺴﺎﻟﺔ ﰲ ﻟﻐﺴﻠﻬﺎ آﻣﻨﺔ اﻷرز وﺣﺎﻣﻞ واﻟﻐﻄﺎء اﻟﺴﻼل آﺧﺮ ﺳﺎﺋﻞ أي ﰲ أو اﳌﺎء ﰲ ﺑﻬﺎ اﻟﺨﺎص اﻟﻘﺎﺑﺲ أو اﻟﻘﺎﻋﺪة ﺗﻐﻤﺮ ﻻ اﻟﺨﺎدﺷﺔ اﻟﺘﻠﻤﻴﻊ أﻗﻤﺸﺔ أو اﻟﻜﺎﺷﻄﺔ اﻟﺘﻨﻈﻴﻒ ﻣﻮاد ﺗﺴﺘﺨﺪم ﻻ ﺗﺤﺬﻳﺮ ورﻗﻴﺔ ﻣﻨﺸﻔﺔ أو ﻣﺒﻠﻠﺔ ﻗامش ﻗﻄﻌﺔ ﺑﺎﺳﺘﺨﺪام ﺑﺮﻓﻖ اﻟﺨﺎرﺟﻲ اﻟﺠﺰء اﻣﺴﺢ اﻟﺘﺨﺰﻳﻦ ﻗﺒﻞ ا ً ﺪ ﺟﻴ اﻷﺟﺰاء ﺟﻤﻴﻊ ﺟﻔﻒ وﺟﺎف ﺑﺎرد ﻣﻜﺎن ﰲ اﻟﺠﻬﺎز ن ّ ﺰ ﺧ اﻟﱰﺳﺒﺎت إزاﻟﺔ أﺷﻬﺮ 3 ﻛﻞ اﻟﺠﻬﺎز ﻣﻦ اﻟﱰﺳﺒﺎت ﺑﺈزاﻟﺔ ﻧﻨﺼﺤﻚ ماعطلا رزجلا َبل...

Page 41: ...ﺼﻒ ﰲ ﻳﻜﻮن ﺑﺤﻴﺚ اﻟﺘﺴﺨني أداة ﺣﻮل اﻟﺒﺨﺎر أﻧﺒﻮب ﺿﻊ اﻟﺘﺤﻜﻢ ﻟﻠﻮﺣﺔ ﻣﻜﺎن ﻟﺘﻮﻓري ﻓﻘﻂ واﺣﺪ اﺗﺠﺎه ﺗﻨﺎﺳﺐ اﻟﺼﻴﻨﻴﺔ اﻟﻮﺣﺪة ﻗﺎﻋﺪة ﻋﲆ اﻟﺼﻴﻨﻴﺔ ﺿﻊ واﺣﺪ ٍ آن ﰲ 3 أو 2 أو 1 رﻗﻢ اﻟﺴﻠﺔ اﺳﺘﺨﺪام ميﻜﻨﻚ 3 و 2 و 1 اﻷرﻗﺎم ﺑﻌﻼﻣﺎت ﻣﺰودة اﻟﺴﻠﺔ ﻣﻘﺎﺑﺾ اﻟﺴﻠﺔ ﰲ اﻟﻄﻌﺎم ﺿﻊ اﻟﺼﻴﻨﻴﺔ ﻓﻮق 1 رﻗﻢ اﻟﺴﻠﺔ ﺿﻊ 1 رﻗﻢ اﻟﺴﻠﺔ ﻓﻮق 2 رﻗﻢ اﻟﺴﻠﺔ ﺿﻊ 2 رﻗﻢ اﻟﺴﻠﺔ ﻓﻮق 3 رﻗﻢ اﻟﺴﻠﺔ ﺿﻊ 3 رﻗﻢ اﻟﺴﻠﺔ ﻓﻮق اﻟﻐﻄﺎء ﺿﻊ أﺛﻨﺎء اﳌﺆﴍ وﺿﻮء اﻟﻄﻬﻲ ﻣﺪة ﺟﺪول اﻧﻈﺮ ﺑﻬﺎ اﳌﻮﴅ اﻟﻄ...

Page 42: ...ء اﻟﺠﻬﺎز ﺗﻐﻤﺮ ﻻ اﻟﺴﺎﺧﻨﺔ أو اﻟﺴﺎﺋﻠﺔ ﺑﺎﻷﻃﻌﻤﺔ ﺎ ً ﺌ ﻣﻤﺘﻠ ﻳﻜﻮن ﻋﻨﺪﻣﺎ اﻟﺠﻬﺎز ﺗﺤﺮك ﻻ اﻟﺒﺨﺎر وﺳﻼل اﻷرز ووﻋﺎء اﻟﻐﻄﺎء ﻹزاﻟﺔ اﻟﻘﻔﺎزات واﺳﺘﺨﺪم اﻟﺘﺒﺨري أﺛﻨﺎء اﻟﺠﻬﺎز ﺗﻠﻤﺲ ﻻ أي إﺟﺮاء ﻗﺒﻞ أو ﺗﺤﺮﻳﻜﻪ ﻋﻨﺪ أو اﻻﺳﺘﺨﺪام ﺑﻌﺪ ا ً ر ﻓﻮ اﻟﻜﻬﺮيب اﻟﺘﻴﺎر ﻋﻦ ﺑﺎﺳﺘﻤﺮار اﻟﺠﻬﺎز اﻓﺼﻞ ﺻﻴﺎﻧﺔ أو ﺗﻨﻈﻴﻒ ﻋﻤﻠﻴﺔ اﻟﺠﻬﺎز ﻟﻬﺬا اﳌﺼﻨﻌﺔ اﻟﴩﻛﺔ ﻣﻦ ﺑﻬﺎ اﳌﻮﴅ اﳌﻠﺤﻘﺎت ﺑﺨﻼف ﻣﻠﺤﻘﺎت أي ﺗﺴﺘﺨﺪم ﻻ ﻣﺜﻞ اﻷﺧﺮى ﻟﻼﺳﺘﺨﺪاﻣﺎت ﻌﺪ ُ ﻣ ﻏري اﳌﻨﺰل ﰲ ﻟﻼﺳﺘﺨﺪام ﻌﺪ ُ ﻣ اﻟﺠ...

Page 43: ... واﻷﺷﺨﺎص ﺳﻨﻮات 8 ﻋﻤﺮ ﻣﻦ ﻟﻸﻃﻔﺎل ﻜﻦ ُ مي اﻟﺠﻬﺎز ﻫﺬا اﺳﺘﺨﺪام واﳌﻌﻠﻮﻣﺎت اﻟﺨﱪة ﺗﻨﻘﺼﻬﻢ ﻣﻦ أو اﳌﻨﺨﻔﻀﺔ اﻟﺬﻫﻨﻴﺔ أو وﻛﺎﻧﻮا آﻣﻨﺔ ﺑﻄﺮﻳﻘﺔ اﻟﺠﻬﺎز ﻻﺳﺘﺨﺪام ﺗﻌﻠﻴامت ﺗﻠﻘﻮا أو إﴍاف ﺗﺤﺖ ﻛﺎﻧﻮا إذا اﳌﺼﺎﺣﺒﺔ اﳌﺨﺎﻃﺮ ﻳﻔﻬﻤﻮن ﺗﻨﻈﻴﻒ ﺳﻨﻮات 8 دون اﻷﻃﻔﺎل ﻋﲆ ﻳﺤﻈﺮ ﺑﺎﻟﺠﻬﺎز اﻟﻠﻌﺐ اﻷﻃﻔﺎل ﻋﲆ ﺤﻈﺮ ُ ﻳ إﴍاف دون وﺻﻴﺎﻧﺘﻪ اﻟﺠﻬﺎز ﺳﻨﻮات 8 دون اﻷﻃﻔﺎل ﻣﺘﻨﺎول ﻋﻦ ا ً ﺪ ﺑﻌﻴ واﻟﺴﻠﻚ اﻟﺠﻬﺎز ﻋﲆ ﺣﺎﻓﻆ اﻻﺳﺘﺨﺪام أﺛﻨﺎء ﻟﻠﺴﺨﻮﻧﺔ اﻷﺳﻄﺢ ﺗﺘﻌﺮض ﻗﺪ اﺧﺘﻴﺎر ﻋﲆ ﻧﺸﻜﺮ...

Page 44: ...us derechos Para servicio técnico y atención al cliente fuera de territorio español envíe su solicitud al punto de venta donde adquirió el aparato RELATÓRIO DE GARANTIA impossível a não ser que uma dessas opções seja impossível de cumprir ou for desproporcionada Neste caso poderá optar por uma redução no preço ou um cancelamento da venda qualquer uma tituição de peças de reposição sempre que o pro...

Page 45: ...horised Technical Service for repair of the product improper use of the same shall render this warranty null and void The warranty must be fully com this warranty This warranty should be retained by the user as well as the invoice receipt or the delivery docket to territory please submit your query to the point of sale where you purchased the item BON DE GARANTIE le droit de faire réparer ou rempl...

Page 46: ...46 UTILISATION DE LA GARANTIE livraison pour faciliter l exercice de ces droits Pour un service technique et un service après vente en acheté B B TRENDS S L B B TRENDS SL 1999 44 B B TRENDS SL B B ...

Page 47: ...47 B B TRENDS SL ً ذ ً ن أن ً B B TRENDS S L EC 44 1999 ارد B B TRENDS S L ء ً B B TRENDS S L ُ ا ر ج ا ...

Page 48: ...AT TECHNICAL ASSITANCE SERVICE TAS SERVIÇO DE ATENÇAO TÉCNICA SAT SERVICE TECHNIQUE ST SERVIZIO DI ASSISTENZA TECNICA SDAT 34 902 997 053 sat bbtrends es B B TRENDS S L C Cataluña 24 P I Ca N Oller 08130 C I F B 86880473 www bbtrends es ...

Page 49: ...RTES 76 B 924841195 comercial arfet es BARCELONA 08015 BARCELONA SUM ELECT DALMAU S C P VILADOMAT 108 934539276 sdalmau ono com 08240 MANRESA SERVICIO ELDE JORGE MANERO BRUCH 55 938728542 elde eldeservei com 08027 BARCELONA SELAROM PASSEIG MARAGALL 102 933 521 805 amoralesnieto hotmail com 08020 BARCELONA SAT MARINE S C P C HUELVA 67 69 932664697 satmarine satmarinescp com 08620 SANT VICENÇ DELS H...

Page 50: ...INO CALDERON 13 942880390 CASTELLON 12005 CASTELLÓ M AGRAMUNT S L C LA LLUNA 22 964261249 12003 CASTELLON INST ELECTR JUMAR 2 SL C BENICARLO 15 964225133 proveedores jumar2castellon es 12500 VINAROS FERCOM SERVICE C B TOMAS MANCISIDOR 60 964450144 fercomcb yahoo es CIUDAD REAL 13003 CIUDAD REAL NOVA ELECTRICIDAD ALTAGRACIA 1 926253101 manuelmartin1122 hotmail com CORDOBA 14014 CORDOBA SAN COR S L ...

Page 51: ...BAJO 981754981 15920 RIANXO BANDIN AUDIO S L C GUDIÑOS Nº10 BAJOS 981866025 sat bandinaudio com LA RIOJA 26001 LOGROÑO JUAN CARLOS GONZALEZ ARIJA hiper del repuesto HUESCA 53 55 941226109 26004 LOGROÑO ASOC IND RIOJANA S L U DOCE LIGERO 30 32 941241015 LAS PALMAS DE GRAN CANARIA 35013 LOS TARAHALES ST CANARIOS S C P BATALLA DE BRUNETE 50 928 292 950 LEON 24002 LEON SAT MAEG C RUIZ DE SALAZAR 24 98...

Page 52: ...o fasepa es 30009 MURCIA ELECTRO SERVICIOS SEBA ISAAC ALBENIZ 4 BAJO 968298593 629613574 30800 LORCA DANIEL SANCHEZ RUIZ DE LA HIGUERA 8 BAJO 968406757 NAVARRA 31011 PAMPLONA FERRETERIA SAN ELOY MERCEDES MONASTERIO DE IRACHE 33 948251095 admin ferreteriasaneloy es 31591 CORELLA Corella C Santa Barbara 52 948780729 31500 TUDELA ELECTRICIDAD FERNANDO S C I YANGUAS Y MIRANDA 12 948826457 okina electr...

Page 53: ...IFA 6 962274794 sat xativa josepastor es 46680 ALGEMESI JOSE A LLACER SANGROS ALBALAT 88 962423519 satllacer hotmail com 46700 GANDIA JOAQUIN MAYOR ESTRUGO TECNOGAR PRIMER DE MAIG 41 B 962865335 46470 CATARROJA AirKival Climatización C B C FRANCESC LARRODÉ 7 961260633 VALLADOLID 47006 VALLADOLID VILDA SERV ASIST TECNICA S L FALLA 16 BAJO DCHA 983226229 vilda vilda es 47400 MEDINA DEL CAMPO JESUS M...

Page 54: ......

Page 55: ......

Page 56: ...B B TRENDS S L C I F B 86880473 C Cataluña 24 P I Ca N Oller 08130 www bbtrends es Ver 04 2021 ...

Reviews: