52 | SWIFT K33A ALL IN ONE FUSION SPLICER
americanilsintech.com | 53
DELETE A SPLICE MODE SETTING
To select a splice mode, select Menu from the LCD display or from the K33A. Next
select “Splice” menu using the touch screen. The Splice screen will list the pre-programed
splice modes that are specifi c to what fi ber type is being spliced.
Select the splice mode to be deleted and select the DEL button on the LCD display and
the setting will be removed from the list. Press Cancel to return to the Ready Menu.
NOTE:
Splice modes No.1 thru No. 35 cannot be deleted.
CREATE A NEW SPLICE MODE SETTING
The K33A enables users to create custom splice modes for applications when the pre-
programmed splice modes are not suffi cient. Custom splice modes enable the user to
defi ne splice parameter values on up to 32 unique splice attributes in situations where
standard splice modes need to be adjusted due to fi ber type, environmental conditions
etc. First create a new splice mode then see the edit a Splice Mode to customize the
settings as desired.
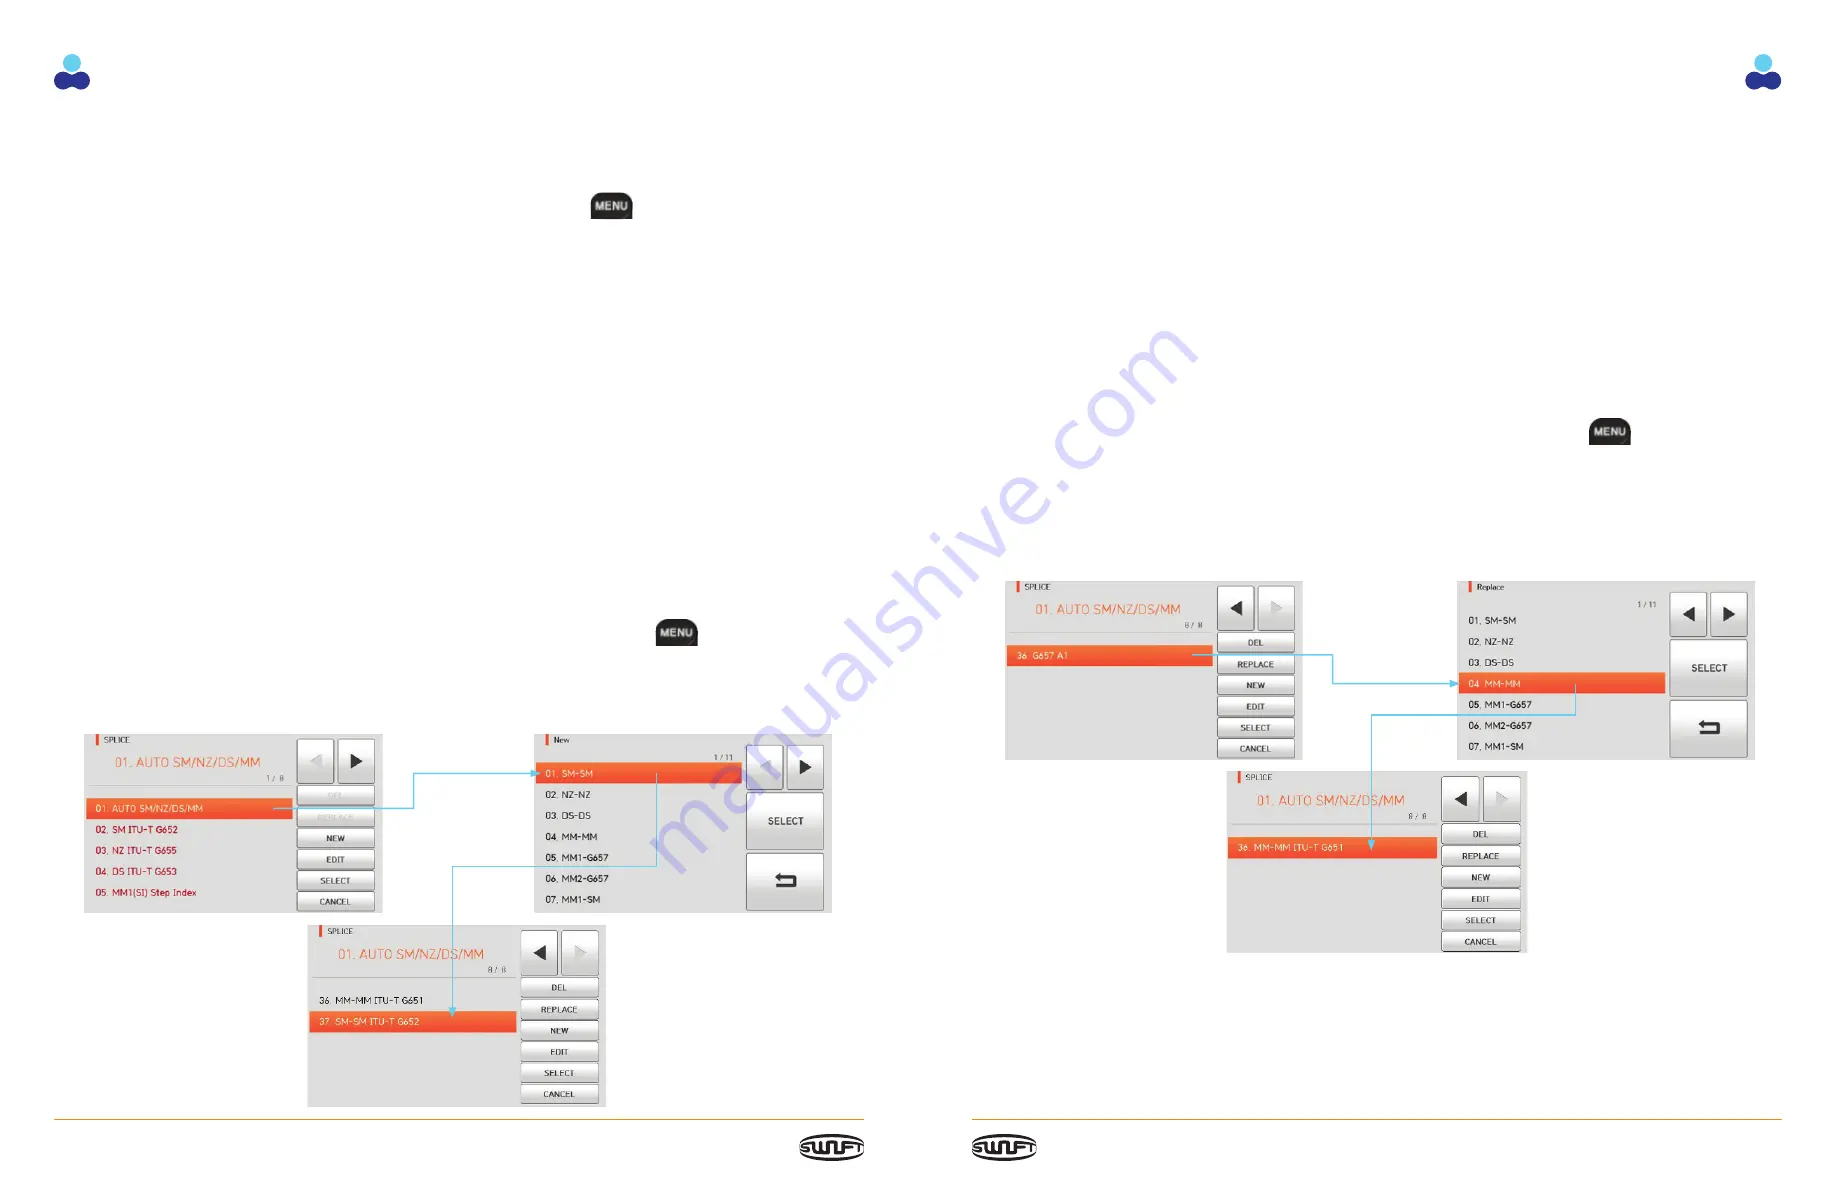
To program a New splice mode select Menu from the LCD display or from the
K33A. Next select “Splice” menu using the touch screen. Click “New” to display the pre-
programmed splice modes. Select the fi ber type for the new Splice Mode. Select the splice
mode, click “OK”. The selected splice mode is added the last blank mode.
Select Cancel to return to the Ready Menu.
NOTE:
Up to 265 New Splice modes can be added and will be numbered from 36 – 300.
REPLACE A SPLICE MODE SETTING
Users can only Replace a user created splice mode. This function gives the ability to
replace a user defi ned setting with up to 75 stored splicing confi gurations of fi ber
stored in the K33A memory.
To replace a user defi ned setting select Menu from the LCD display or from the
K33A. Next select “Splice” menu using the touch screen. Using the arrows on the LCD
screen scroll to page that lists the setting that to be replaced and select it on the LCD
screen, select “Replace”. The splice modes stored in memory are displayed on the
screen, select the desired splice mode to be replaced and select “OK”. The selected
splice mode replaces the last blank entry in the splicer menu.
Select Cancel to return to the Splice Menu then Ready to return to the Ready Menu.
NOTE:
Splice modes from No.1 to No.35 cannot be replaced.


