background image

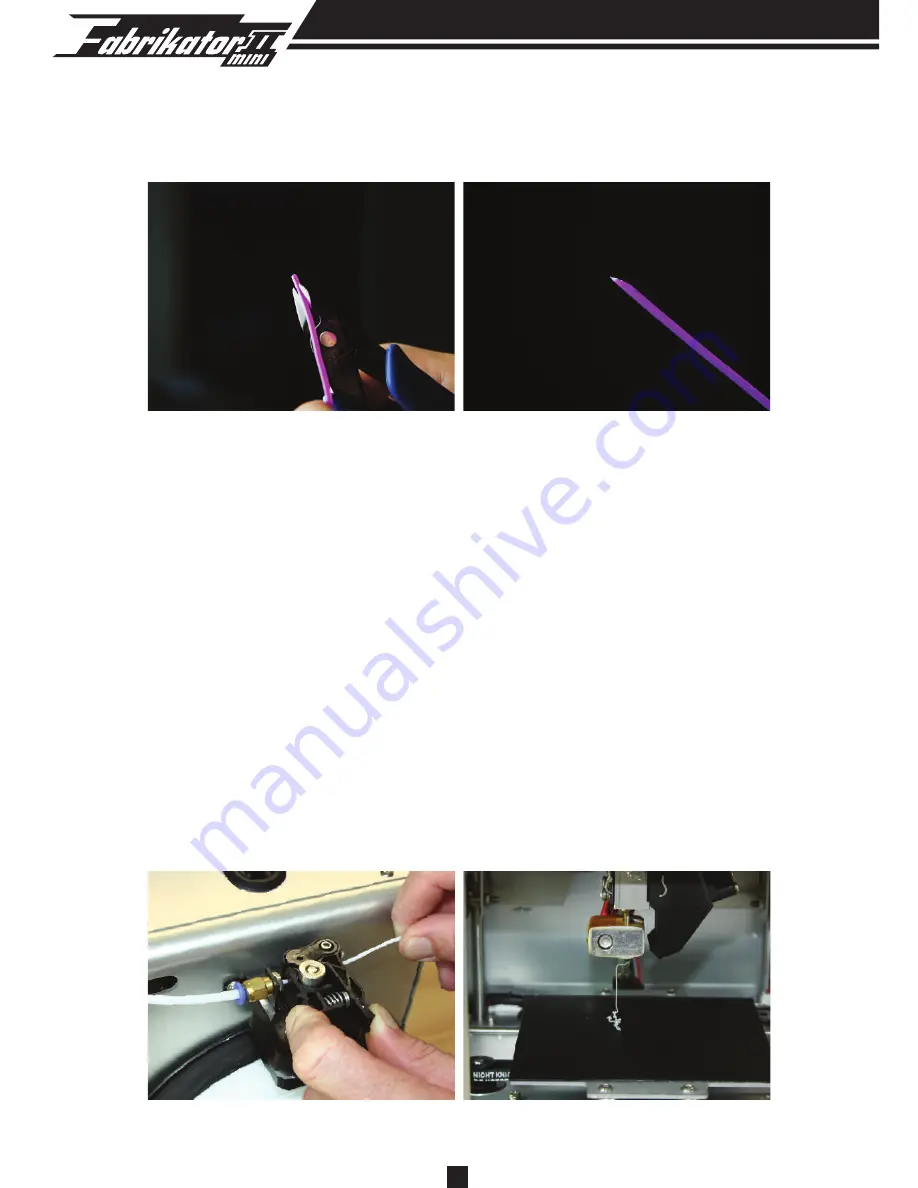
Now take the end of your filament and using sharp side cutters or a hobby knife snip the 
tip off at a sharp angle, this helps the filament slide through the feeder and print head 
easily.

To start loading use one hand to hold the charging handle and the other hand to push 
the filament through the Bowden tube connector and along the Bowden tube until you 
feel a slight resistance, this means you have reached the extruder where the path 
narrows and the filament now needs to be pushed a little harder to get through this. It 
is important that you do this next step in a single forward motion and that you don’t pull 
the filament back at any stage as this can cause the filament to form a plug which will 
block the extruder. You will notice that the filament becomes slightly easier to push 
through and a thin stream of filament will begin to be extruded from the print nozzle, the 
extruder is now charged and ready to print. 

Tip:

 To make it easier to thread the filament you can disconnect the Bowden tube and 

pull through some filament slack so you don’t have to hold charge handle while pushing 
the filament through extruder. Once you have the extruder charged, hold the charge 
handle and push the extra filament back towards the roll until you can reconnect the 
Bowden tube.

13

Summary of Contents for Fabrikator II mini

Page 1: ...Instruction Manual...

Page 2: ...ecklist Component Diagram Specifications Hardware Installation Setting Up Commissioning Wireless Network Function Printing Troubleshooting Maintenance NOTE P 2 P 3 P 3 P 4 P 5 P 5 9 P 10 14 P 14 16 P...

Page 3: ...fe please dispose of your 3D printer responsibly 8 Do not load unsupported filament 9 Keep your 3D printer and all accessories out of children s reach 10 When printing via USB keep a stable connection...

Page 4: ...C COMPONENT DIAGRAM 3D Printer Micro USB cable Micro Memory card Power adapter Power line Plastic scraper 1 1 1 1 1 1 5 Power switch 4 Extruder motor 3 Bowden tube 2 USB and Memory card slots 1 Extru...

Page 5: ...ume Shipping Box FDM Desktop 3D Printer Rapid Prototyping print 3D models samples parts toys Aluminum Single 0 4 mm 0 015 in XY 11 microns 0 0004 in Z 2 5 micron 0 0001 in 100 micron 0 0039 in 100 240...

Page 6: ...u will also need access to mains power to connect to the printer s power supply Included in the provided SD memory card you will find the Repetier installation package this is a slicer tool that you u...

Page 7: ...software to suit to the Mini Fabrikator V2 by clicking on the printer settings icon the top right corner of the window In the settings window click on the Connection tab please refer to the following...

Page 8: ...7 7 Then click on the Printer tab and input the settings below Then click on the Extruder tab and input the settings below Finally click on the Printer Shape tab and input the settings below...

Page 9: ...le you can quickly configure the Cura Slicer in the following steps Let s head back to Repetier Host program Look along the top right and find the Slicer tab Select the CuraEngine from the drop down T...

Page 10: ...9...

Page 11: ...ked and calibrated before printing To calibrate the bed connect the printer to your PC and use the Manual Control in Repetier to return the print head to its home position 4 Connect 3D printer After s...

Page 12: ...very close to the printer platform use a piece of ordinary A4 paper between the print head nozzle and the platform to set the gap The paper should be able to slide with minimal resistance If the paper...

Page 13: ...get the print nozzle hot enough to allow you to push the filament through Why you need to calibrate the print bed If the distance between heat bed and nozzle is too large prints may not stick to prin...

Page 14: ...hat you do this next step in a single forward motion and that you don t pull the filament back at any stage as this can cause the filament to form a plug which will block the extruder You will notice...

Page 15: ...rse but just make sure before you pull the filament back that you push it forward first so that some filament is extruded and then pull back gently but quickly to disengage the filament from the extru...

Page 16: ...layan link icon in the task bar and select WIFI Wizard Enter the SSID and password for your WIFI router then click connect Disconnect the printer from the USB once prompted and click finish The printe...

Page 17: ...Please note the IP address of the printer using the Malyan link software Entering this IP address in your web browser will allow the printer to be controlled through the web interface Note this IP ad...

Page 18: ...nting 1 PC printing After connecting your PC load the STL or G Code documents and slice with Cura engine After slicing is completed you can click Print and your project will start printing over the US...

Page 19: ...ing After slicing is completed save the G Code file to SD Click save here When the save dialogue box comes up save the file as auto00 g this name will be automatically read as the file to print by the...

Page 20: ...tton for 4 seconds in idle state will initialise the wireless network smart configuration 19 I Printing Now insert the SD card into the SD slot on the side of the printer There is a button beside USB...

Page 21: ...ezers to remove the residual plastic filament If this doesn t work remove the nozzle and use tweezers to pull the blockage down If the blockage is in the nozzle it is usually simple enough just to hea...

Page 22: ...d belt lubricant 3 Preheat extruder properly before loading filament 4 Check the extruder and platform calibration regularly 5 Keep platform clean and empty when idle 6 Keep printer away from dust and...

Page 23: ...22 Note...

Page 24: ...ADDR Office K1 9th Floor MG Tower 133 Hoi Bun Road Kowloon Hong Kong Tel 852 3125 1903 Website www Hobbyking com Ltd...

Reviews: